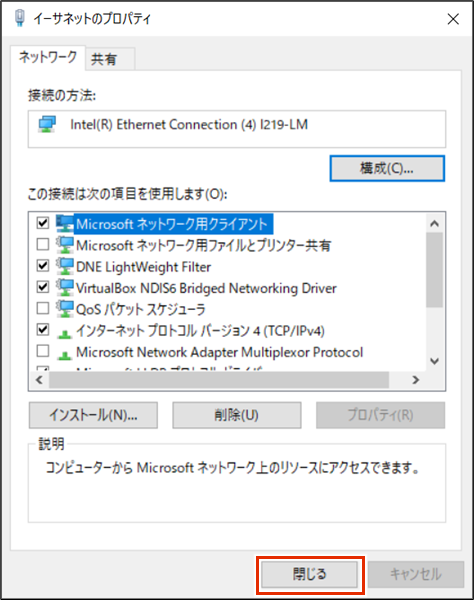
To sign in to the GUI configuration screen, the device and PC must belong to the same network. Change the IP address of your PC to match the IP address of the device "192.168.0.254".
NOTE
- This manual is explained using Windows 10.
- In this document, the IP address of your PC is changed to "192.168.0.10" to match the IP address of the device "192.168.0.254".
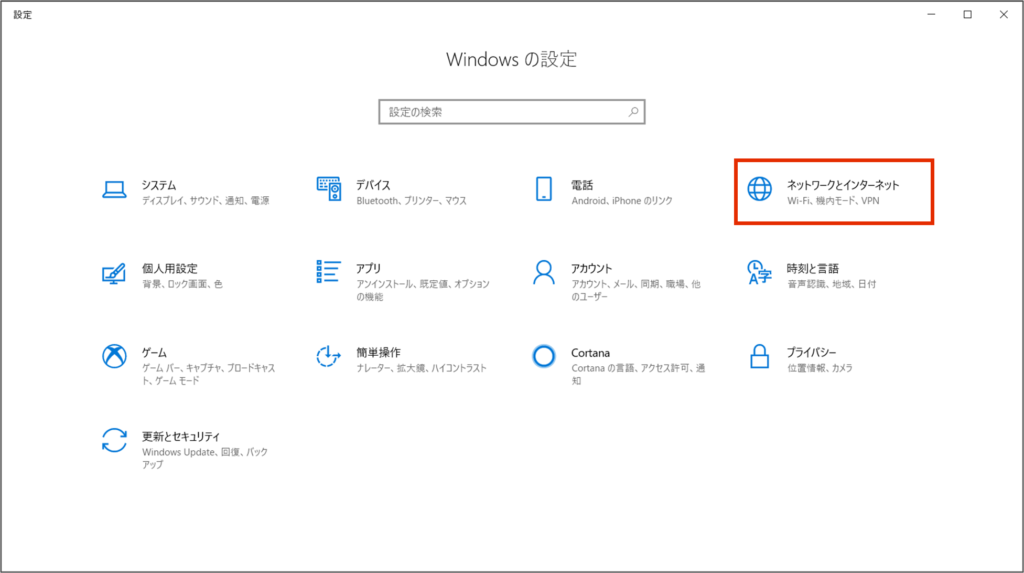
Under Windows Settings, click Network and Internet.
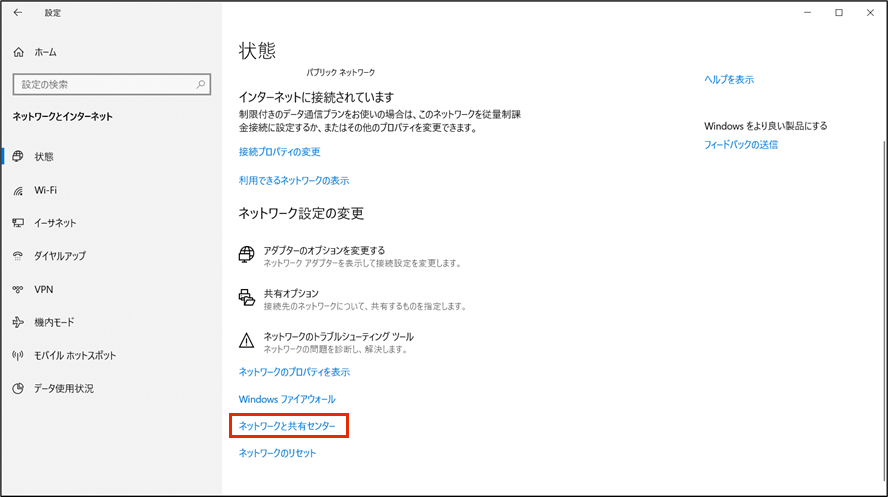
[Click Network and Sharing Center.
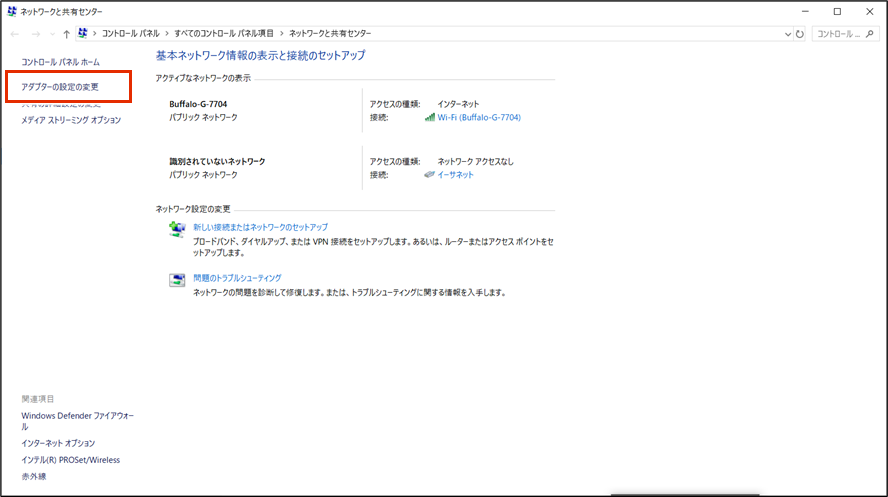
[Click Change Adapter Settings.
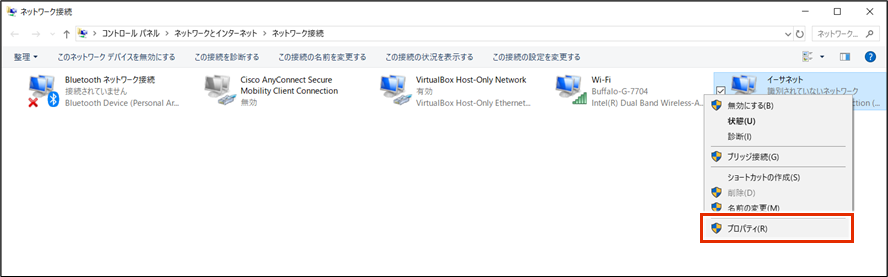
[Right-click on "Ethernet" and select "Properties" from the menu that appears.
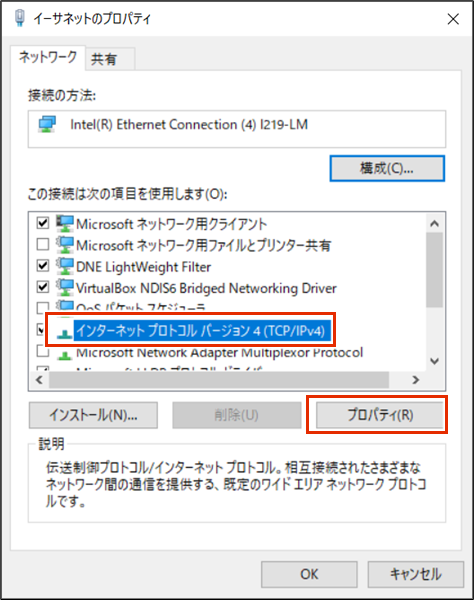
Select "Internet Protocol Version 4 (TCP/IPv4)" and click Properties.
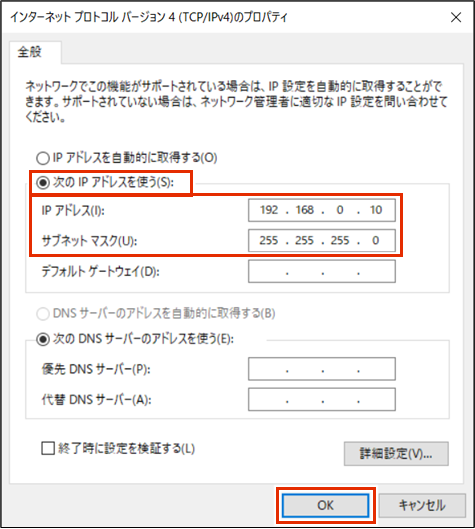
Set the IP address.
❶ Select [Use the following IP address].
Enter "192.168.0.10" in "IP Address" and "255.255.255.0" in "Subnet Mask".
❸ Click [OK].
[Click Close.
An IP address will be set.