
IPsec設定の追加、編集、削除の操作について説明します。
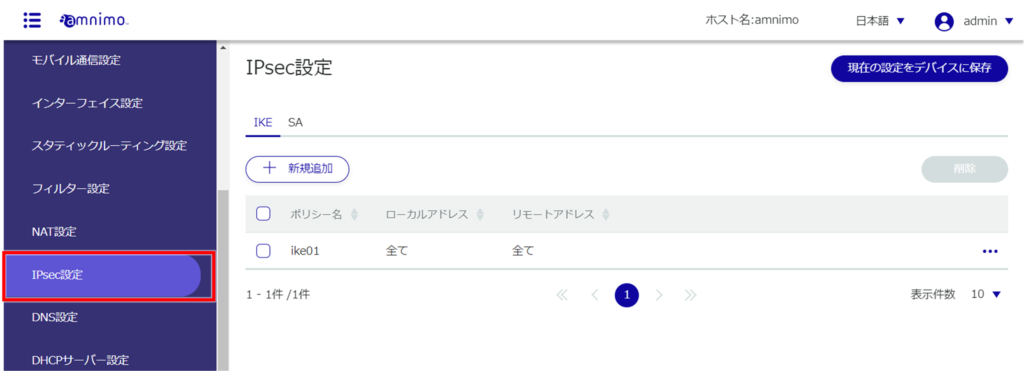
IPsec設定の一覧を表示する #
IPsec設定の一覧を表示します。
「IPsec設定」画面に、本製品に登録されているIPsec設定の一覧が表示されます。
IPsec設定を追加する #
IPsec設定を追加します。
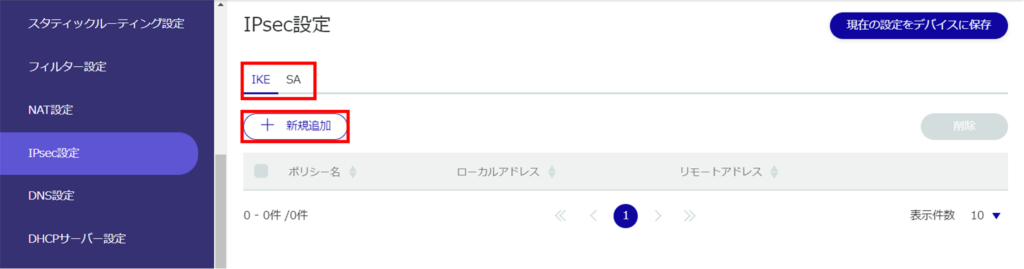
「IKE設定の追加」または「SA設定の追加」画面が表示されます。
IKE設定の追加
IKEのタブを選択した場合の設定方法です。
❶ 任意のポリシー名を入力します。

❷ ローカル側のアドレスを入力します。
全アドレスを許可する場合は[全て]を選択します。
ローカルIDにチェックを入れることで、タイプの選択やIDを入力することも出来ます。

❸ リモート側(接続先)のアドレスを入力します。
全アドレスを許可する場合は[全て]を選択します。
リモートIDにチェックを入れることで、タイプの選択やIDを入力することも出来ます。

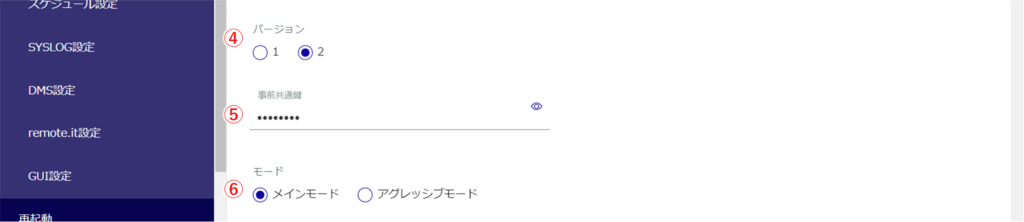
❹ IKEのバージョンを選択します。
❺ 事前共通鍵(PSK)を設定します。
❻ IKEモードを指定します。このモードは、❹でバージョン1を選択した場合のみ有効です。
❼ リトライ回数を、1~255 の範囲で設定します。
リトライ回数の上限なしの場合、「上限なし」を選択します。

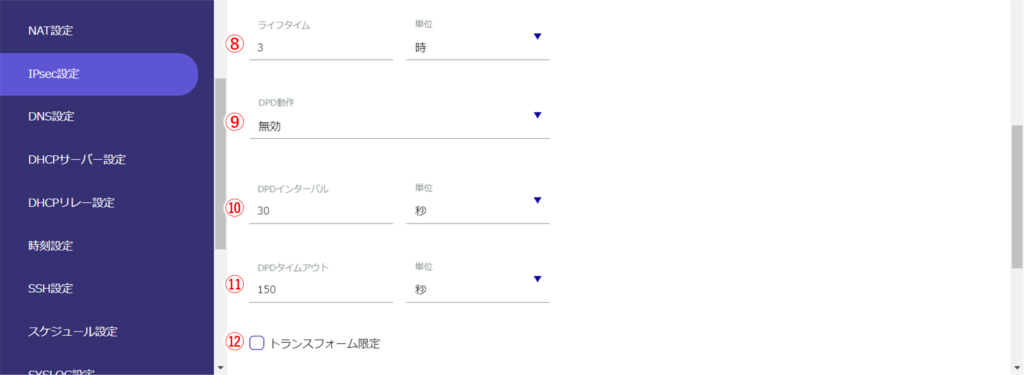
❽ IKEのライフタイムを設定します。秒、分、時間で指定することが出来ます。
❾ DPD(Dead Peer Detection)で切断されたときの動作を指定します。
❿ DPDのインターバルを設定します。秒、分、時間で指定することが出来ます。
⓫ DPDのタイムアウトを設定します。秒、分、時間で指定することが出来ます。
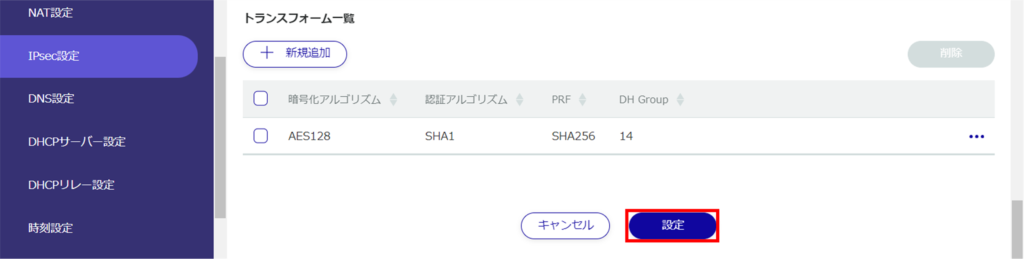
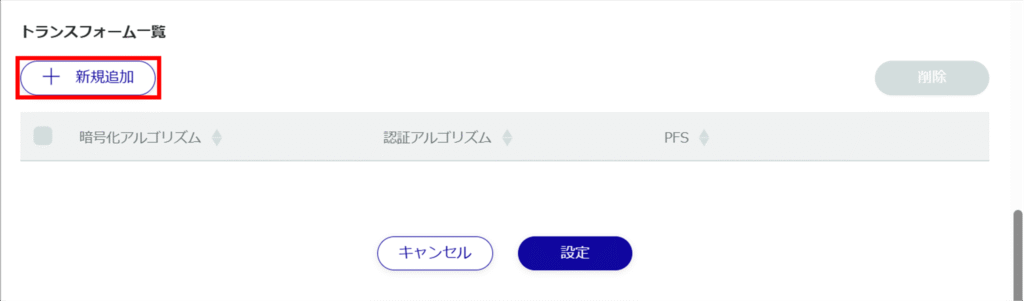
⓬ [トランスフォーム設定]にチェックを入れると、指定のトランスフォームのみに限定する動作を有効にすることが出来ます。
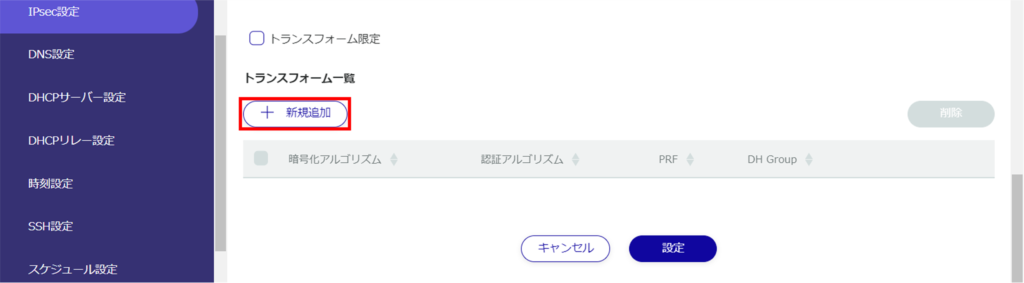
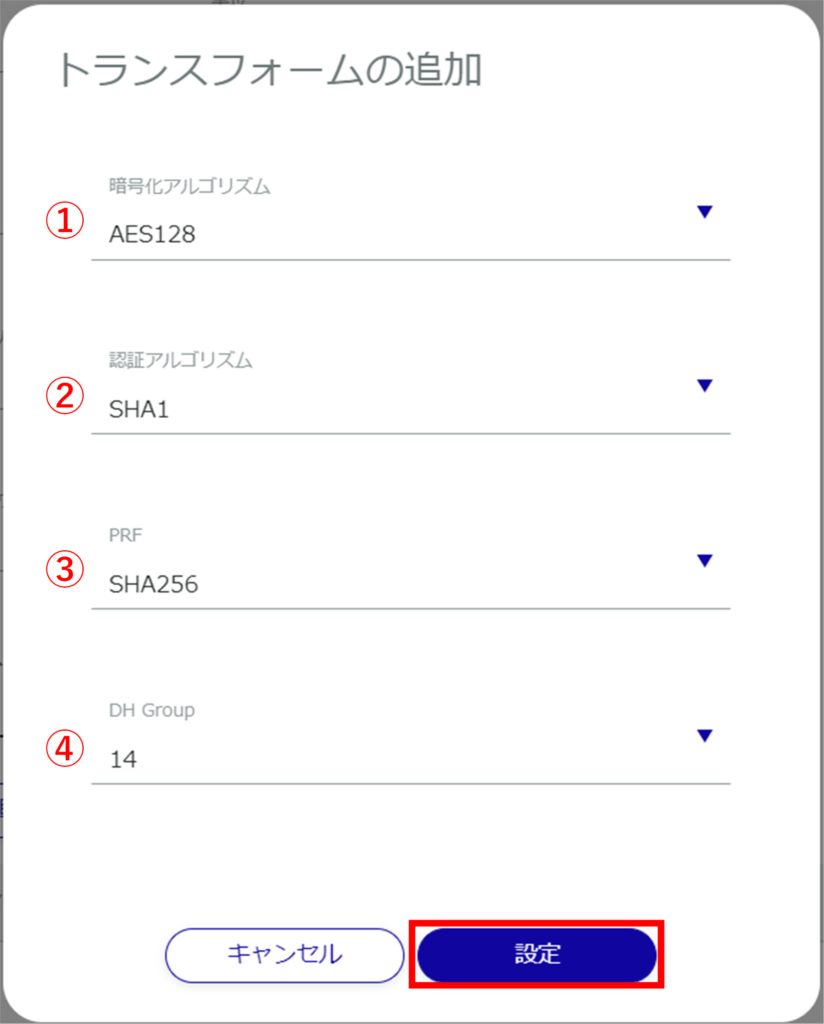
❶ 暗号化アルゴリズムを選択します。
❷ 認証アルゴリズムを選択します。
❸ PRF(Pseudo-Random Functions)を指定します。これはIKEv2 の場合にのみ有効です。
❹ Diffie Hellman Groupsを選択します。
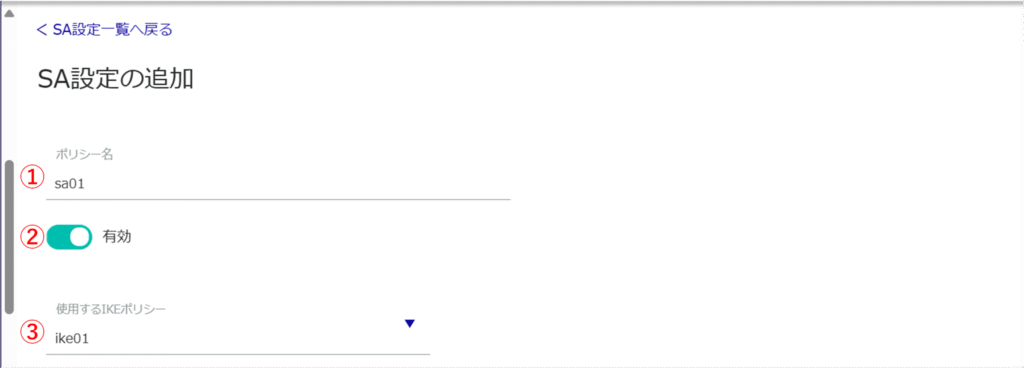
SA設定の追加
SAのタブを選択した場合の設定方法です。
❶ 任意のポリシー名を入力します。
❷ トグルをクリックして有効/無効を選択します。
❸ 鍵交換で使用する IKE 名を指定します。
❹ IPsecの接続動作を選択します。
IPsec接続は、以下の順で動作します。
- initiate動作を行う
- ルートを追加する(通信によってinitiate動作を行う)
- SA設定のみを行う(initiate動作は行わない)
なお、すべての設定で相手からのinitiate通信を受けた場合、可能であればresponder側として動作します。

❺ IPsecの切断時動作を選択します。

❻ [再接続]にチェックを入れると再接続が有効になります。
❼ プロトコルタイプを選択します。

❽ 通信モードを選択します。
パススルーモードを選択した場合は、後述のローカルサブネットとリモートサブネットが必須になります。

❾ SAのライフタイムを設定します。秒、分、時間で指定することが出来ます。
❿ 優先度を選択します。
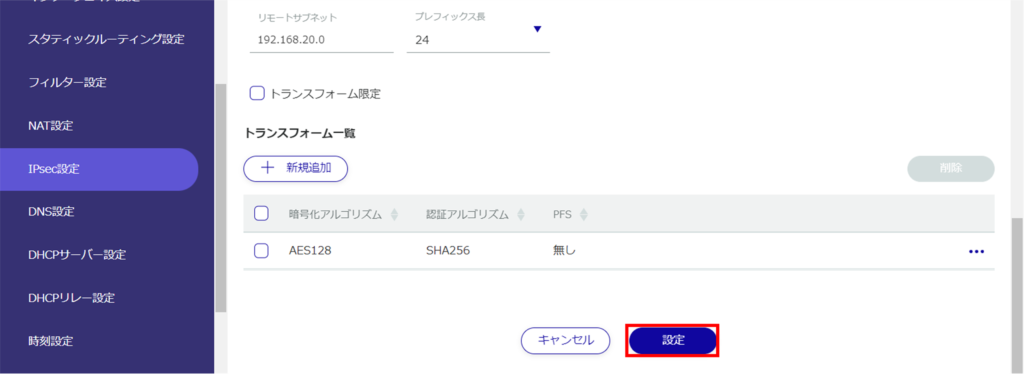
⓫ ローカル側のサブネットを設定します。(複数設定可)
⓬ リモート側のサブネットを設定します。(複数設定可)
⓭[トランスフォーム設定]にチェックを入れると、指定のトランスフォームのみに限定する動作を有効にすることが出来ます。
❿ 優先度 について、数値の入力もしくは「 自動 」を選択することで設定が可能です。
優先度は数値が小さいほうが優先となります。

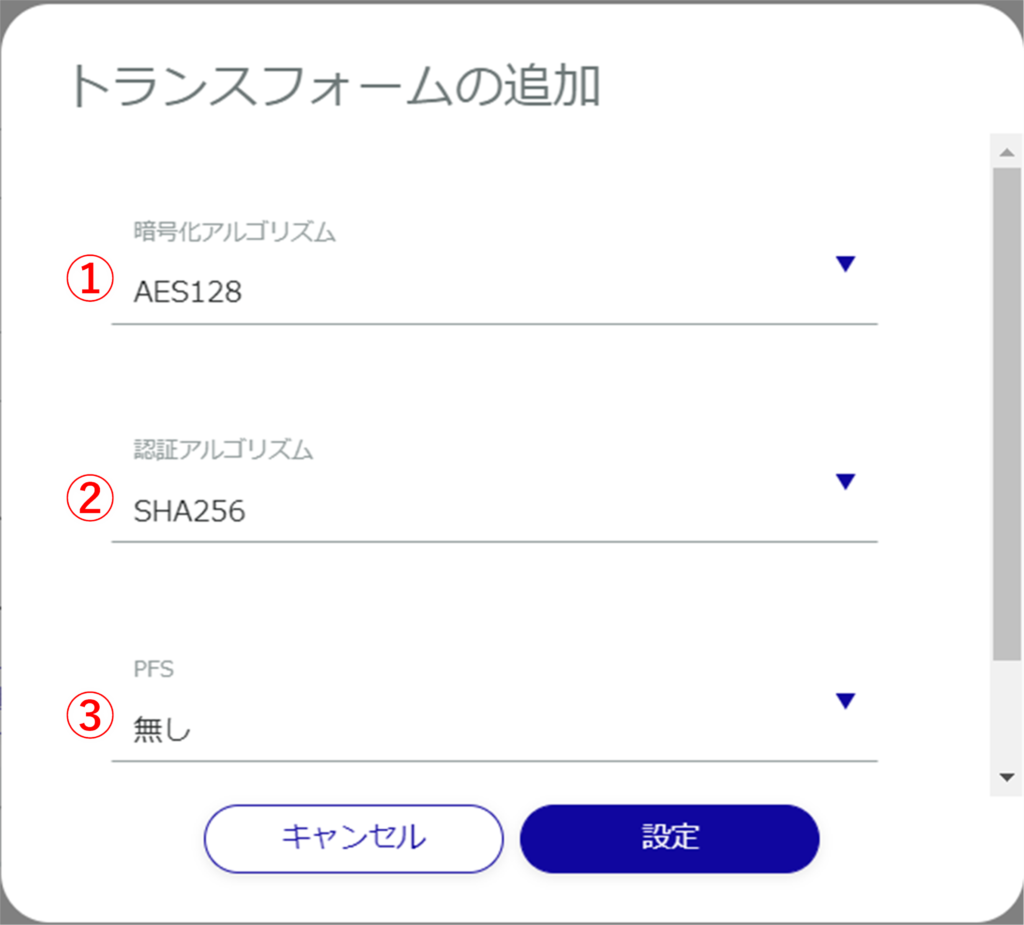
❶ 暗号化アルゴリズムを選択します。
❷ 認証アルゴリズムを選択します。
❸ PFS ( Perfect Forward Secrecy)を指定します。
IPsec設定を編集する #
登録されているIPsec設定を編集します。
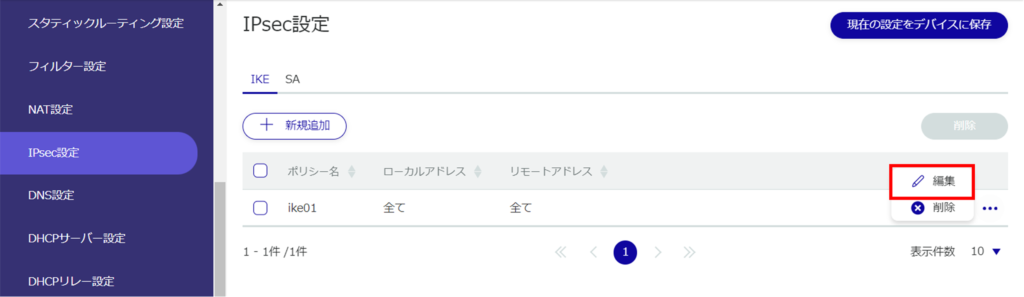
「IKE設定の編集」または「SA設定の編集」画面が表示されます。
変更したIKE設定またはSA設定の情報が更新されます。
IPsec設定を削除する #
登録されているIPsec設定の削除には、IPsecの操作メニューから個別に削除する方法と、削除したいIPsec設定をすべて選択してから削除する方法があります。
IPsec設定を個別に削除する
IPsec設定の操作メニューから削除を選択する方法です。
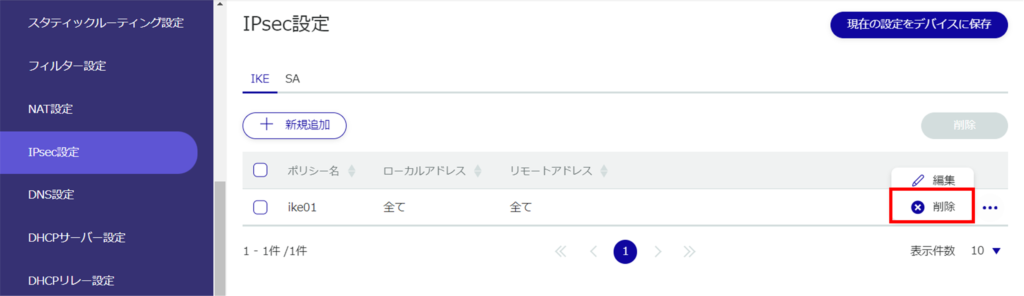
「確認」画面が表示されます。
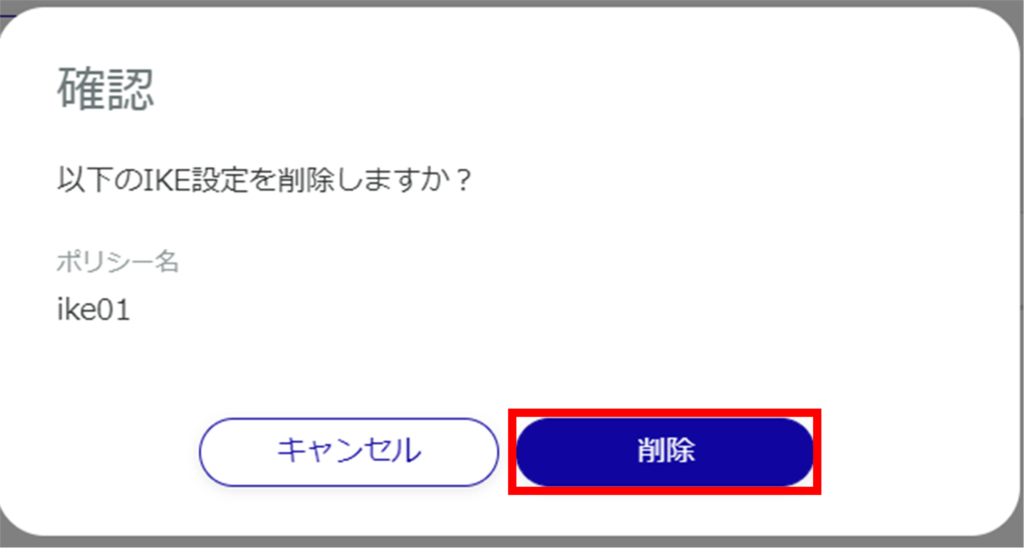
IPsec設定が削除されます。
IPsec設定を複数選択して削除する
削除したいIPsec設定にチェックを付けてから削除する方法です。複数のIPsec設定を一括で削除する際に便利です。IPsec設定を1つだけ選択して削除することもできます。
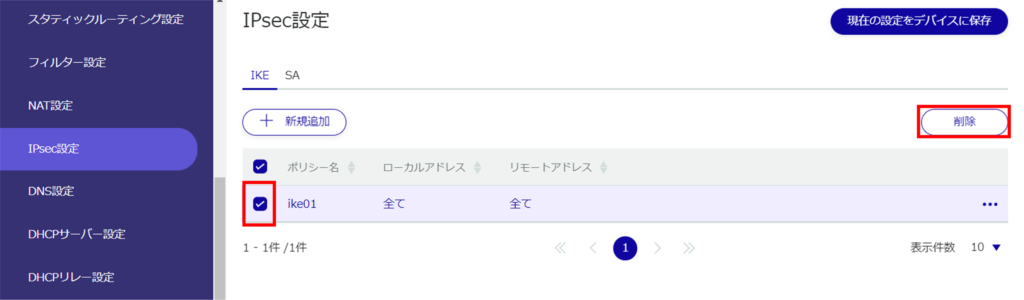
「確認」画面が表示されます。
選択したIPsec設定が削除されます。