
This section describes the operation of the "Wireless LAN" screen.
AI Edge Gateways and Sensor Connection Gateways (amnimo X Series), Edge Gateways (amnimo G Series), IoT Routers (amnimo R Series), and Compact Routers Indoor Type (AC10) do not have this feature.
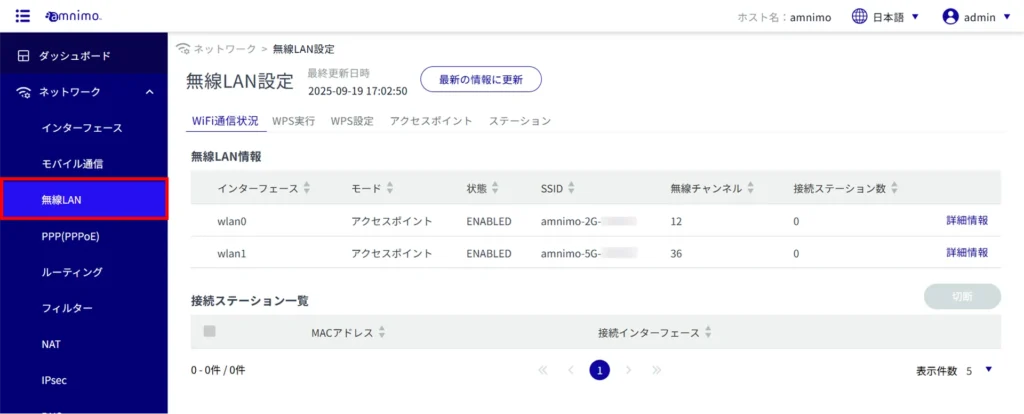
Click [Network] > [Wireless LAN] on the side menu to open the "Wireless LAN" screen.
WiFi Connection Status #
Display WiFi connection status #
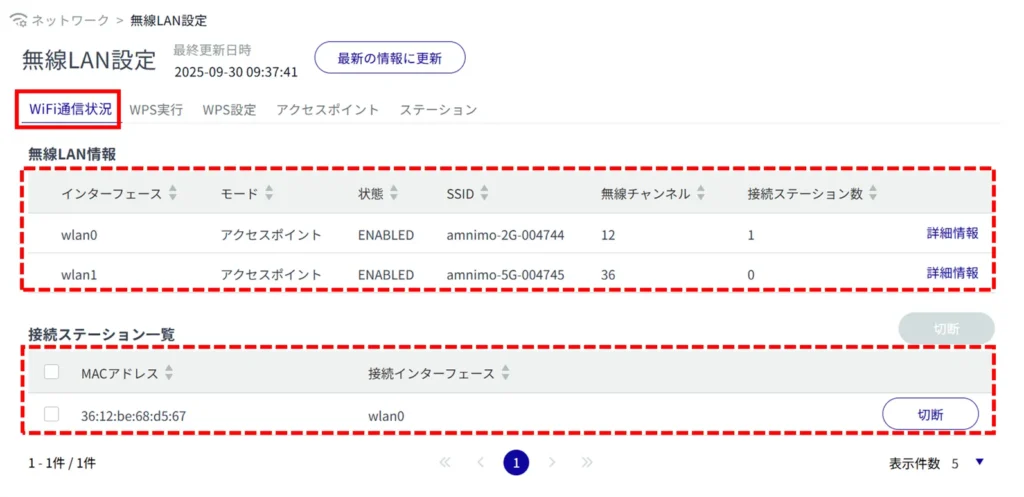
Click on the "WiFi Connection Status" tab to view the WiFi connection status.
When operating in access point mode, the bottom of the screen displays the stations connected to the device as "List of connected stations. When operating in station mode, the "Access Point List" at the bottom of the screen shows the access points to which the device can be connected.
Find out more about Wireless LANs #
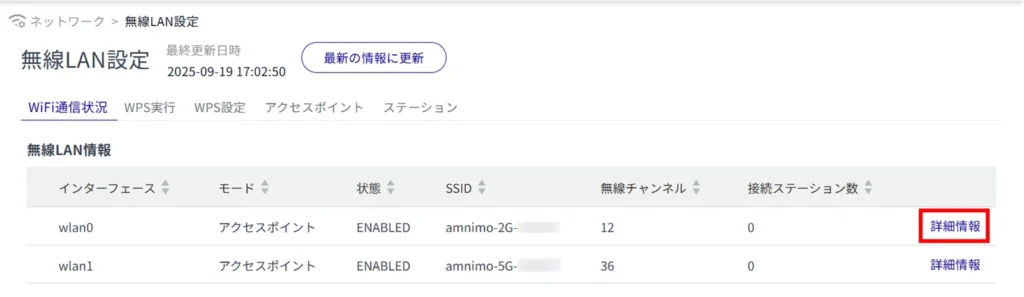
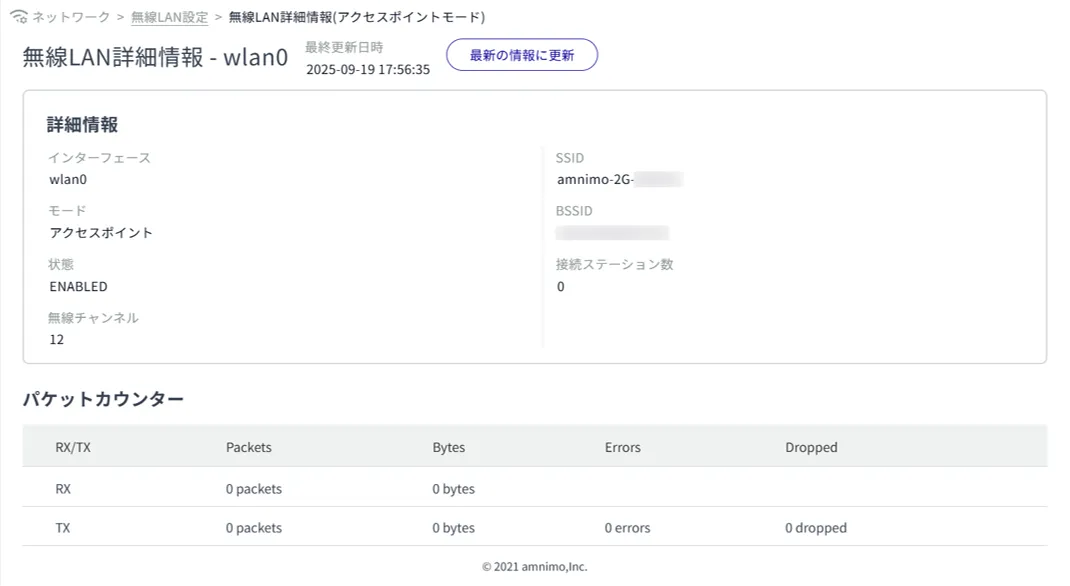
Detailed information (interface name, mode, status, wireless channel, SSID, BSSID, number of connected stations) and packet counter can be viewed.
Disconnect the connection station. #
Disconnect from the station connected to the device.


The station is disconnected.
For instructions on how to use the device in access point mode, please refer to the following
⇒ AC Series Getting Started Guide , "Using in Access Point Mode".
Changing the access point to connect to. #
You can change the connection destination from the currently connected access point to another access point that has already been configured.
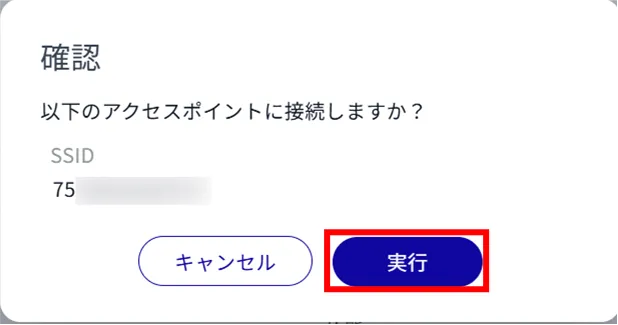
The change of the access point to be disconnected is completed.
For instructions on how to use the device in station mode, please refer to the following
⇒ AC Series Getting Started Guide , "Using in Station Mode".
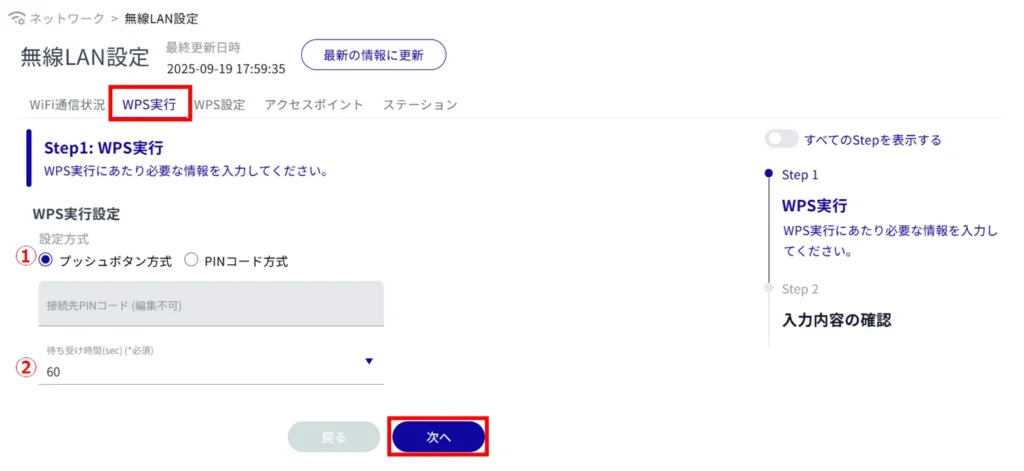
WPS Execution #
Running WPS #
- WPS can be used to connect a WiFi device to a compact router with wireless LAN running in access point mode. WPS cannot be used when the compact router with wireless LAN is operating in station mode.
- When using the PIN code method, the PIN code generated by the station to be connected must be entered.
- For details on how to connect using WPS, please refer to the following.
⇒ AC Series Compact Routers Startup Guide "Using in Access Point Mode
(1) Select the setting method (push button method or PIN code method).
Enter the standby time (seconds).
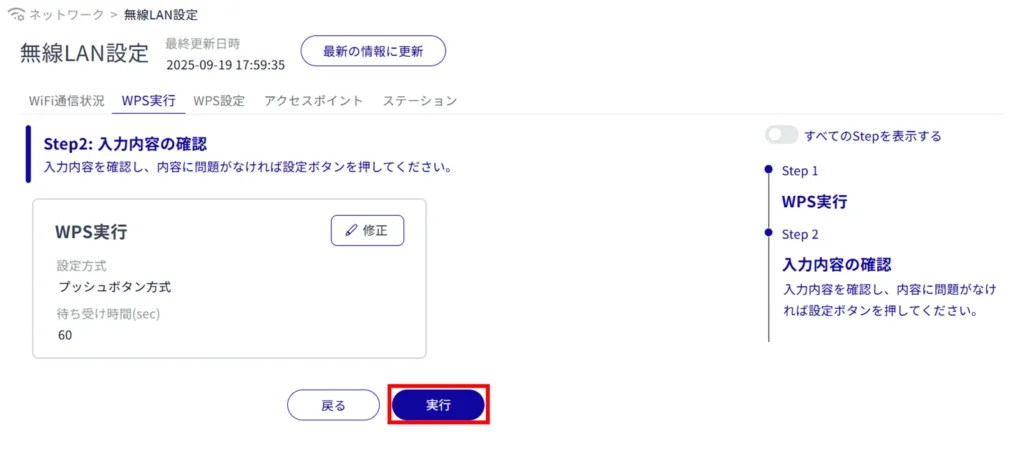
WPS execution is completed.
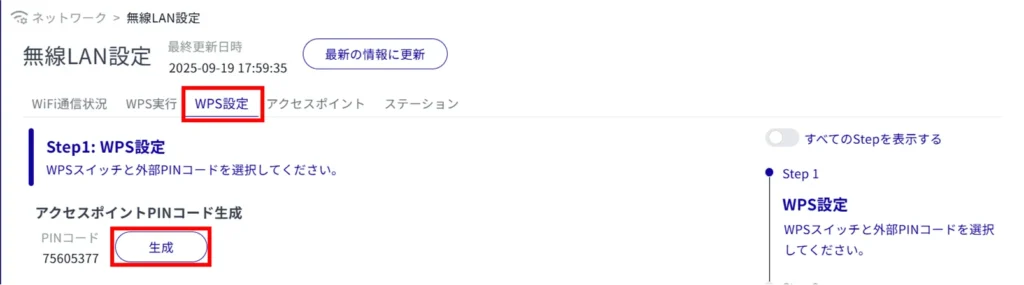
WPS Settings #
Configure WPS #
Displays and changes WPS settings.
- WPS can be used to connect a WiFi device to a compact router with wireless LAN running in access point mode. WPS cannot be used when the compact router with wireless LAN is operating in station mode.
- When using the "PIN code method," a PIN code generated in advance must be entered at the station connected to the wireless LAN compact router.
[Click "Generate" to regenerate the PIN code.
Click the toggle to enable or disable the WPS setting.
Click the toggle to enable/disable the WPS switch.
Click the toggle to enable/disable external PIN code entry.
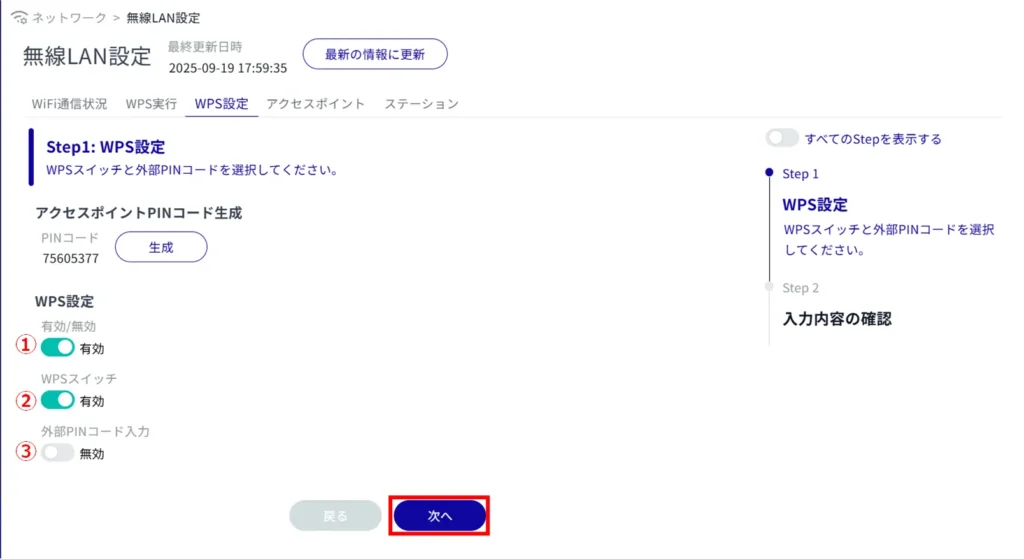
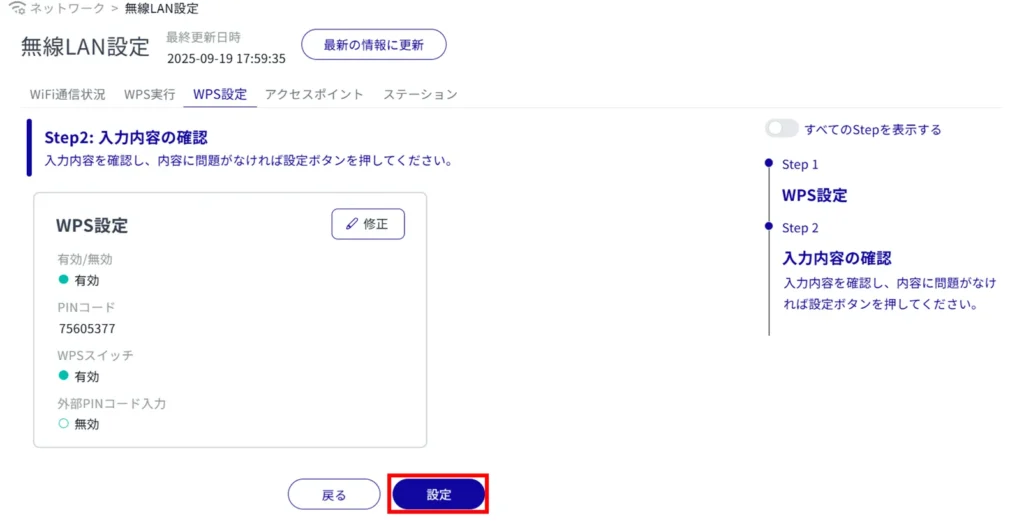
WPS setting is completed.
For details on how to connect using WPS, please refer to the following.
⇒ AC Series Compact Routers Startup Guide "Using in Access Point Mode
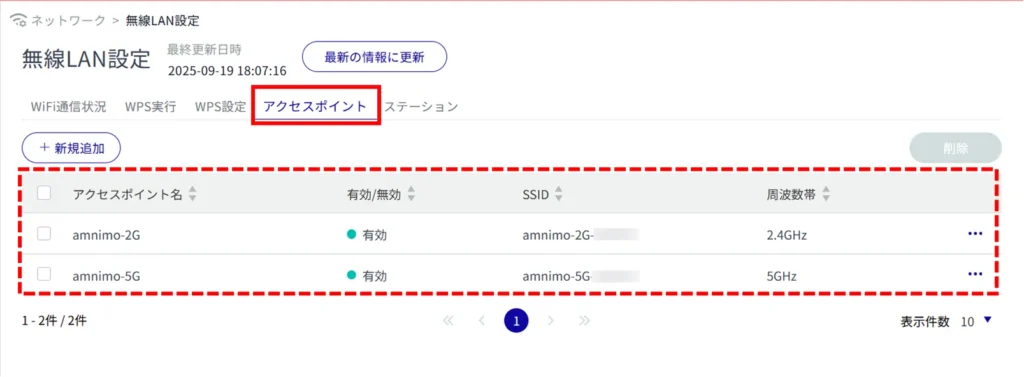
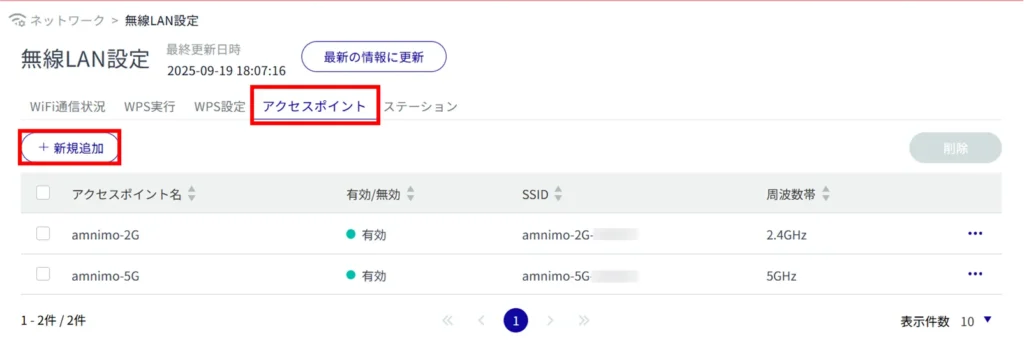
access point #
View a list of access points #
Clicking on the "Access Points" tab displays a list of registered access point settings.
The factory-installed compact router with wireless LAN starts operating as a wireless LAN access point as soon as it is connected to the Internet The two default values for the SSID name are as follows
- amnimo-2g-xxxxxxxx
- amnimo-5G-xxxxxxxx (AC15 only)
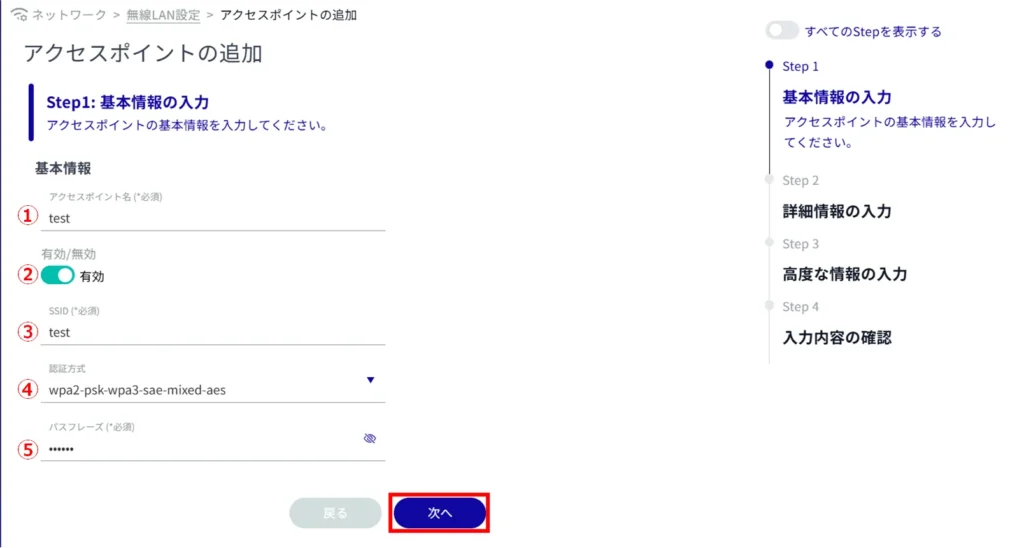
Add an access point #
Add an access point.
Enter an access point name.
Click the toggle to enable or disable the access point.
Enter the SSID.
Select the authentication method from the pull-down menu.
(5) Enter a passphrase.
Click the toggle to enable or disable SSID stealth.
Click the toggle to enable or disable the quarantine function.
Click the toggle to enable/disable the MAC address filter.
Specify the MAC address to be allowed to connect, if necessary.
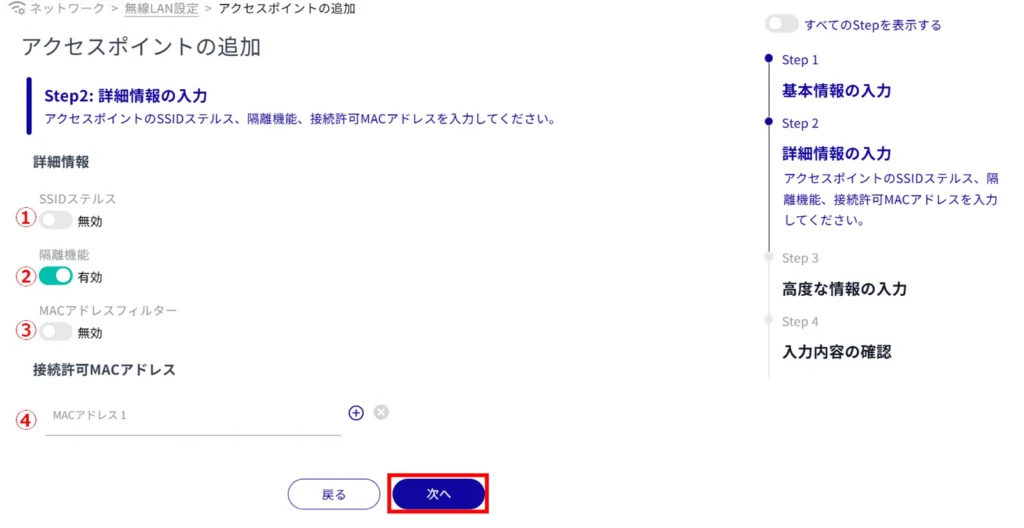
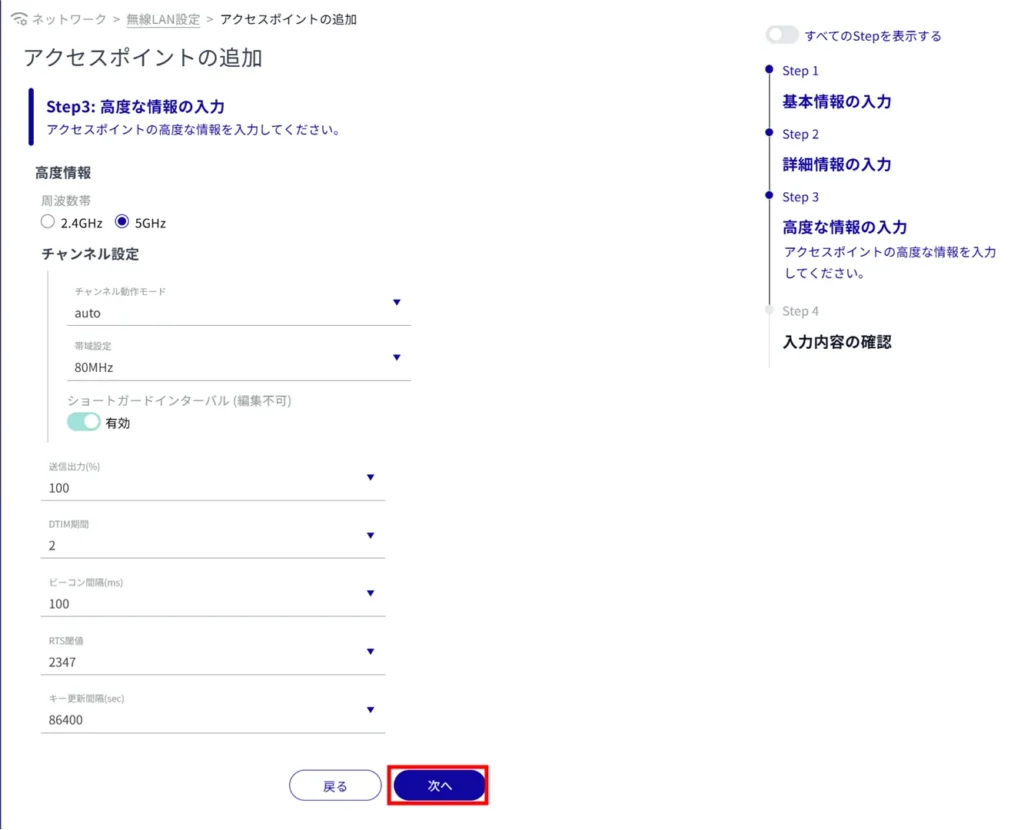
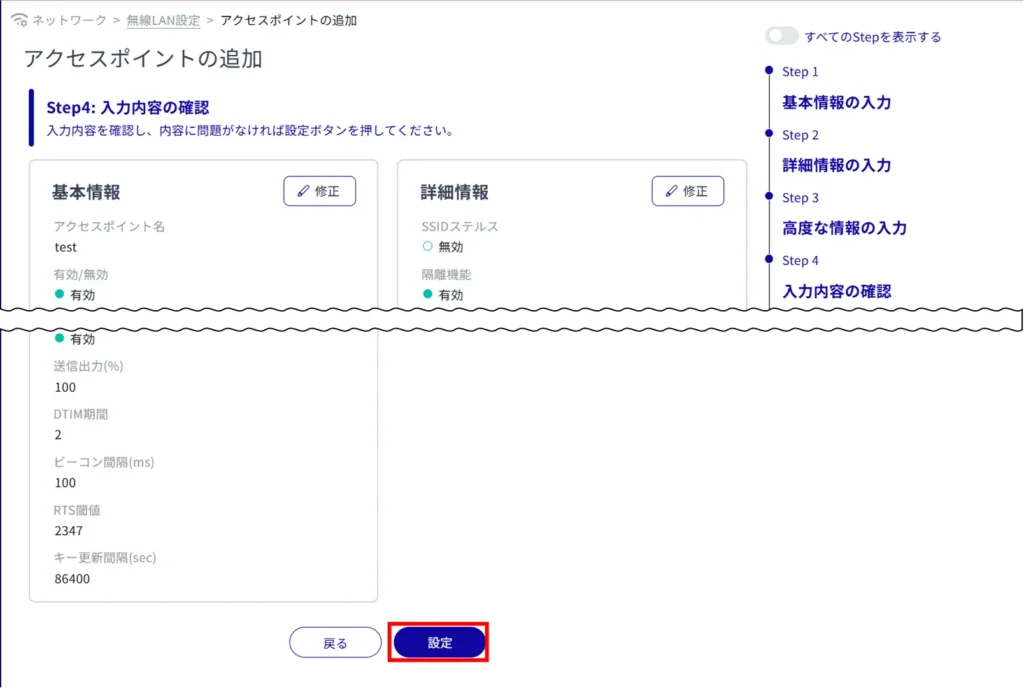
Adding an access point is completed.
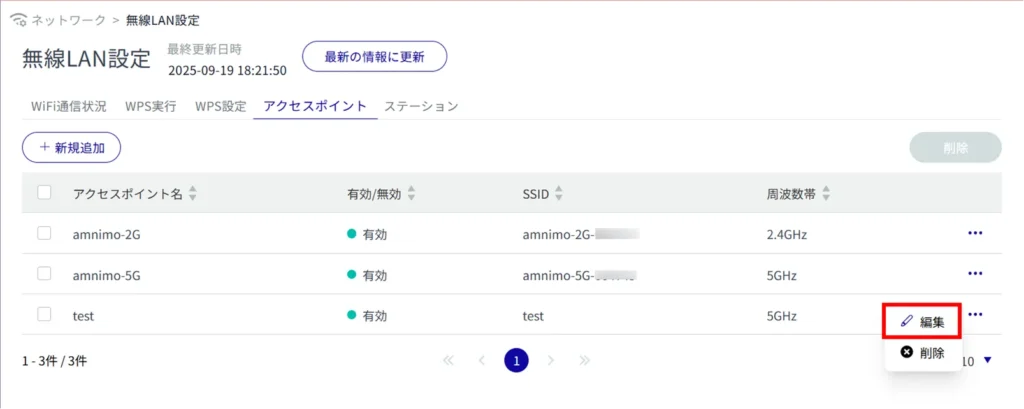
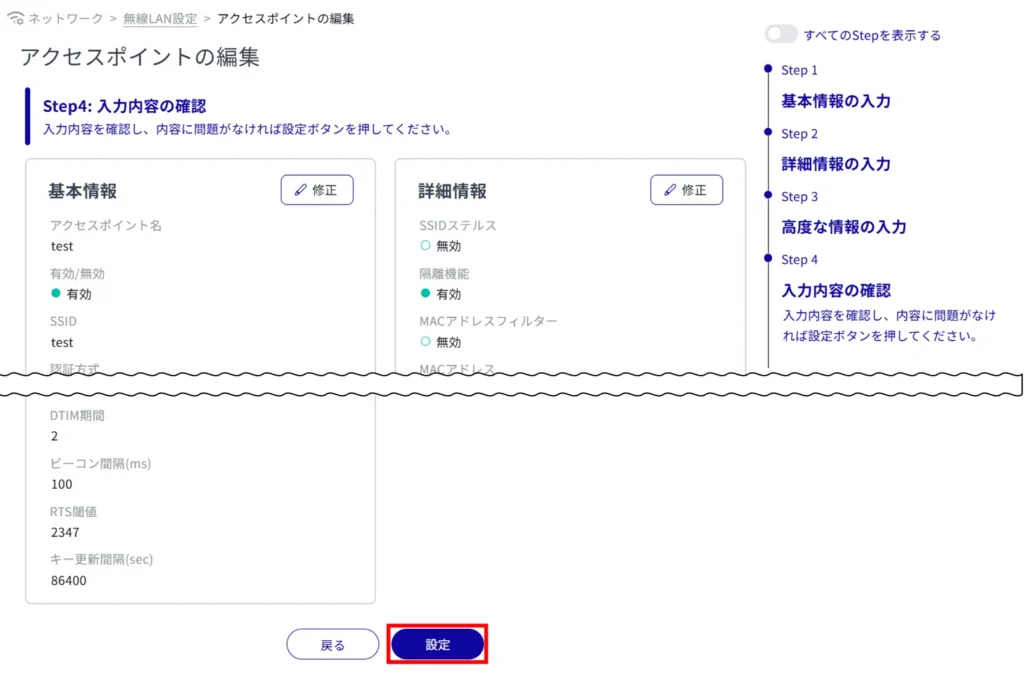
Edit access points #
Edit the registered access points.
Compact routers with wireless LAN cannot change the interface used by br0 because the DHCP server for br0 is enabled by default. Since wlan0 is also used as br0's interface, it is not possible to change the following access points used by wlan0.
- amnimo-2g-xxxxxxxx
- amnimo-5g-xxxxxxxx
Before editing the access point, set br0 to disabled from the DHCP Server Settings screen. For information on editing DHCP server settings, see " Edit DHCP server settings See the "The following is a list of the most important factors that must be taken into account when making a purchase.
The "Edit Access Point" screen appears.
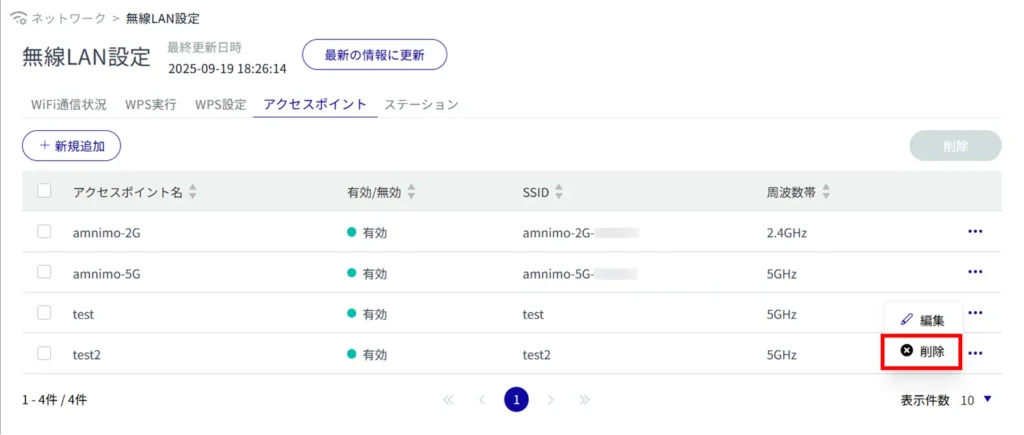
Delete an access point #
There are two ways to delete registered access points: individually from the access point operation menu, or by selecting all access points to be deleted and then deleting them.
Delete individual access points
This method is to select Delete from the access point's operation menu.
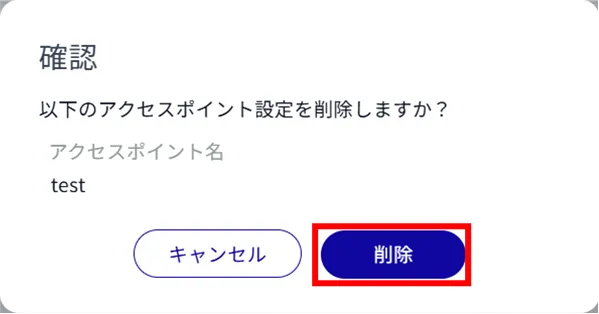
The access point is deleted.
Select and delete multiple access points
This method is used to delete access points after checking the check boxes for the access points to be deleted. This is useful for deleting multiple access points at once. You can also select only one access point to delete.

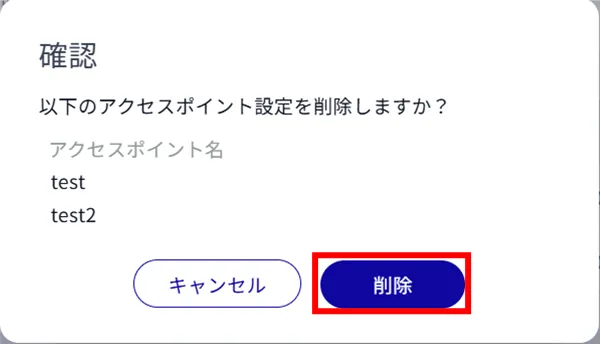
The selected access point is deleted.
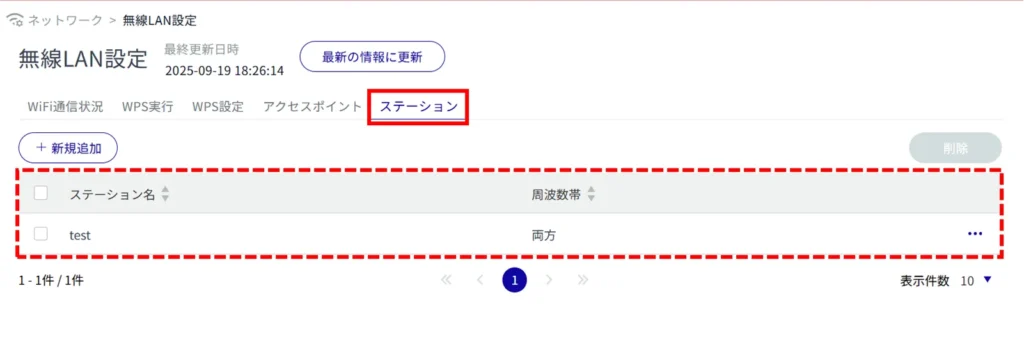
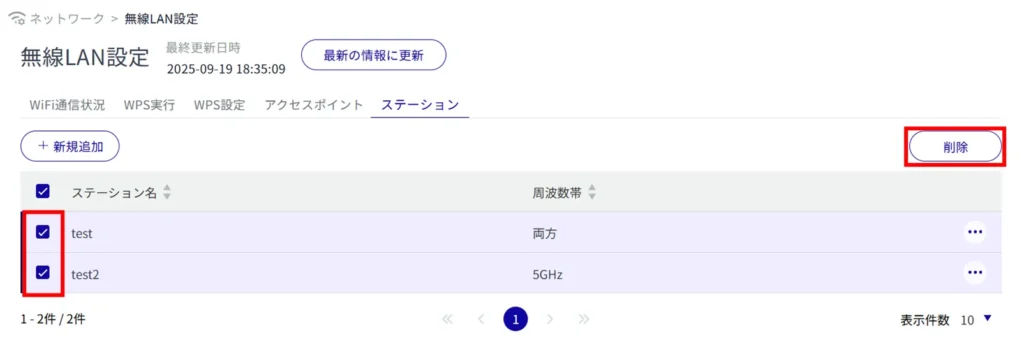
station #
View a list of stations #
Click on the "Stations" tab to view a list of stations.
The factory-installed compact router with wireless LAN starts operating as a wireless LAN access point immediately after power-on, so no stations are registered.
Several steps must be taken to operate in station mode. Please refer to the following for detailed instructions.
⇒ AC Series Startup Guide "Using in Station Mode
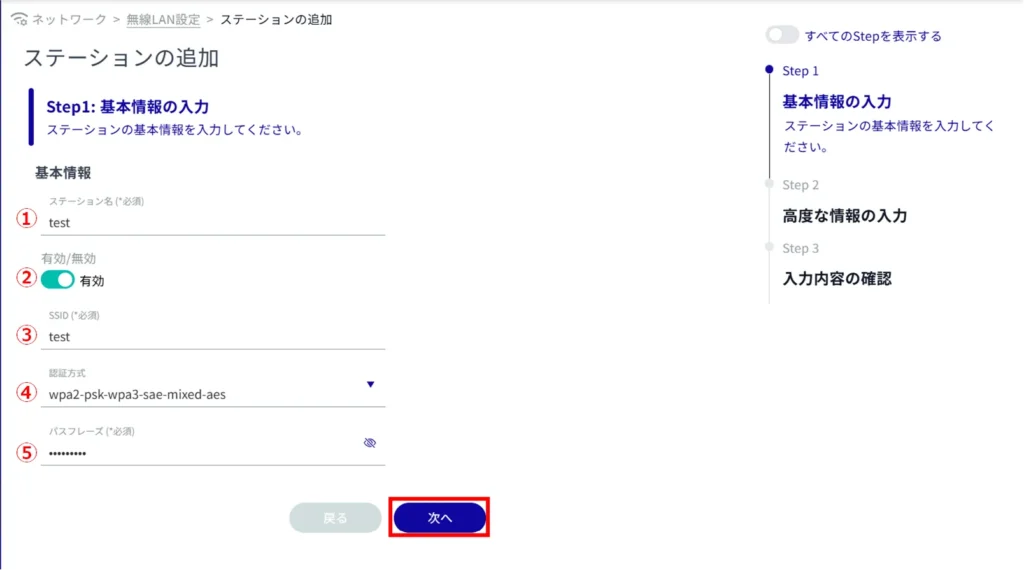
Add a station #
Add a station.

Enter a station name.
Click the toggle to enable/disable the station.
Enter the SSID.
Select the authentication method from the pull-down menu.
(5) Enter a passphrase.

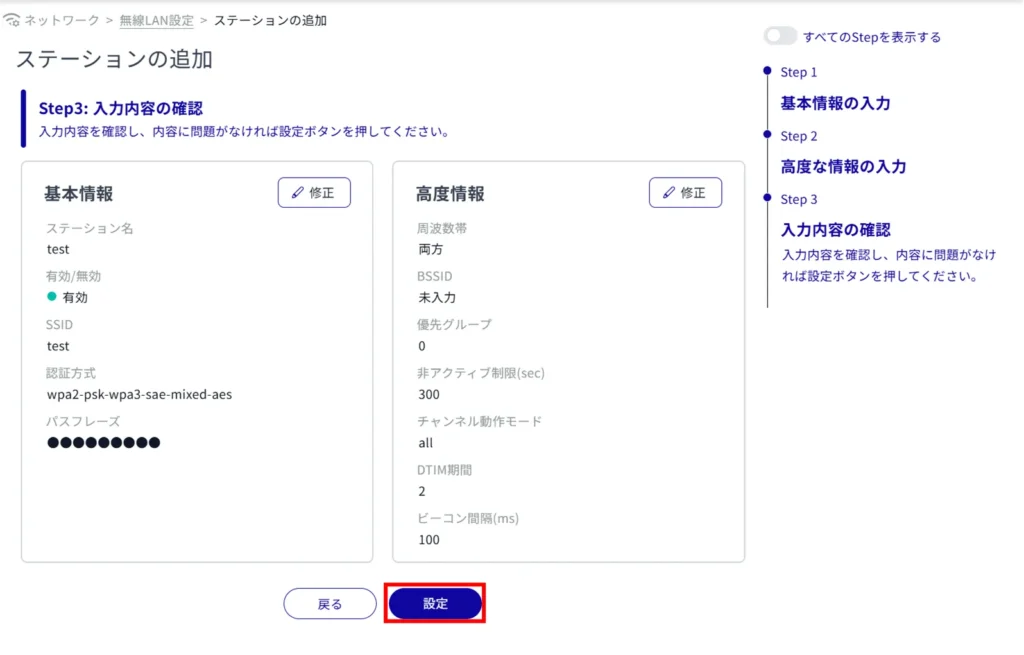
Adding a station is completed.
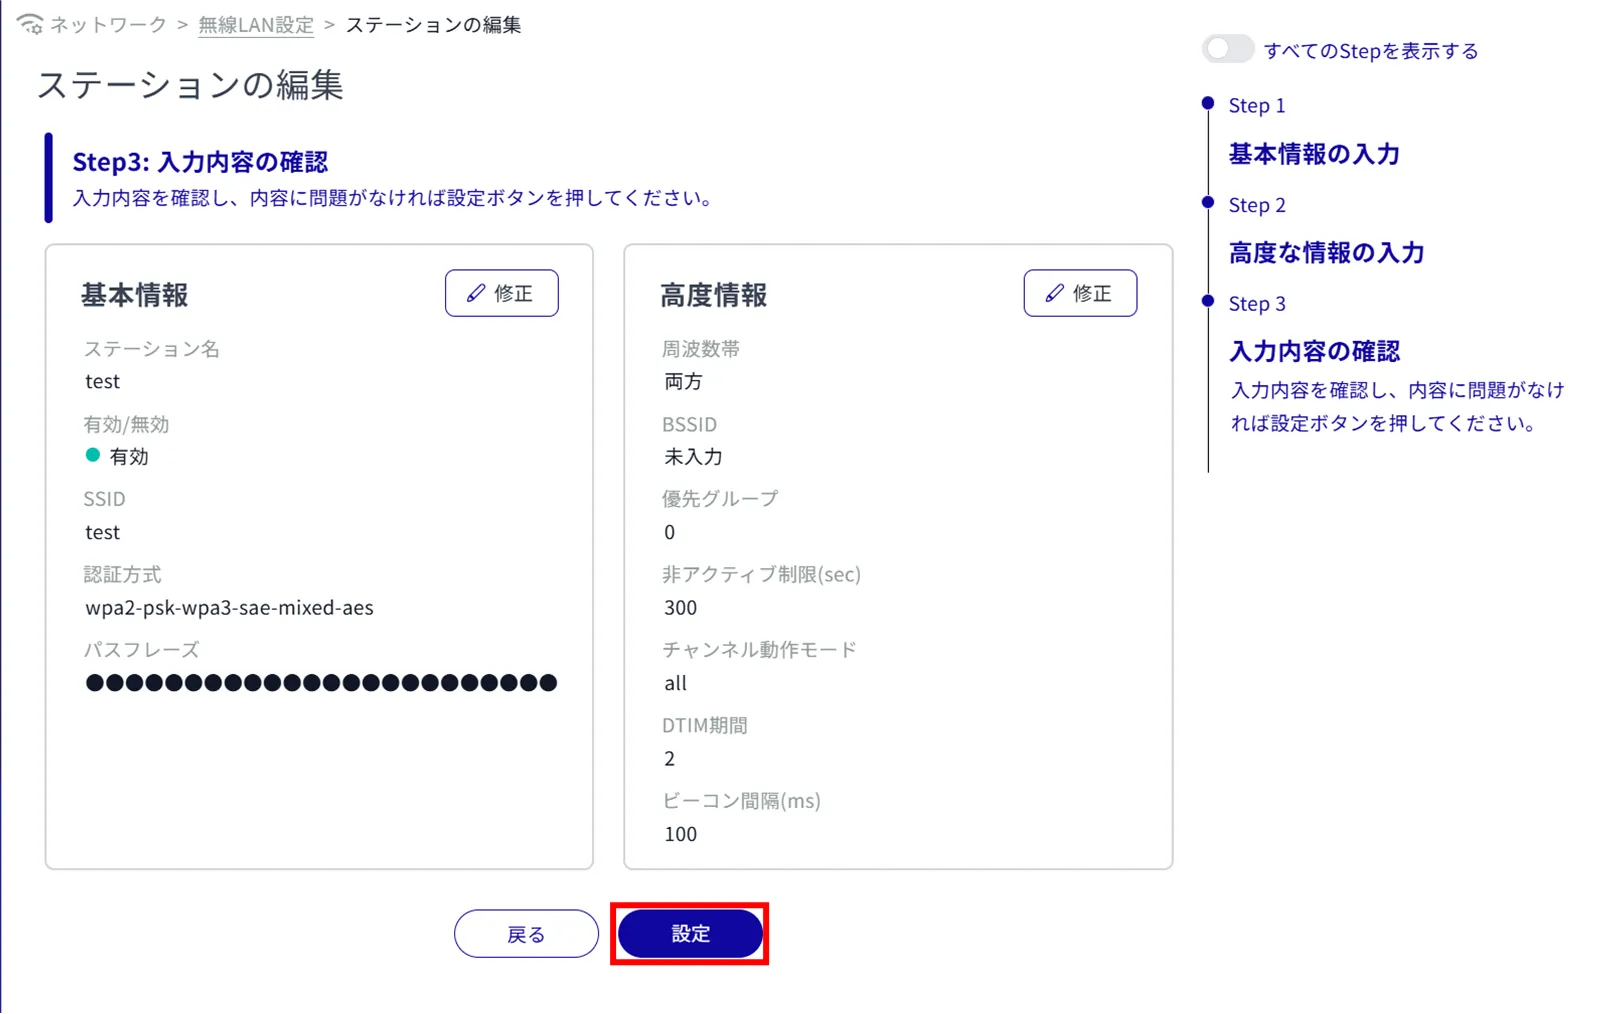
Edit Station #
Edit the registered stations.
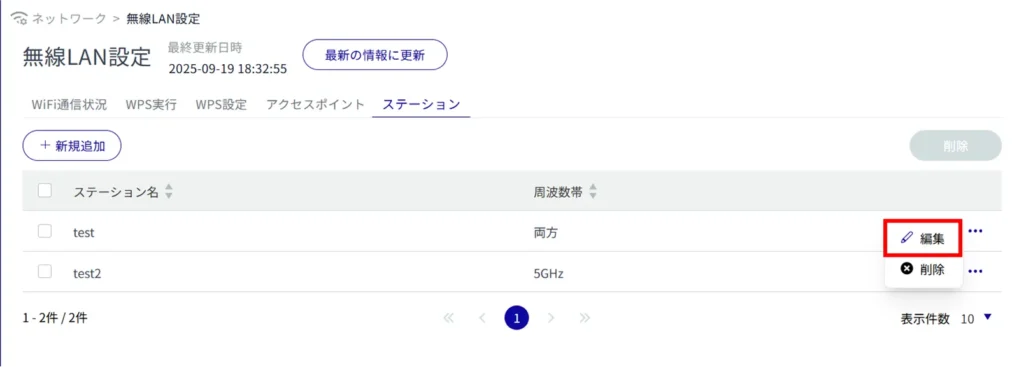
The "Edit Station" screen appears.
Delete a station #
To delete registered stations, you can either delete them individually from the station operation menu, or you can delete them after selecting all the stations you wish to delete.
Delete individual stations
This method is to select Delete from the station's operation menu.
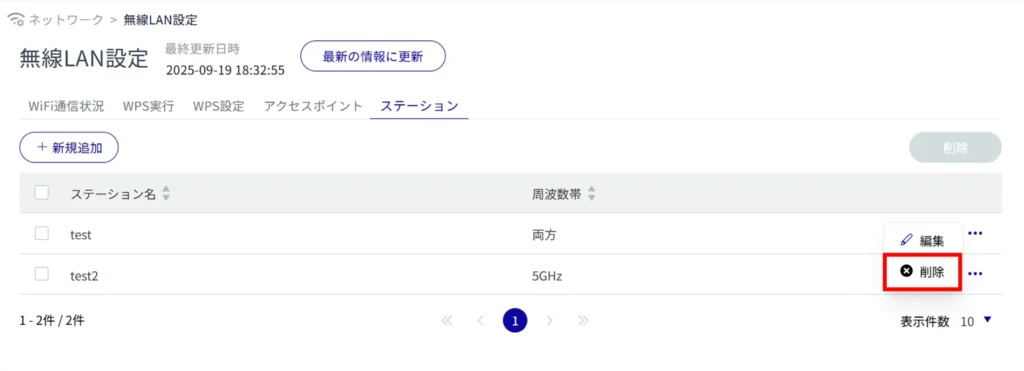
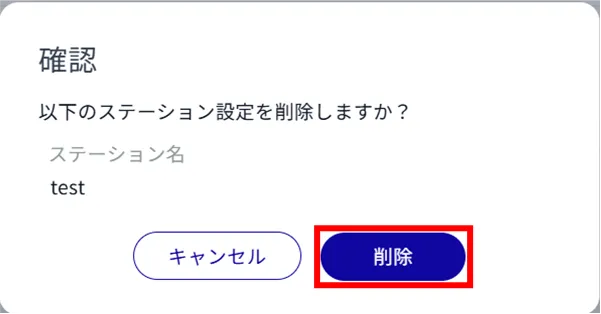
Station settings are deleted.
Delete multiple selections of station settings
This method is used to check the stations to be deleted before deleting them. This is useful for deleting multiple stations at once. You can also select a single station to delete.
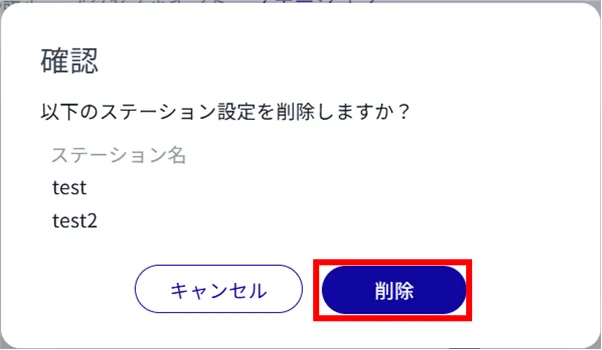
The selected station is deleted.