
This section describes the operation of the "Interface" screen.
Here, you can check the status of each interface and configure settings.
Click [Network] > [Interface] on the side menu to open the "Interface" screen.
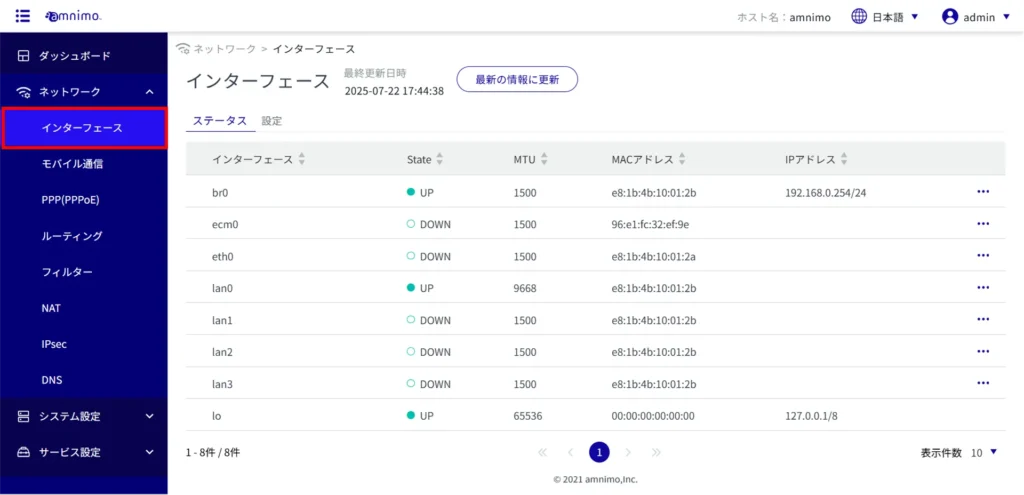
Check the interface #
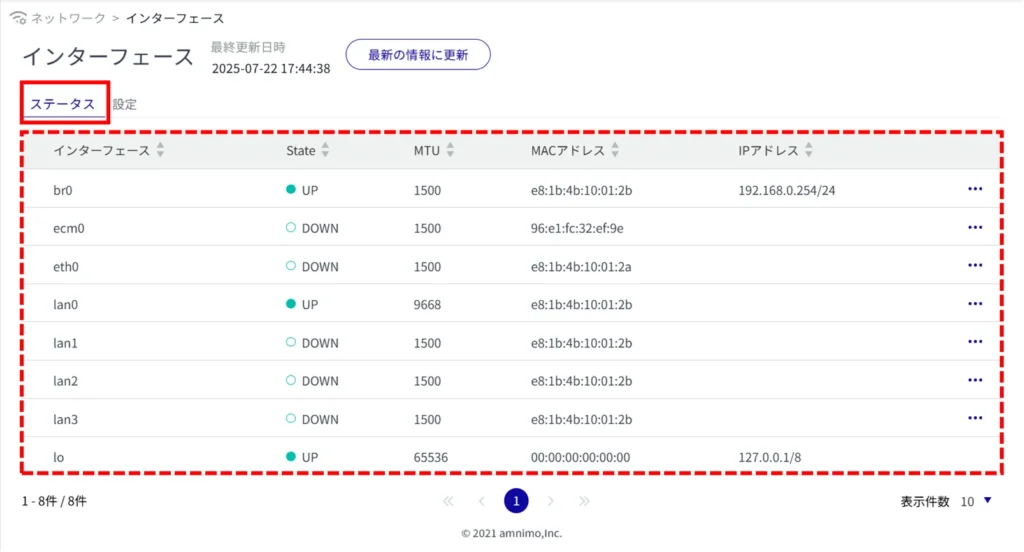
Displays a list of interface statuses #
Click on the "Status" tab to view a list of interface statuses.
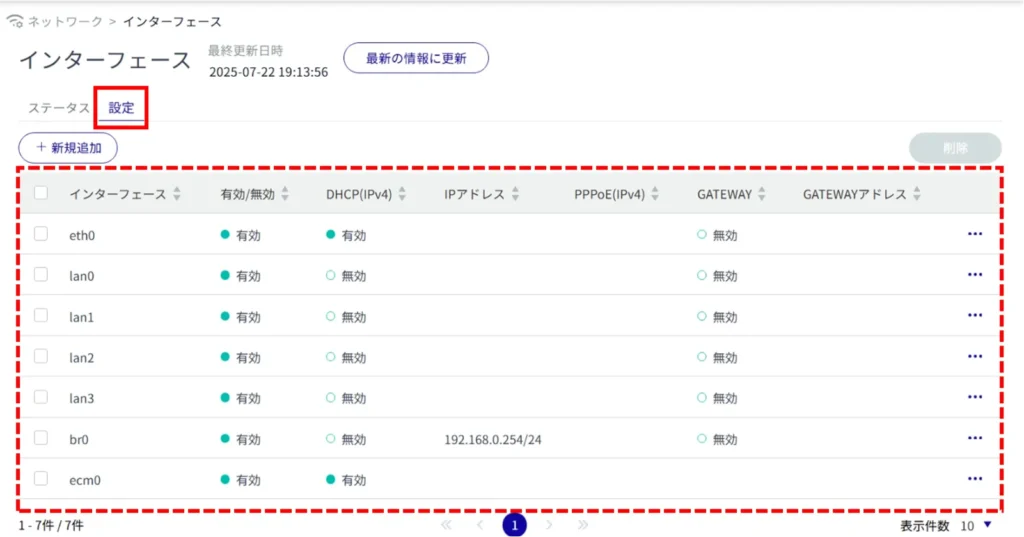
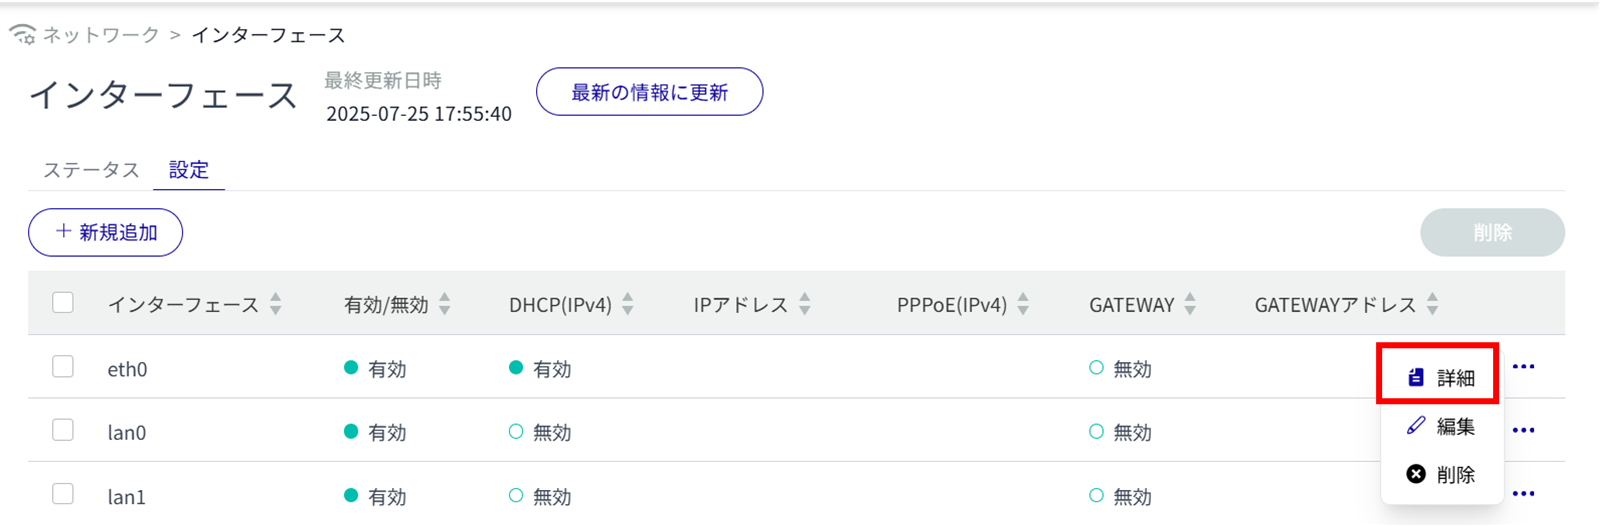
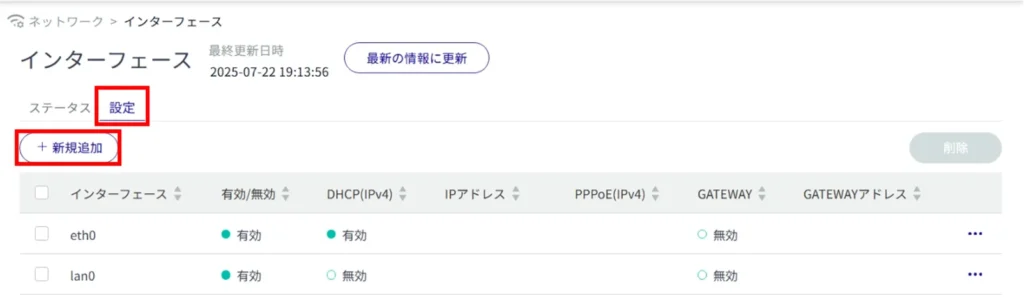
Display a list of interface settings #
Click on the "Settings" tab to view a list of interface settings.
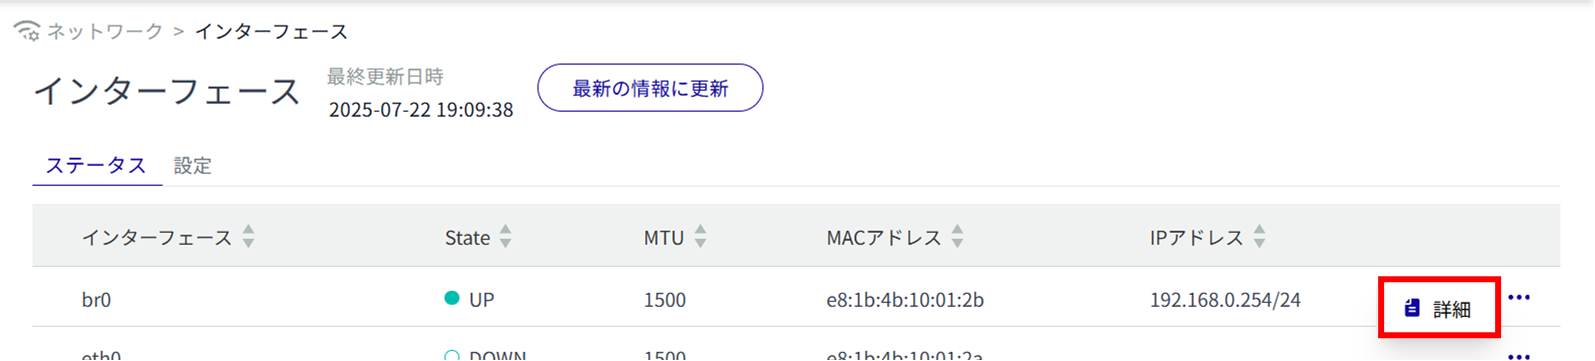
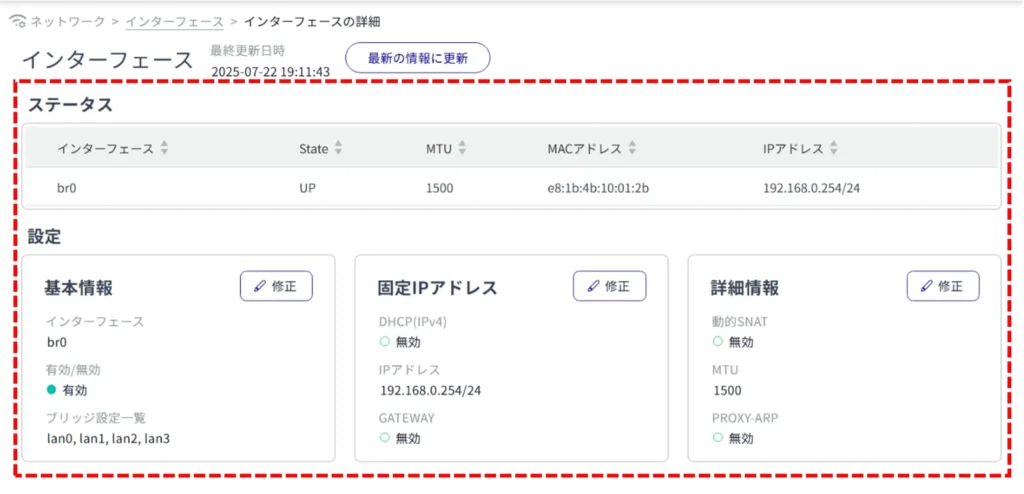
View interface details #
Interface details can be viewed from both the "Status" and "Settings" tabs.
| Status tab |
 |
| Settings" tab |
 |
Add interface settings #
Interface Selection #
The "Add Interface" screen appears.
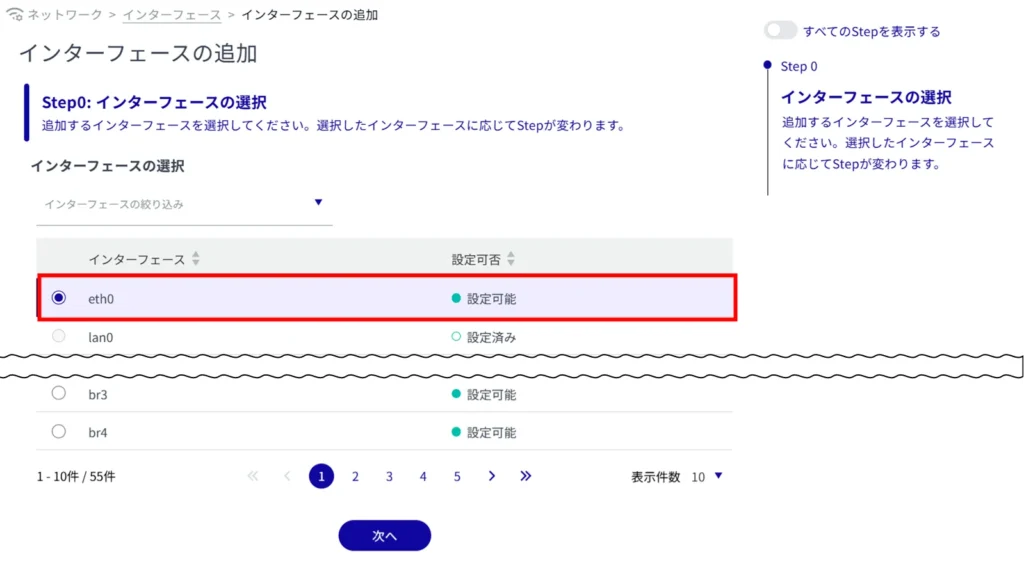
The setting items vary depending on the selected interface.
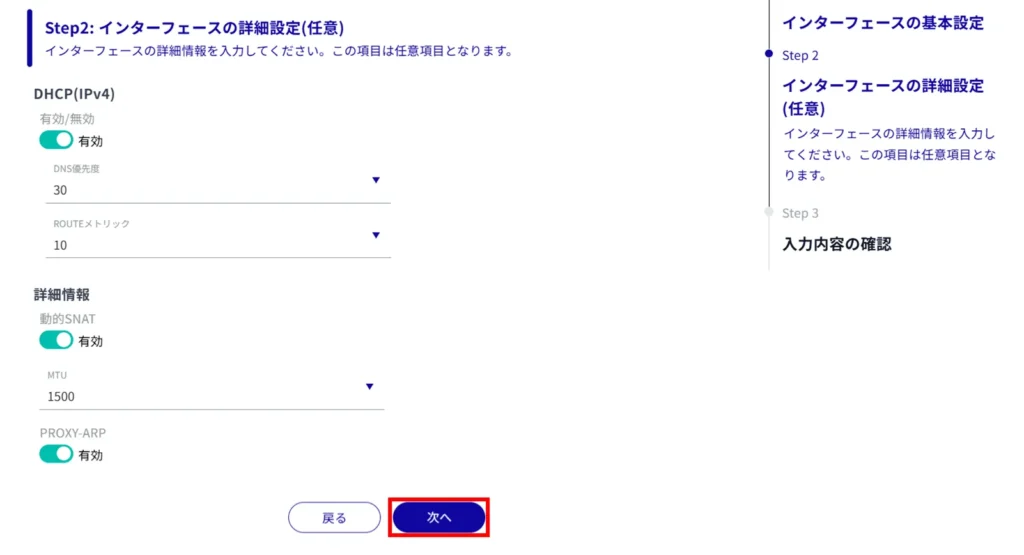
Adding eth0 #
This is how to configure the settings when the eth0 interface is selected.
For AI edge gateways, this section should be operated on wan0, not eth0.
Click on the toggle and select Enable/Disable.
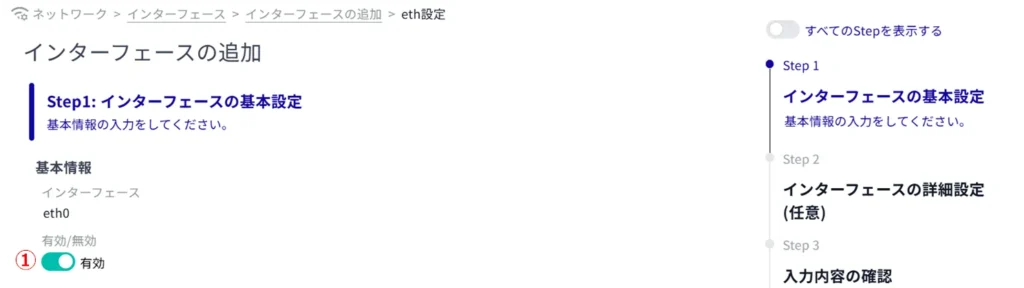
② If DHCP (IPv4) is enabled, select the DNS priority and ROUTE metric.
DNS PRIORITY is set in the range 0-99. The default value is 30.
The ROUTE metric is set in the range 0-255. Default value is 30.

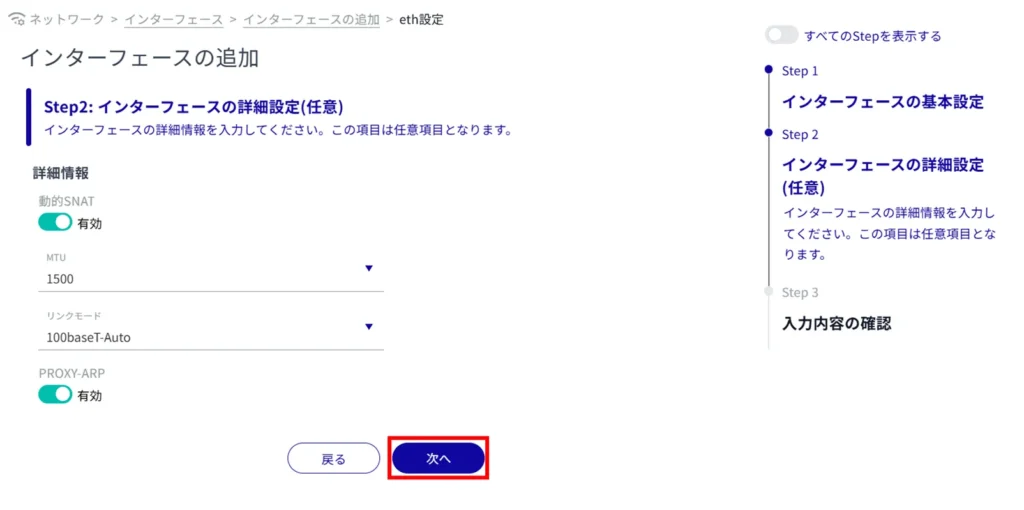
(iii) Enter the fixed IP address (multiple settings are possible by clicking the "Add" button) and set the prefix length.

(4) If GATEWAY is enabled, set the IP address that will be the default gateway.

*Because this is an optional field, you can proceed to the next step even if you have not entered any information.
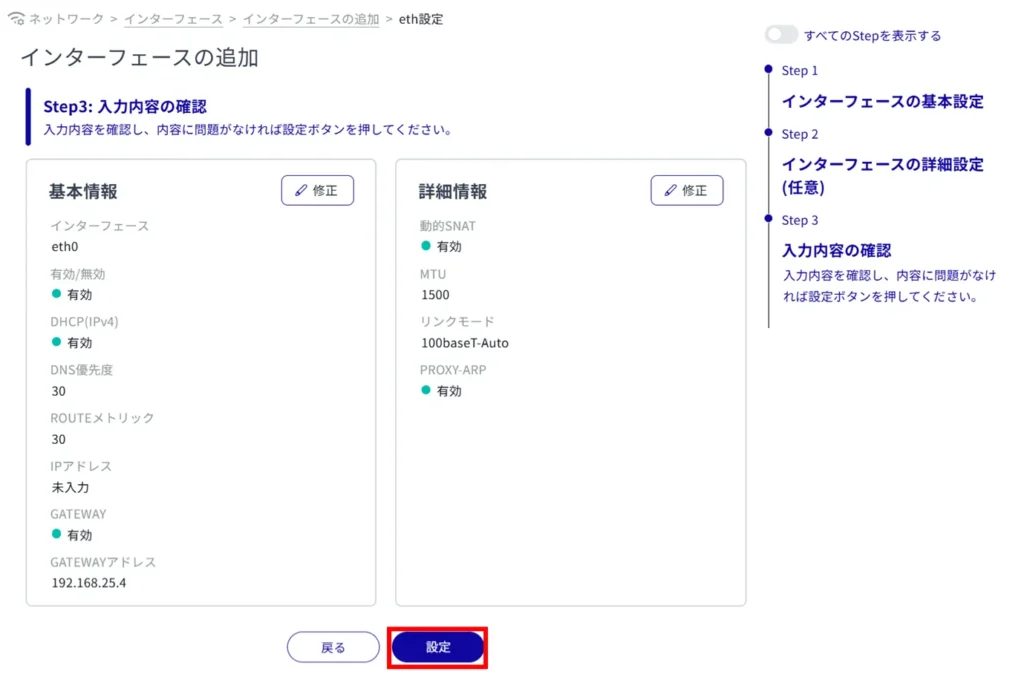
The interface will be added.
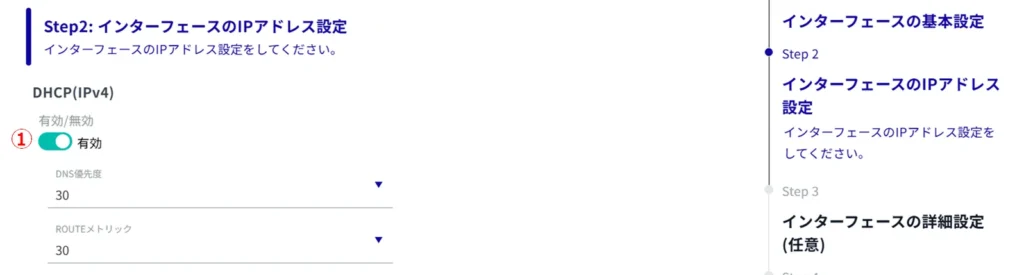
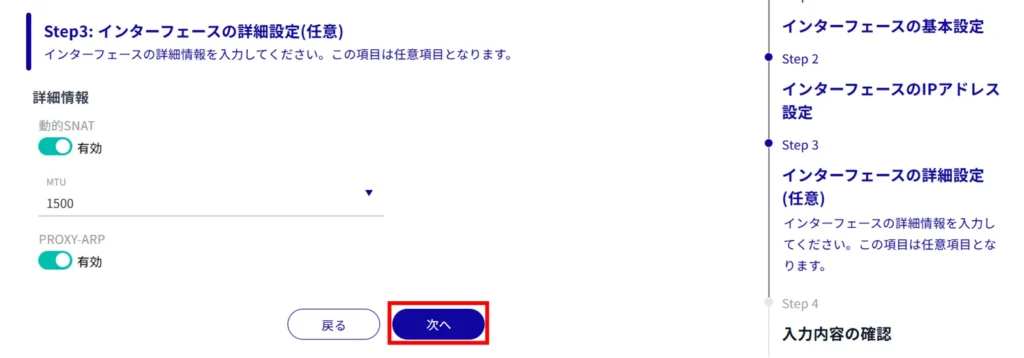
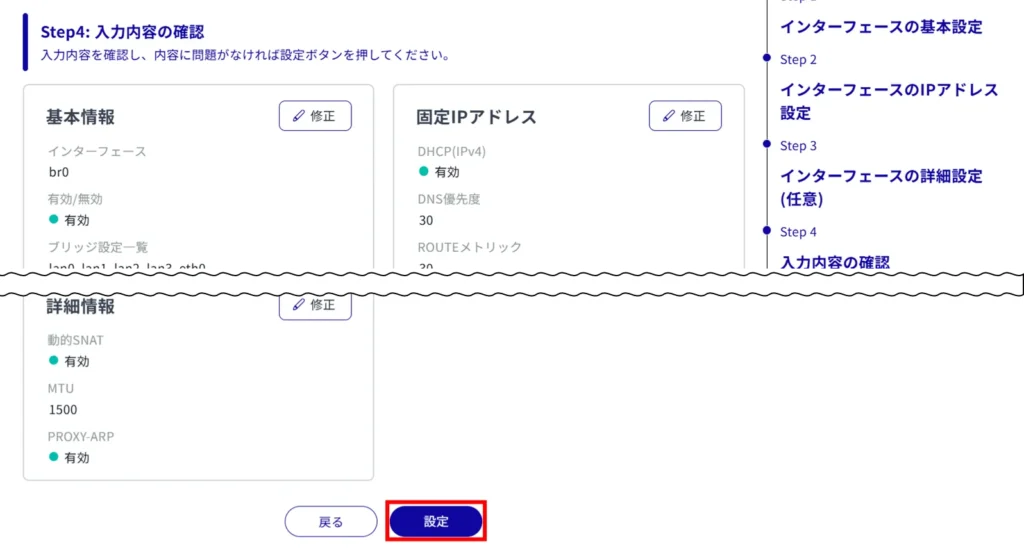
Add br0 #
This is how to configure the settings when the br0 interface is selected.
Click on the toggle and select Enable/Disable.

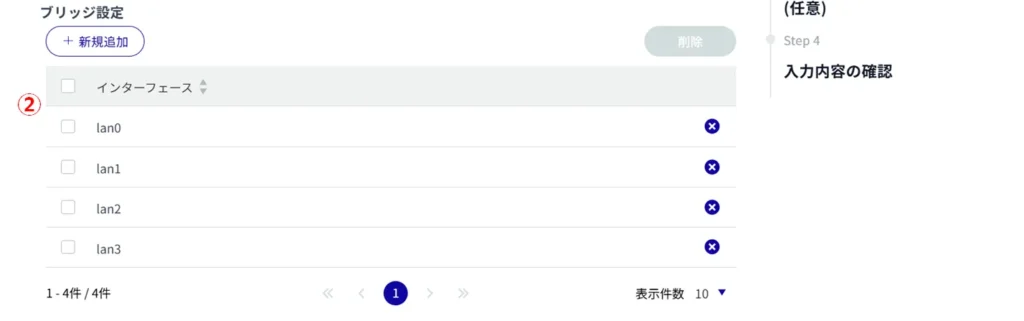
Set the interface to be used for bridge configuration.
- [You can add interfaces to be bridged with the "Add New" command.
- The lan registered in the bridge configuration of br cannot be assigned a fixed IP.
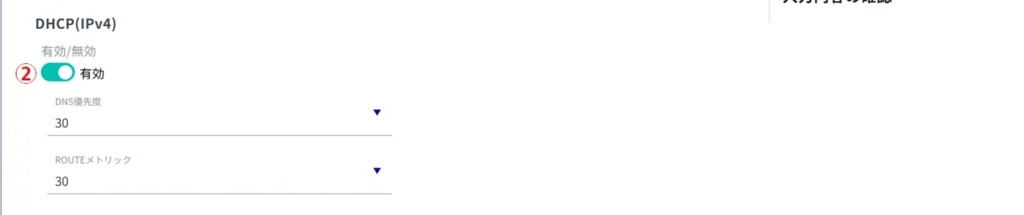
(1) If DHCP (IPv4) is enabled, select the DNS priority and ROUTE metric.
DNS PRIORITY is set in the range 0-99. The default value is 30.
The ROUTE metric is set in the range 0-255. Default value is 30.
(ii) Enter the fixed IP address (multiple settings are possible by clicking the "Add" button) and set the prefix length.

(3) If GATEWAY is enabled, set the IP address that will be the default gateway.

*Because this is an optional field, you can proceed to the next step even if you have not entered any information.
interface will be added.
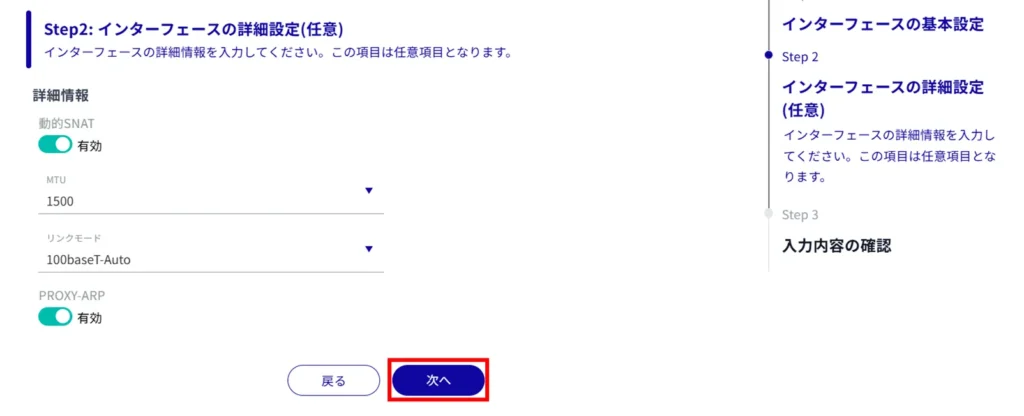
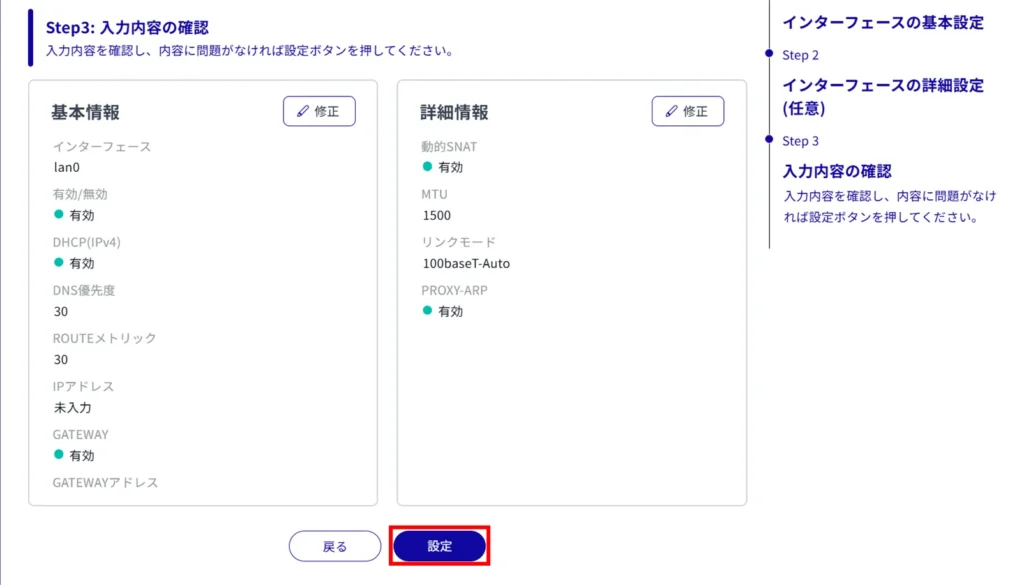
Add lan0 to lan3 #
This is the setting method when the interface from lan0 to lan3 is selected.
Click on the toggle and select Enable/Disable.

② If DHCP (IPv4) is enabled, select the DNS priority and ROUTE metric.
DNS PRIORITY is set in the range 0-99. The default value is 30.
The ROUTE metric is set in the range 0-255. Default value is 30.
(iii) Enter the fixed IP address (multiple settings are possible by clicking the "Add" button) and set the prefix length.

(4) If GATEWAY is enabled, set the IP address that will be the default gateway.

*Because this is an optional field, you can proceed to the next step even if you have not entered any information.
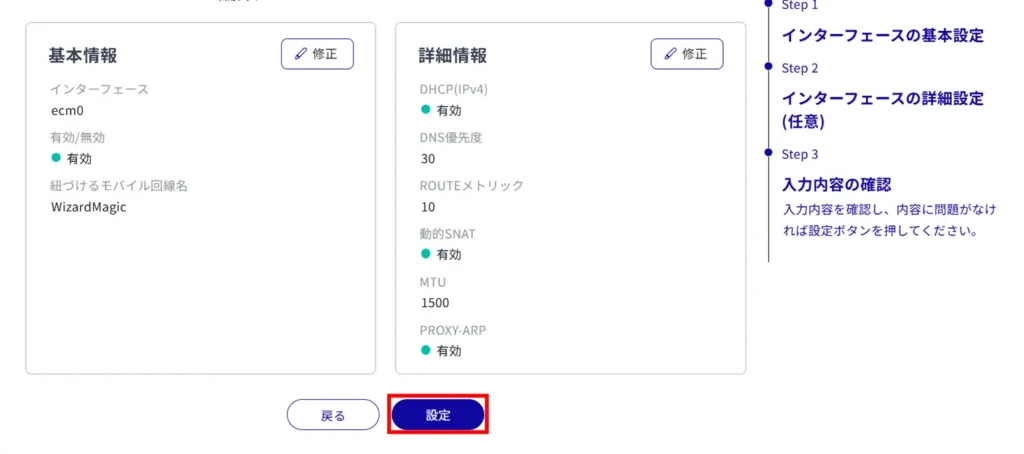
Add ecm0 / rmnet_data0 #
This is how to set up the ecm0 interface when it is selected.
If you are using a compact router, replace ecm0 with rmnet_data0.
Click on the toggle and select Enable/Disable.
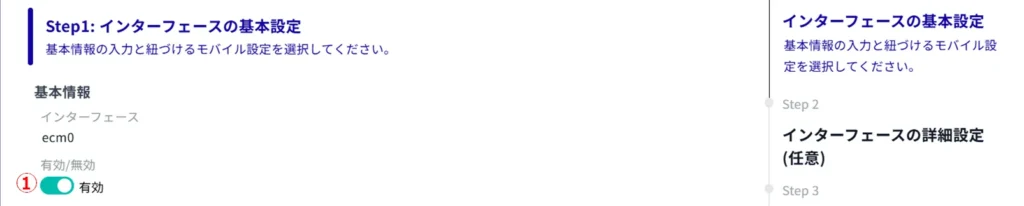
Select a mobile line name.
[You can select the name of the mobile line set in [Network] - [Mobile Communication].

*Because this is an optional field, you can proceed to the next step even if you have not entered any information.
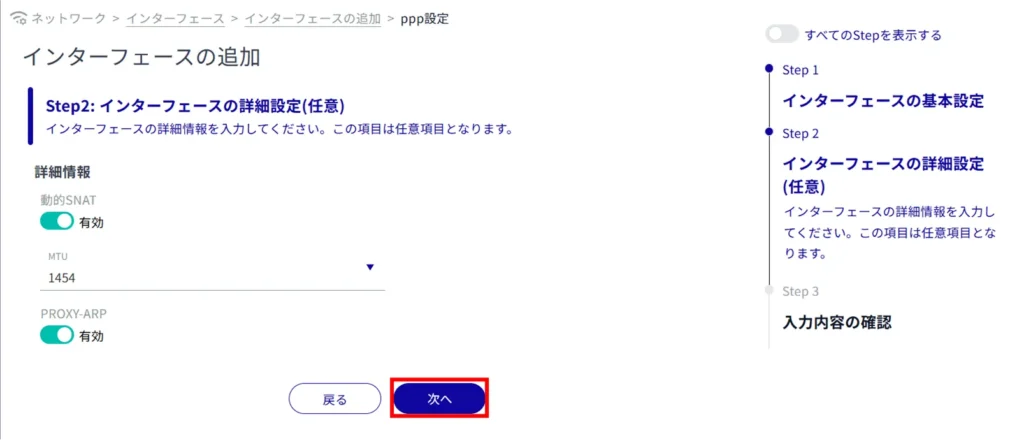
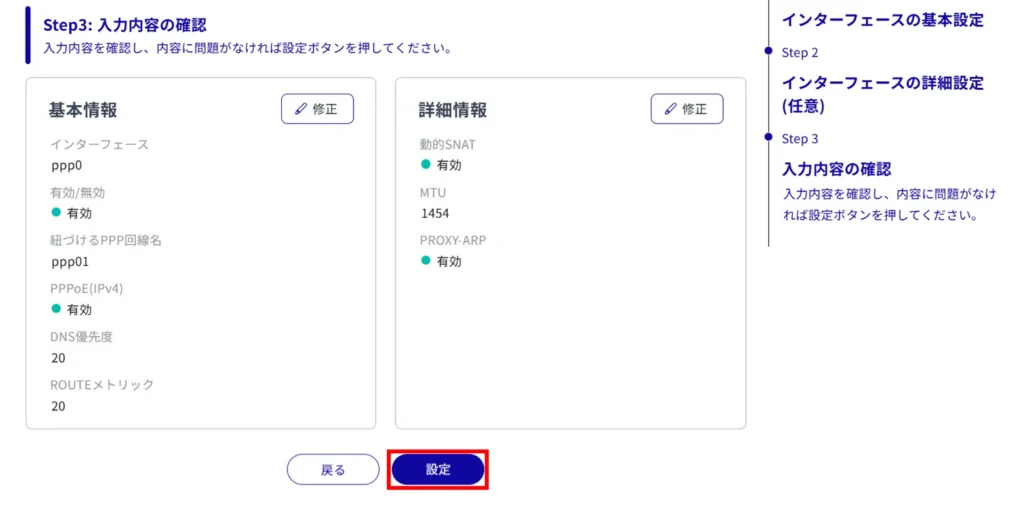
Addition of ppp0 #
This is how to configure the settings when the ppp0 interface is selected.
Click on the toggle and select Enable/Disable.

Select the PPP line name.
[The PPP line name set in [Network] - [PPP(PPPoE)] can be selected.

(3) If PPPoE (IPv4) is enabled, select the DNS priority and ROUTE metric.
DNS PRIORITY is set in the range 0-99. The default value is 20.
The ROUTE metric is set in the range 0-255. Default value is 20.

*Because this is an optional field, you can proceed to the next step even if you have not entered any information.
Editing the interface #
Edit the registered interface settings.

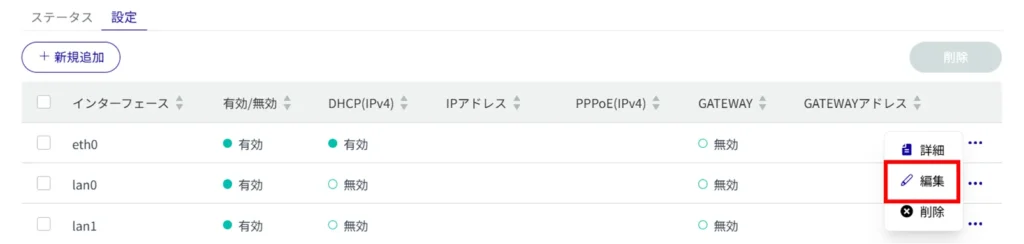
The "Edit Interface" screen appears.
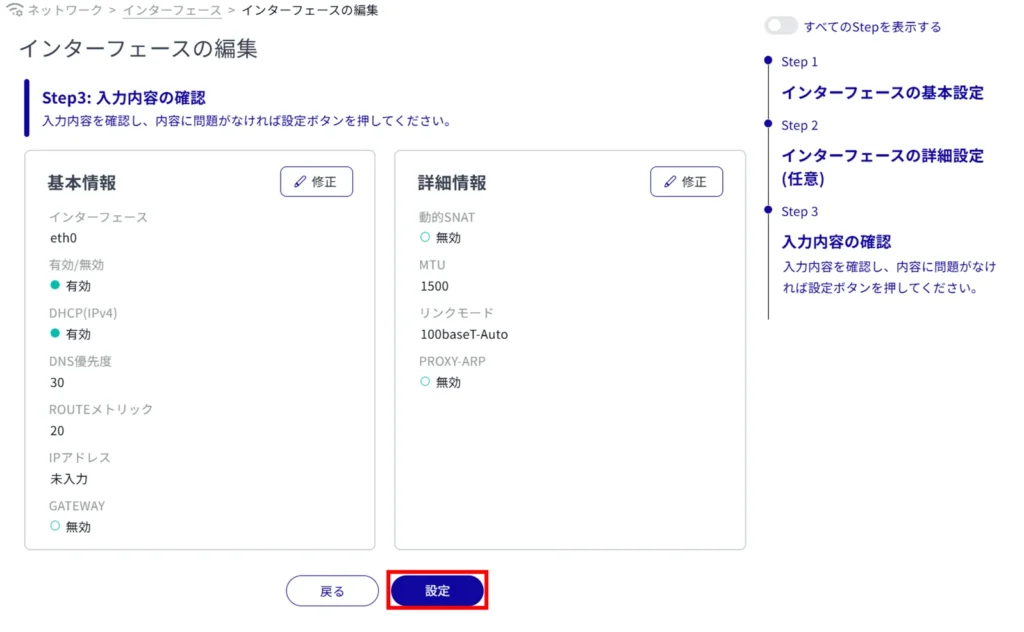
Information on interface settings is updated.
Since the IP address will be changed, please access the new URL after the setup is complete.
Deleting an interface #
There are two ways to delete registered interfaces: individually from the interface operation menu, or by selecting multiple targets and then deleting them.
Delete individual interfaces #
This is how to select Delete from the interface's operation menu.

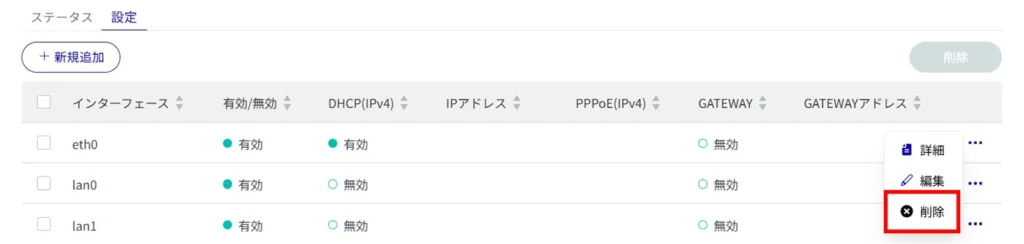
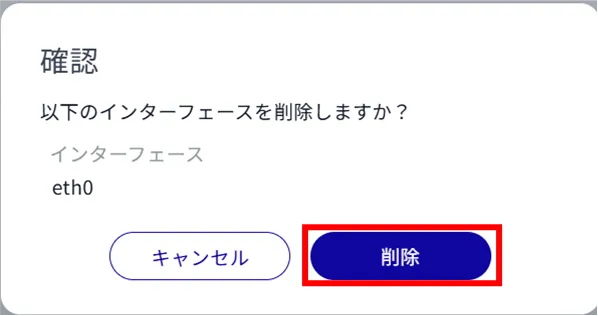
The interface is removed.
Select and delete multiple interfaces #
This method is used to delete an interface after checking the check boxes of the interfaces to be deleted. This is useful when deleting multiple interfaces at once. You can also select a single interface to delete.


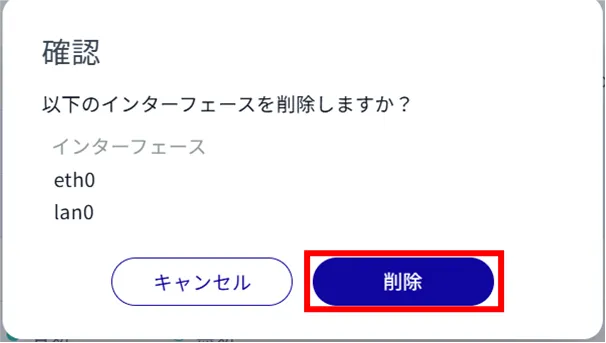
The interface is removed.