
The camera patrol function supports remote monitoring of live video according to a predefined patrol plan.
By installing cameras in the areas to be patrolled and linking them to an integrated video management system, staff (people) can also reduce the amount of time they spend patrolling.
A maximum of 30 tour plans can be registered.
Application is required to use this function.
Add a camera patrol #
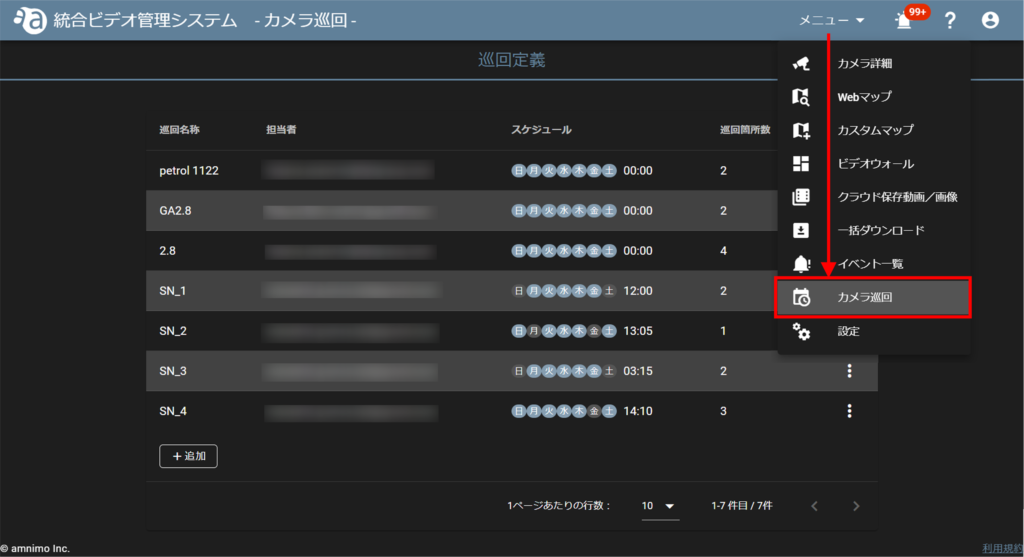
Follow the steps below to add a camera patrol.

- Circuit Name: Enter a name and click the save button
 .
. - Contact person: Enter directly or select a contact person from the drop-down list.
- Schedule: Select the day and time to patrol.

About the patrol time
Click on the time to display the clock.
You can also select the time by turning the mouse wheel.
❶ Click at the positive hour position you wish to set. | ❷ Next, click on the number of minutes you wish to set. |

About display type
Select the display method for normal and live images from two types: [Overlapping] or [Side-by-side].
Overlapping display | Display side by side |
- Display Motion Events (beta feature) is not an official version and is not supported.
- Please be aware that unforeseen problems may occur when using the product.


Clicking on the name of the patrol location will bring up an input screen, so give it an easy-to-understand name.

Click on the icon in the ❶ [ Normal Image ] section and select the normal image.

❷ Select the normal image from the following screen. (The images displayed here are thumbnails or snapshots that have already been taken.)

❸ Thumbnails are displayed as shown below.

To make this setting, the fisheye correction setting in the camera details must be enabled in advance.
➡" Setting Fisheye Correction Settings "
❶ Click [FISHEYE] in the camera orientation settings.

❷ When the image is displayed, determine the camera orientation by moving the mouse or scrolling the wheel, and click the Save button.


The camera patrol is added by these operations.