
You can check the logs and time stored in the product.
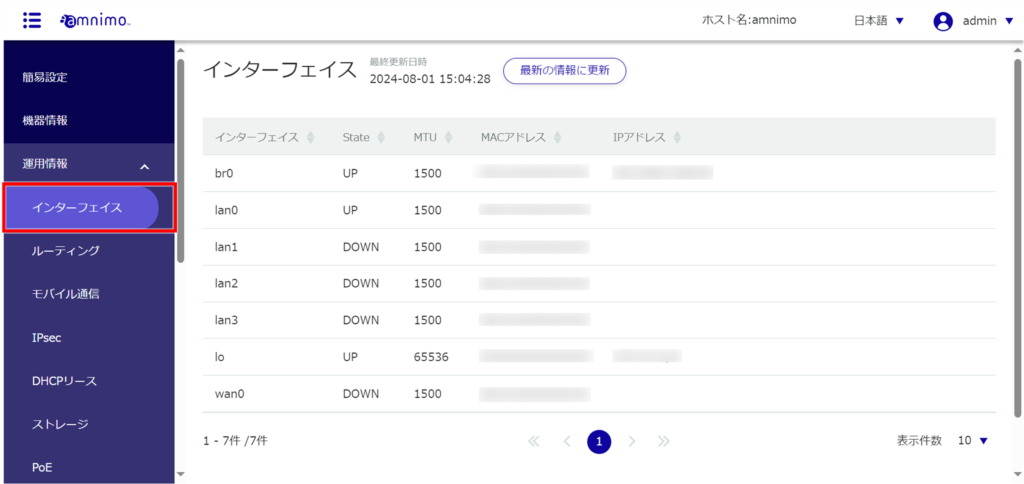
Check the status of the interface #
interface status.
[The Interface screen appears.

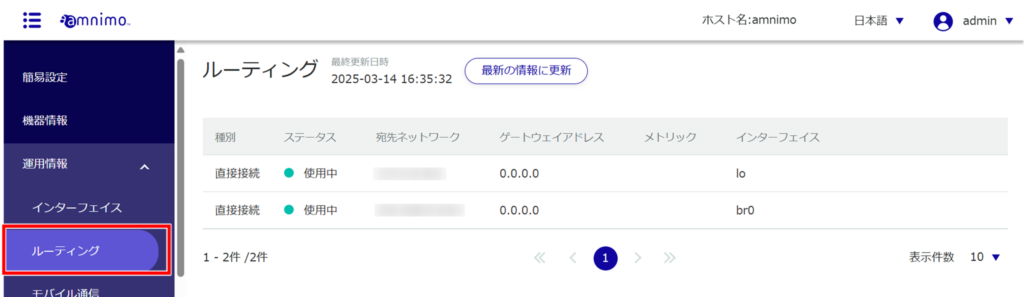
Check routing table information #
You can check the routing table information (route information referenced during the routing process).
[The Routing screen appears.
The "Type" information is not displayed for AI Edge Gateway (amnimo X series), Edge Gateway (amnimo G series) and IoT Router (amnimo R series).
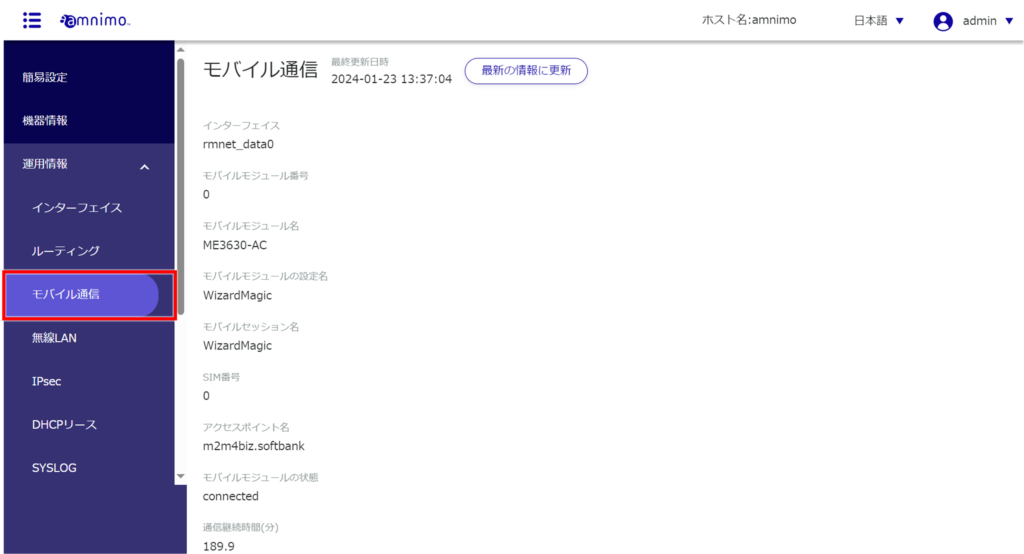
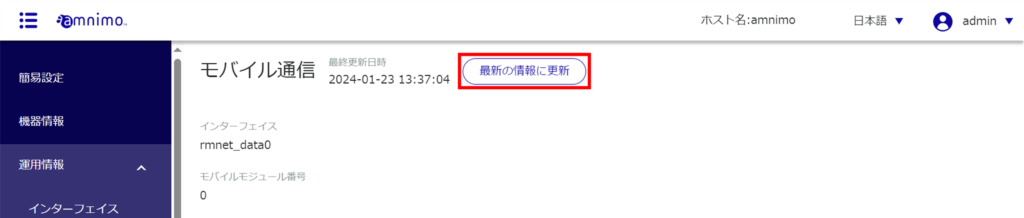
Check the communication status of your mobile line #
Devices without communication modules do not have this function.
Check the communication status of the mobile line.
The "Mobile Communications" screen will appear (see example below).
If the mobile connection is unconnected, a screen will appear informing you of the [unconnected status].
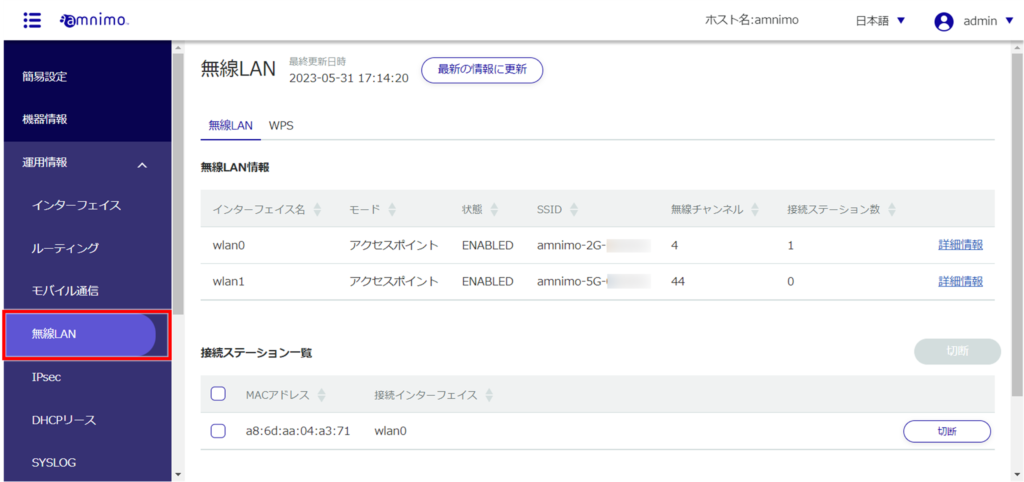
Check wireless LAN information #
AI Edge Gateway and Sensor Connection Gateway (amnimo X Series), Edge Gateway (amnimo G Series), IoT Router (amnimo R Series), and Compact Router Indoor Type (AC10) do not have this feature.
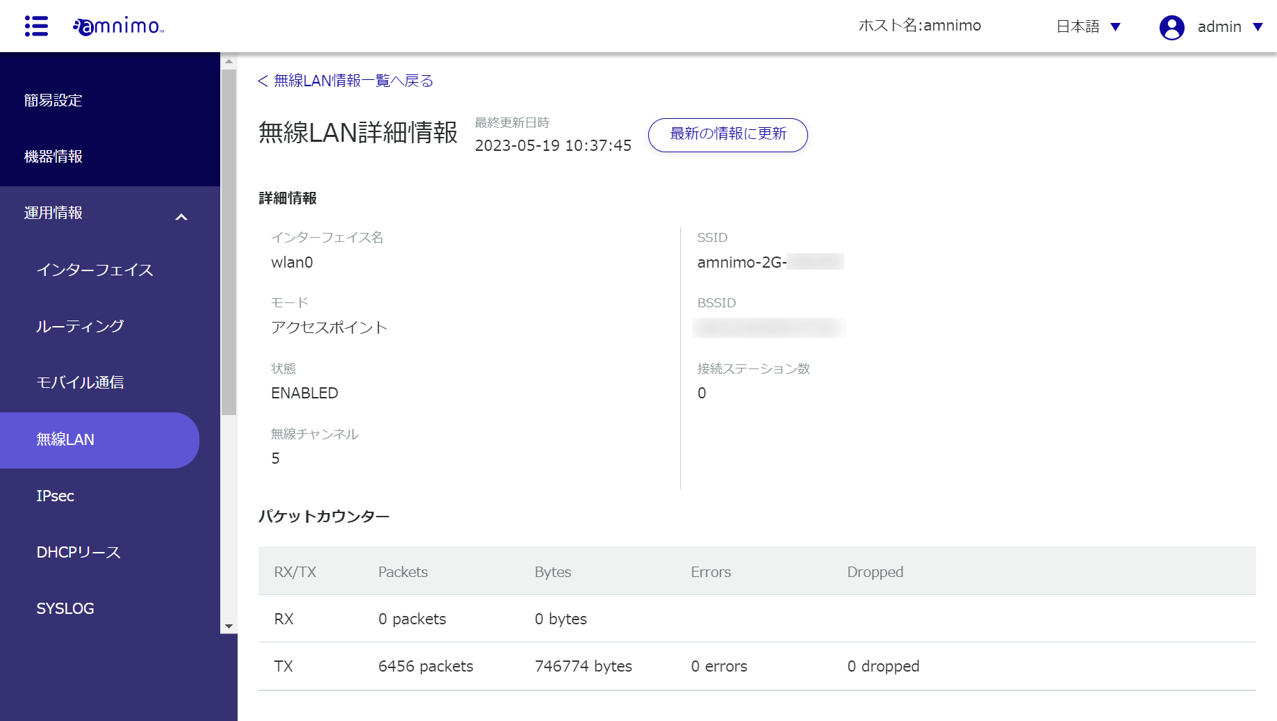
Check wireless LAN information
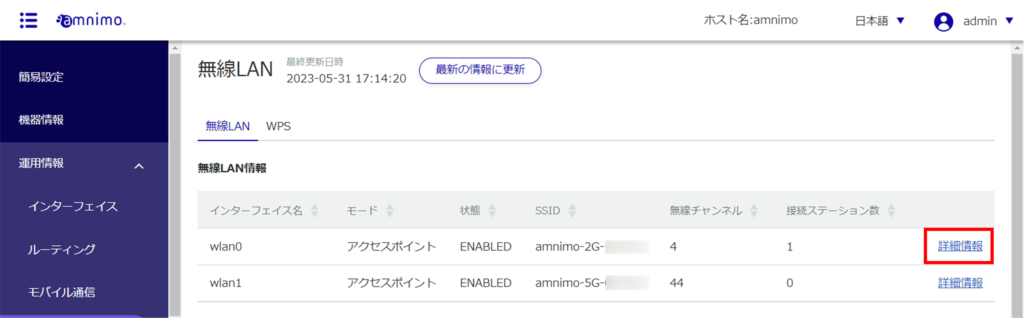
Wireless LAN information and details.
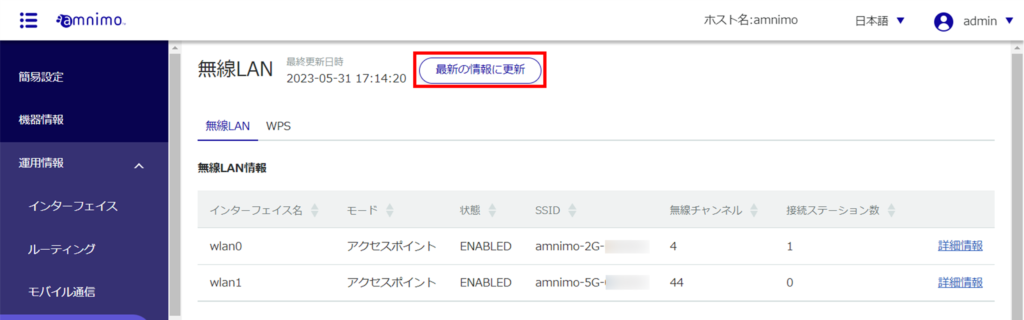
The "Wireless LAN" screen will appear (see example below).
When operating in "Access Point Mode," the stations connected to the device are displayed at the bottom of the screen as a "List of Connected Stations. When operating in "Station Mode," the "Access Point List" at the bottom of the screen shows the access points to which this device can be connected.
This function is available when operating in "access point mode.

Click [Connect] in the Access Point List to switch the connection to another access point that has already been set.
This function is available when operating in "station mode.

Running WPS
- WPS can be used to connect a compact router equipped with a wireless LAN when it is operating in "Access Point Mode". It cannot be used to connect to other access points in "Station Mode".
- When using the "PIN code method," the PIN code generated by the station to be connected must be entered.
- Please refer to the " amnimo C Series Compact Router Startup Guide " for details on how to connect using WPS.
The "WPS" screen appears.
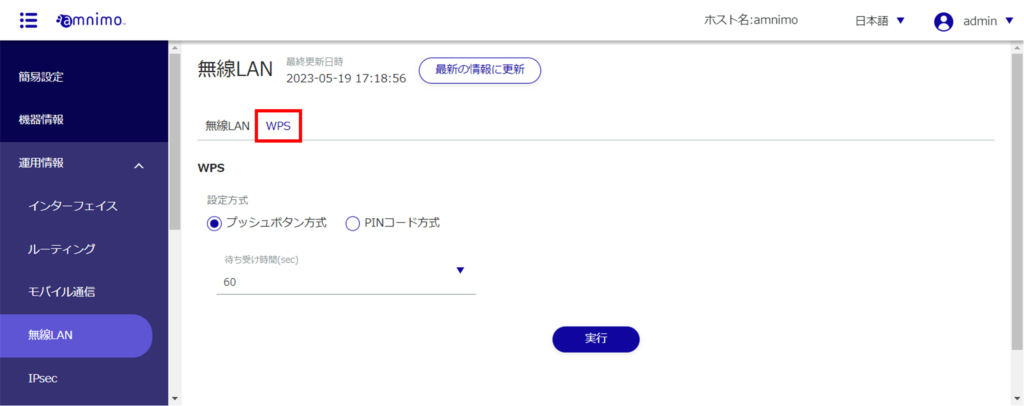
Select from push button method or PIN code method.
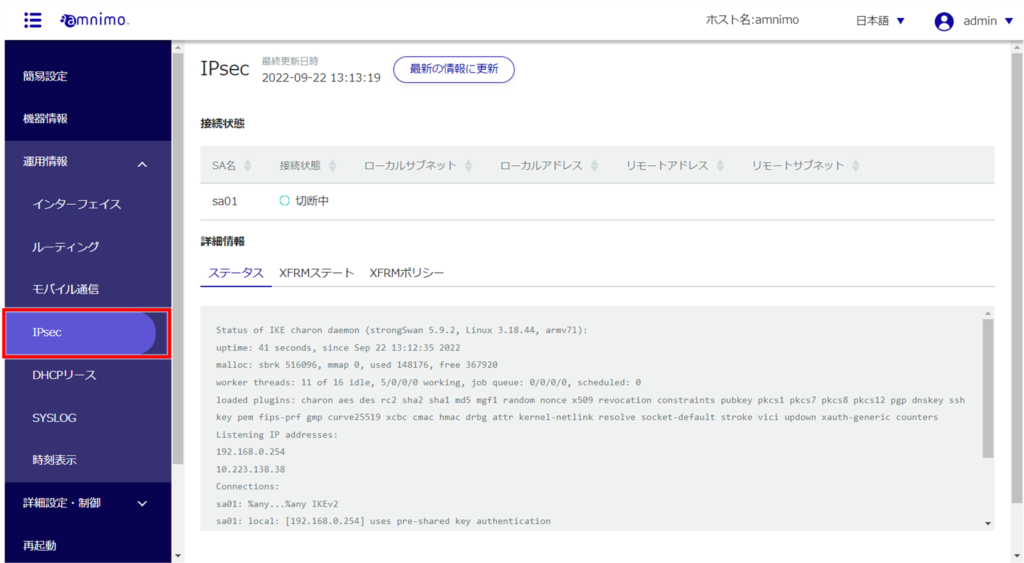
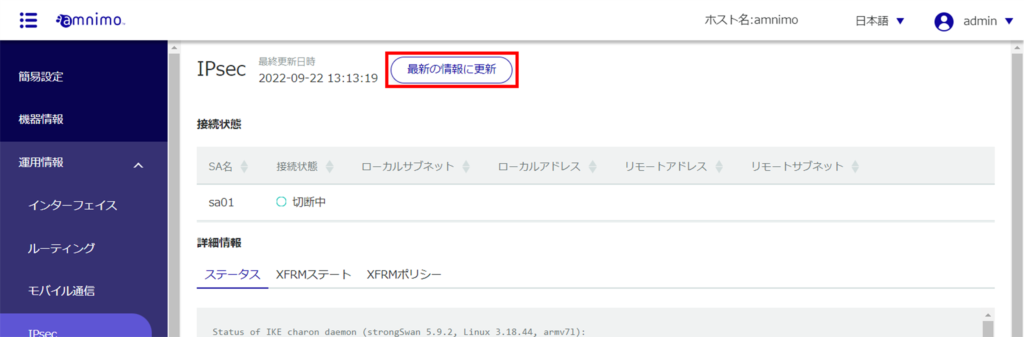
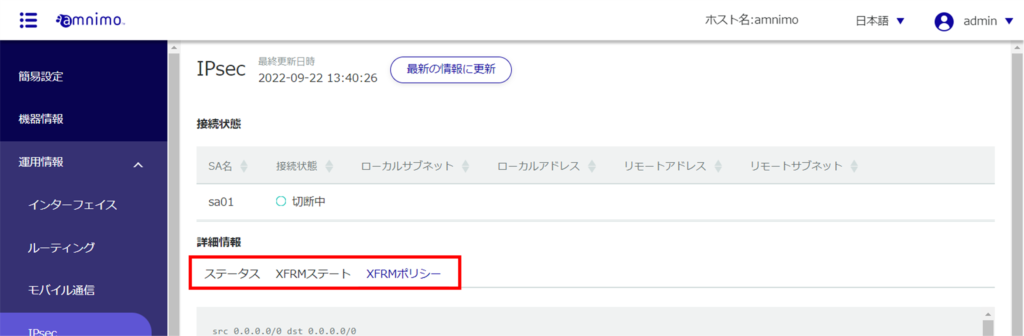
Check IPsec connection status #
IPsec settings must be configured in advance. See " Configuring IPsec Settings " for details.
Check IPsec connection status and detailed information.
The "IPsec" screen will appear (see example below).
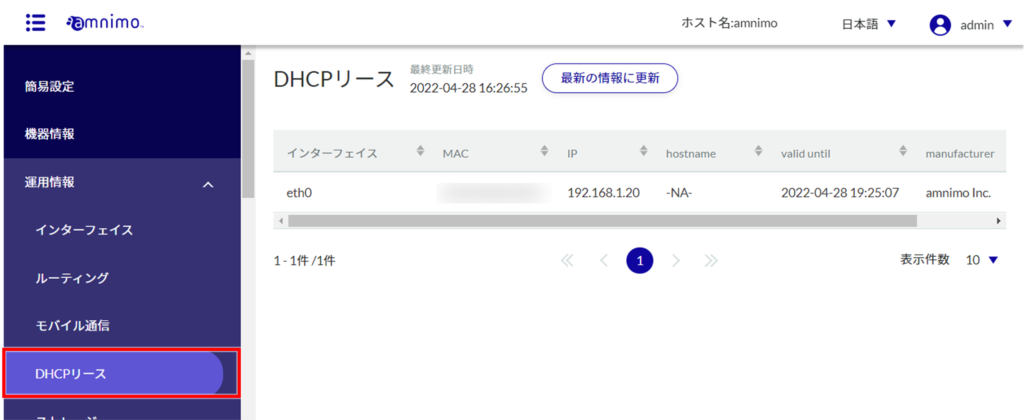
Check DHCP lease status #
DHCP server configuration on the relevant interface is required to use this feature. See " Configuring DNS Settings " for details.
Check the status of IP addresses leased from the interface with DHCP server settings.
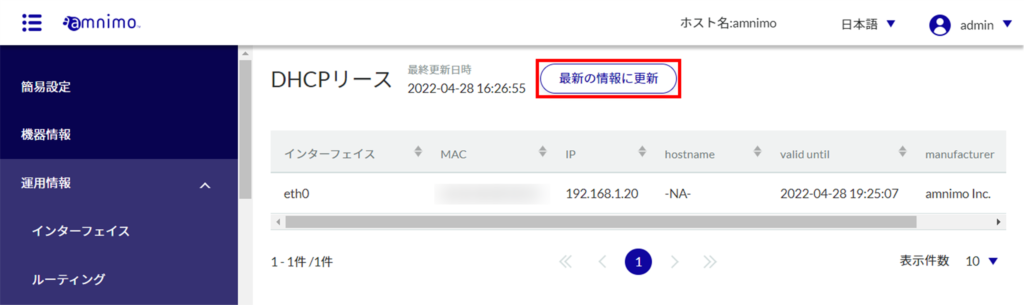
The "DHCP Leasing" screen will appear (see example below).
For compact routers, "manufacturer" is not displayed.
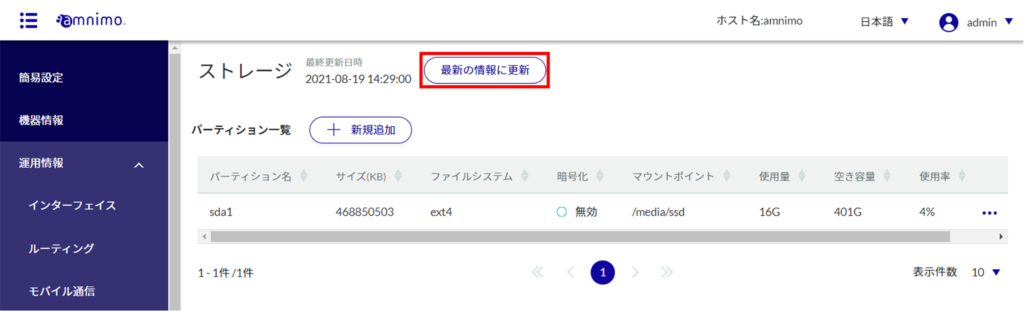
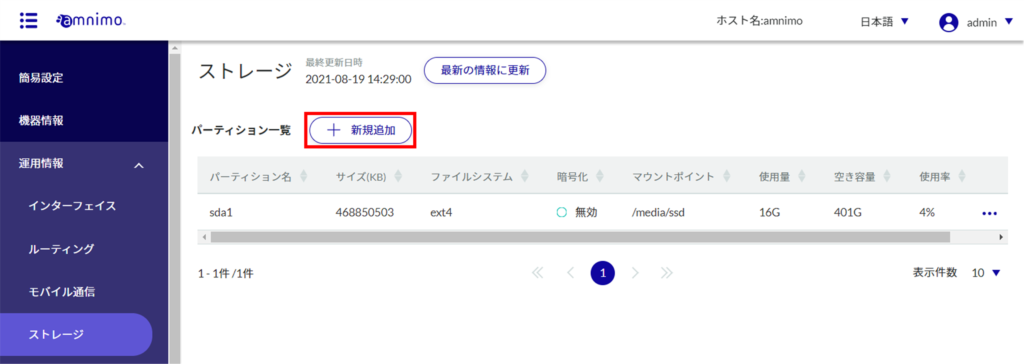
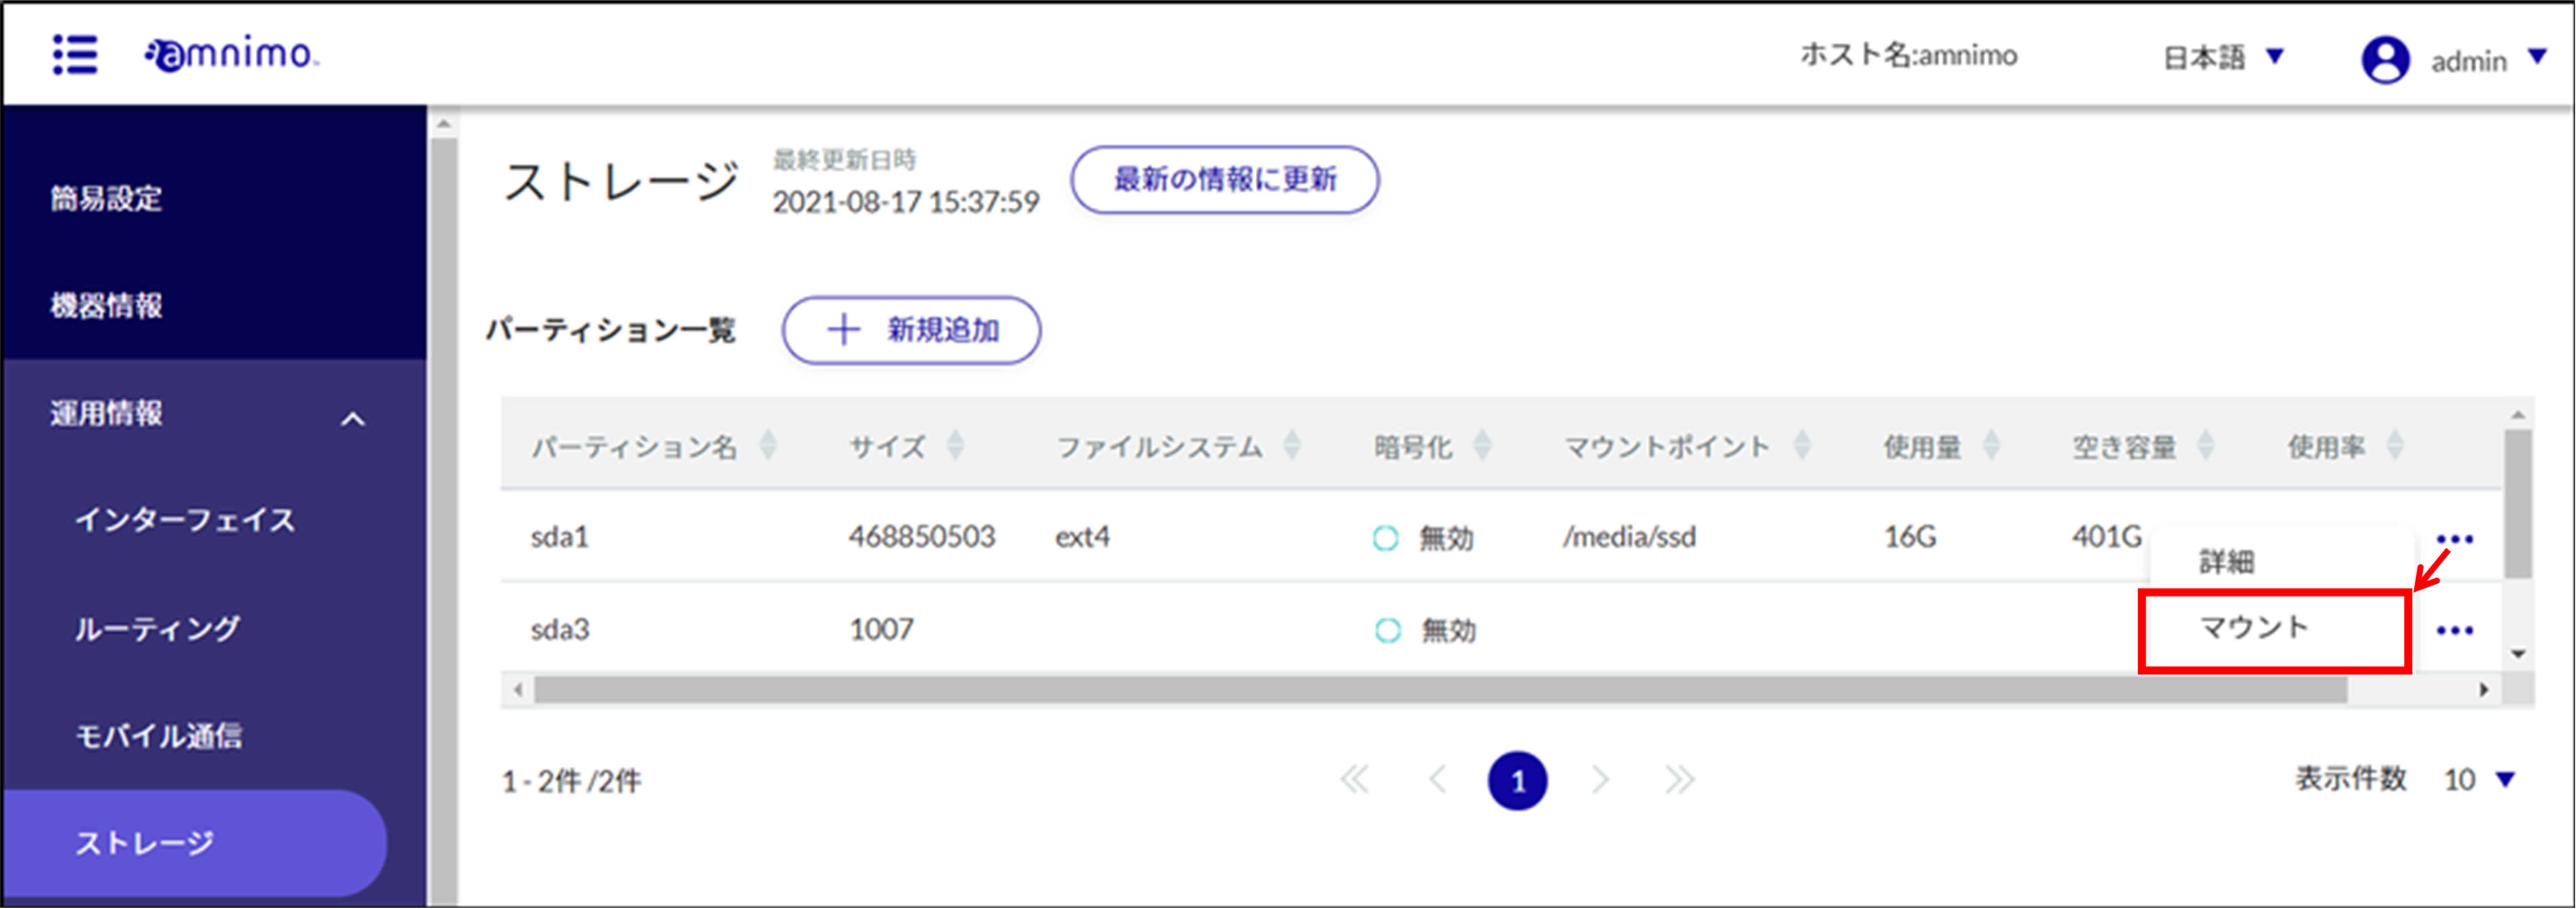
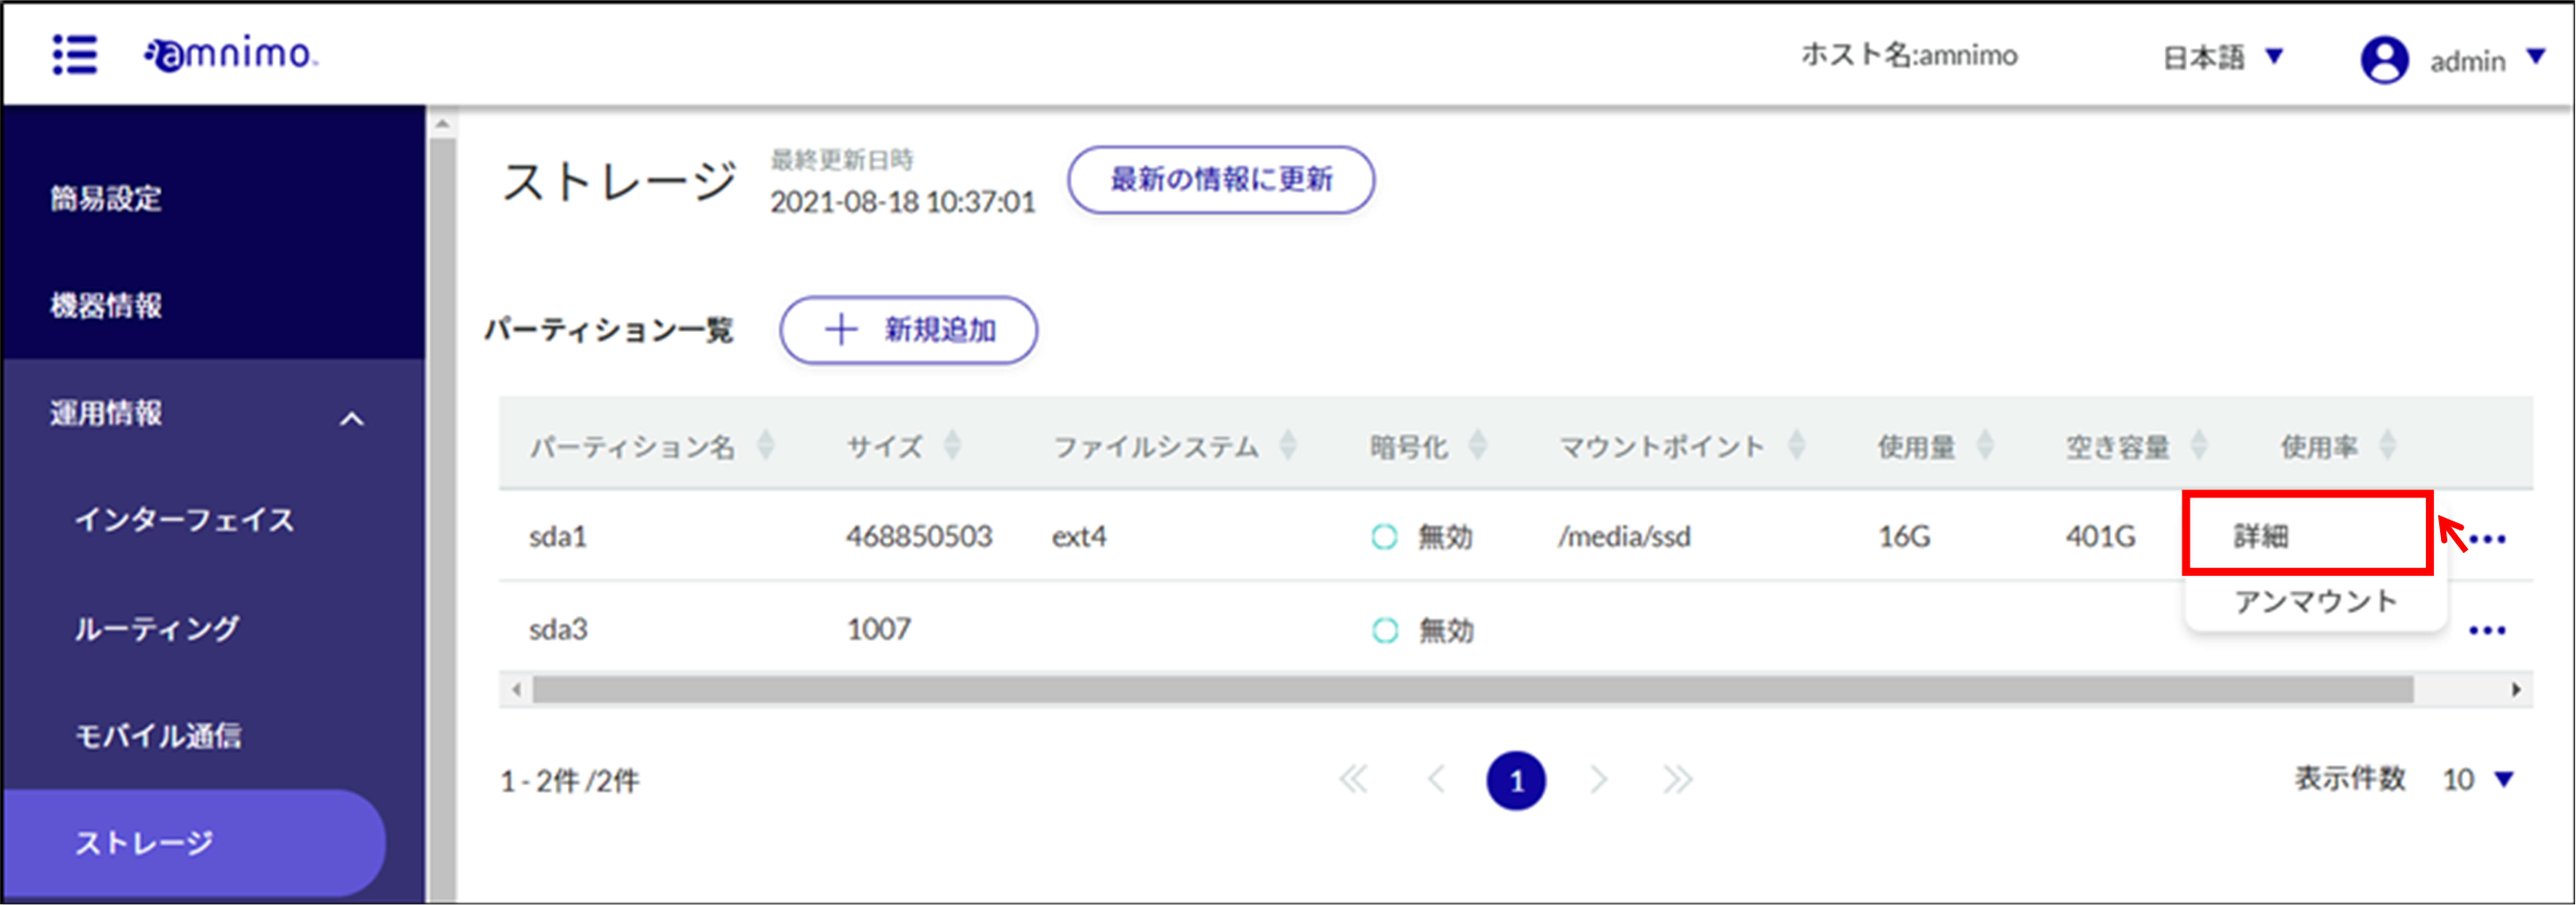
Check storage configuration status #
IoT routers (amnimo R series) and compact routers (amnimo C series) do not have this feature.
This section describes operations such as displaying storage usage and mounting/unmounting storage.
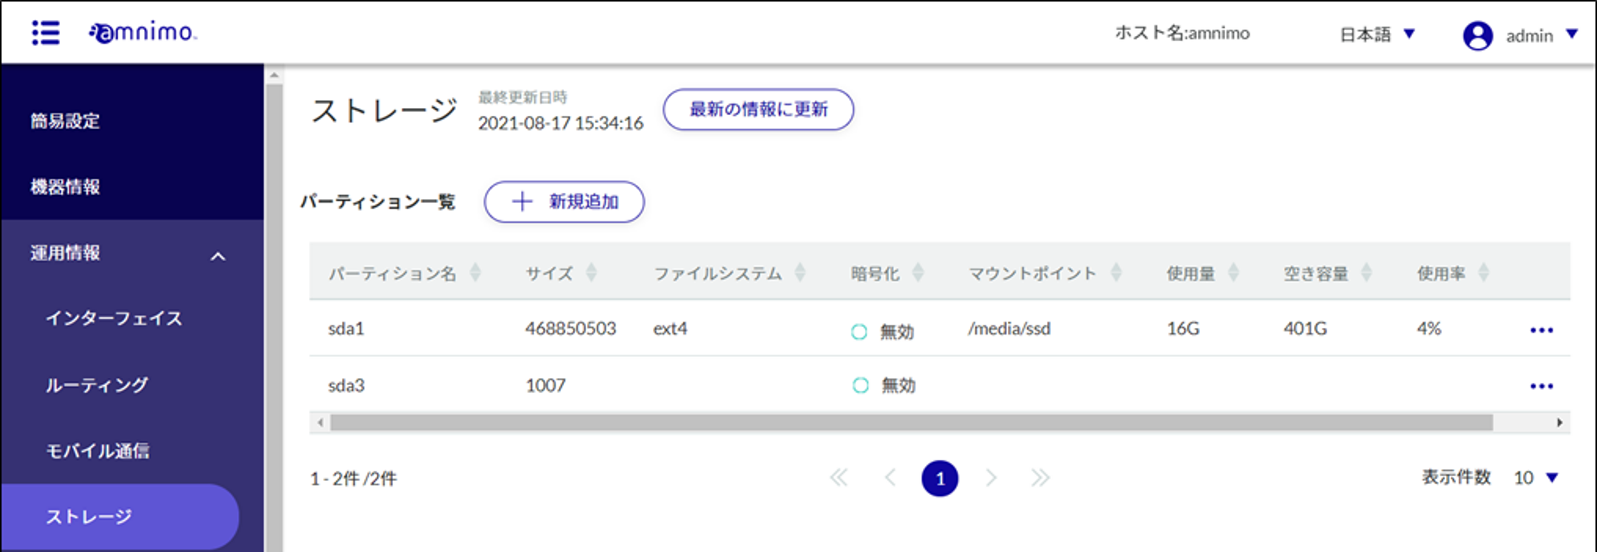
The Storage screen appears.

Adding partitions
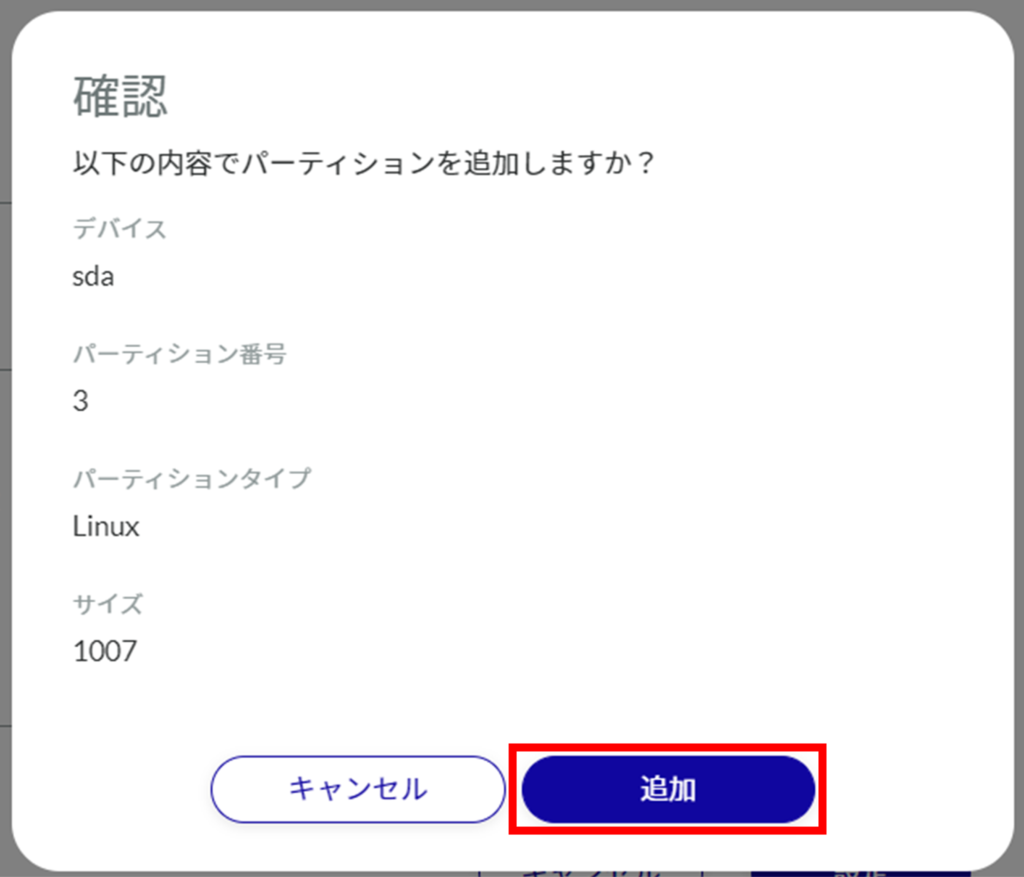
The "Create Partition" screen appears.
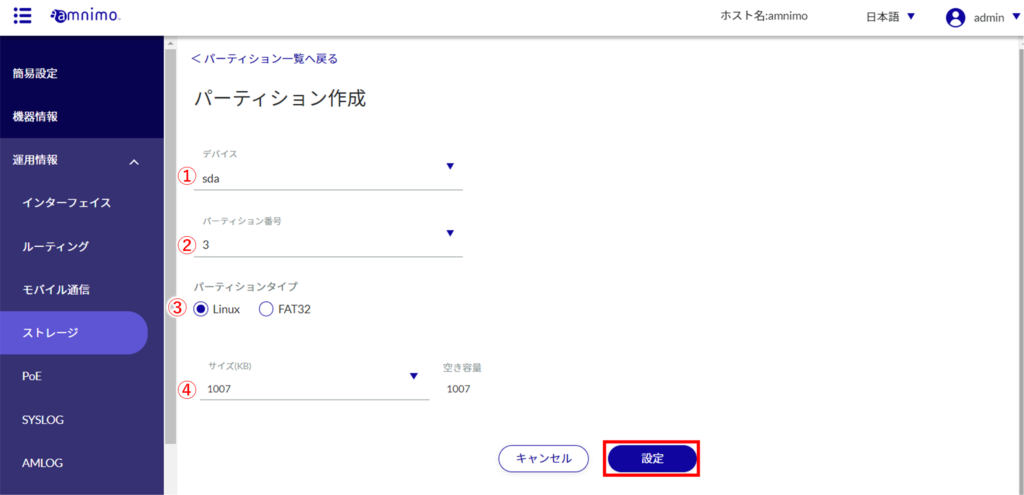
❶ Select a device.
❷ Select the partition number in the range of 2 to 9.
❸ Select the partition type.
Linux・・・・This is the Linux standard partition type. It is set by default.
If you are using Windows, you must select this type.
❹ Enter the partition capacity in kilobytes.
If omitted, the maximum value of the storage device will be used.
Format partitions
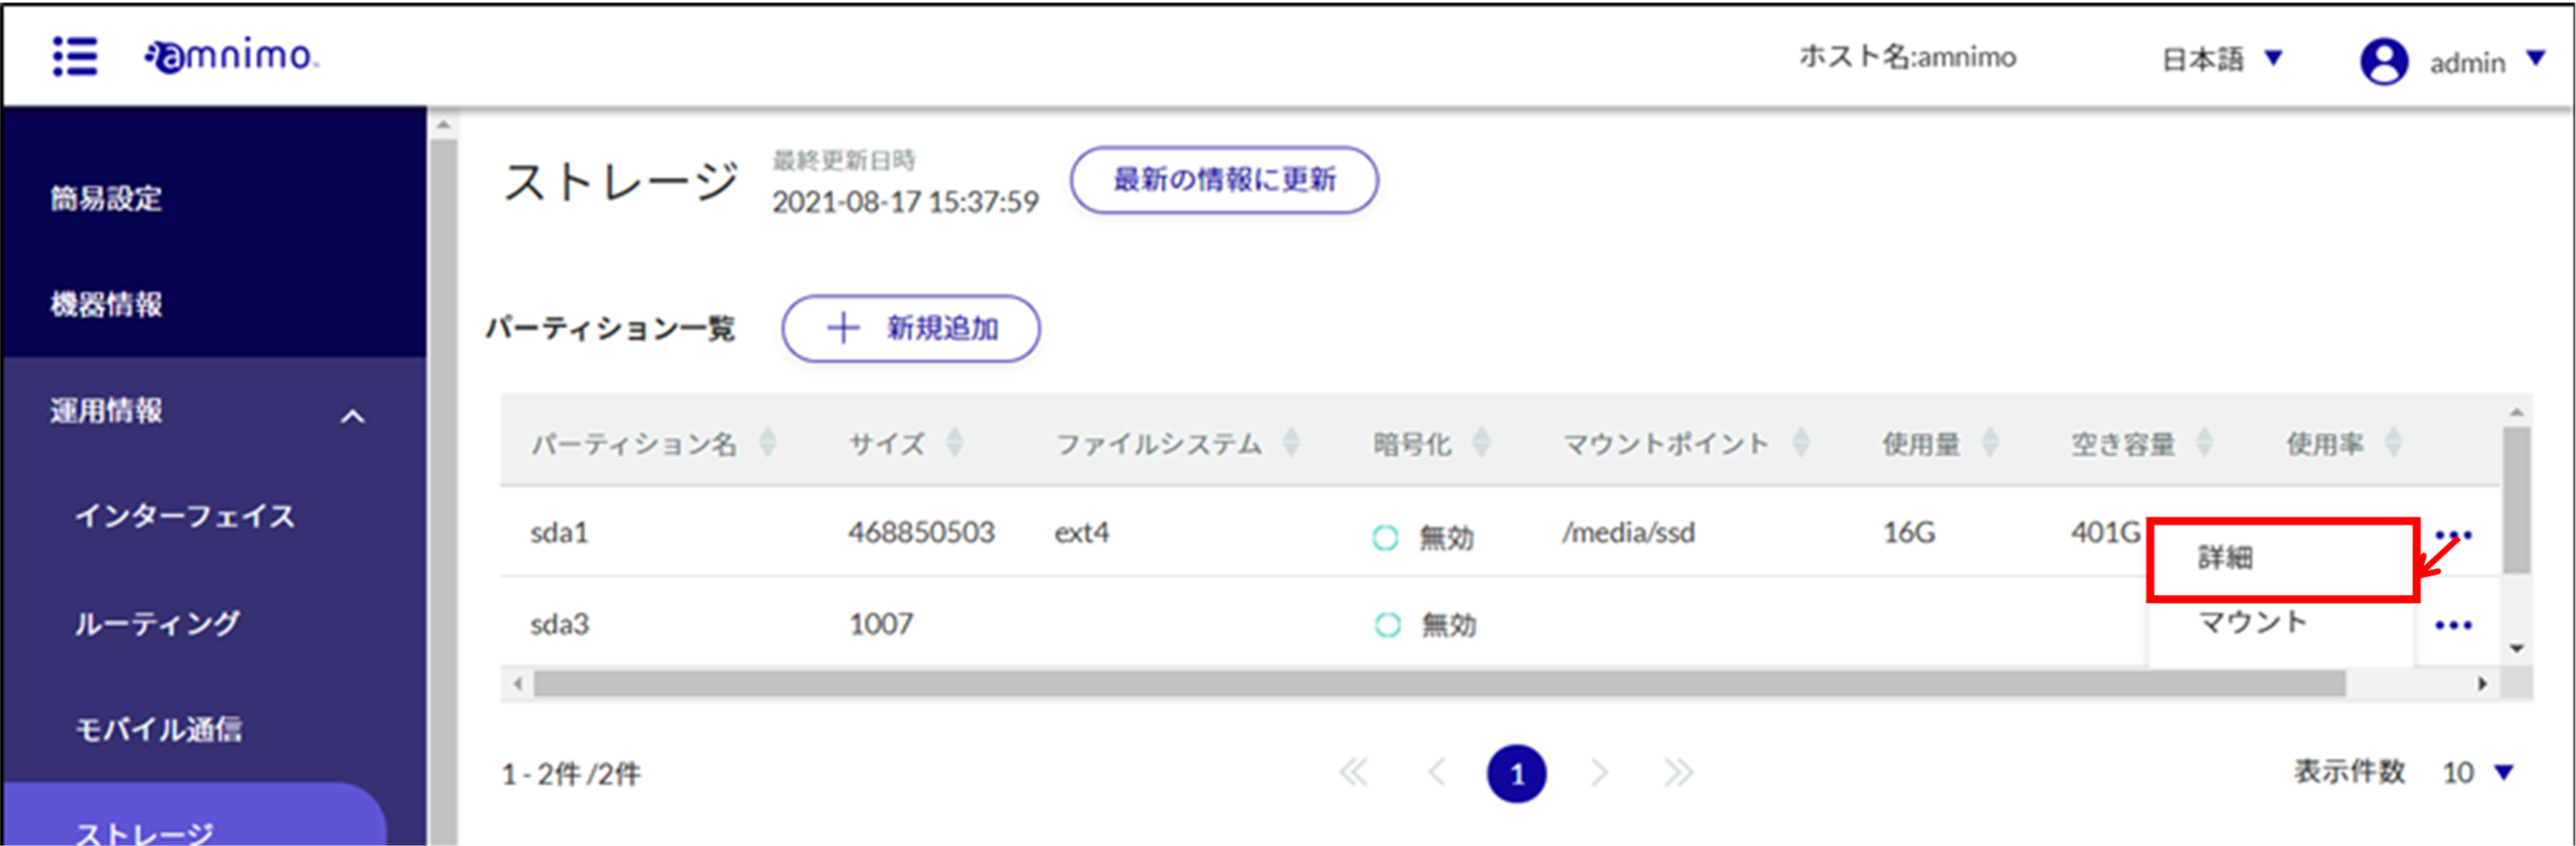
The partition details screen appears.
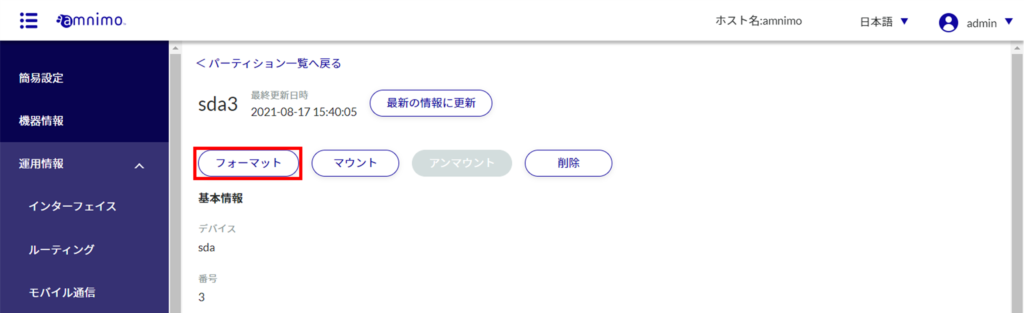
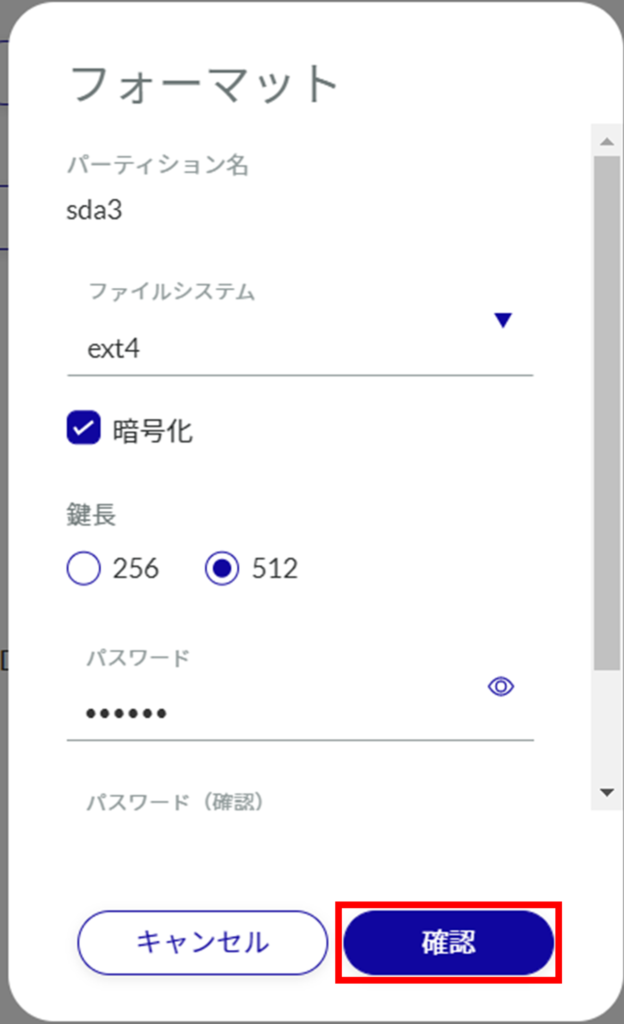
If [ Encryption ] is checked, 256 or 512 must be specified as the key length (bit) to be used for encryption.
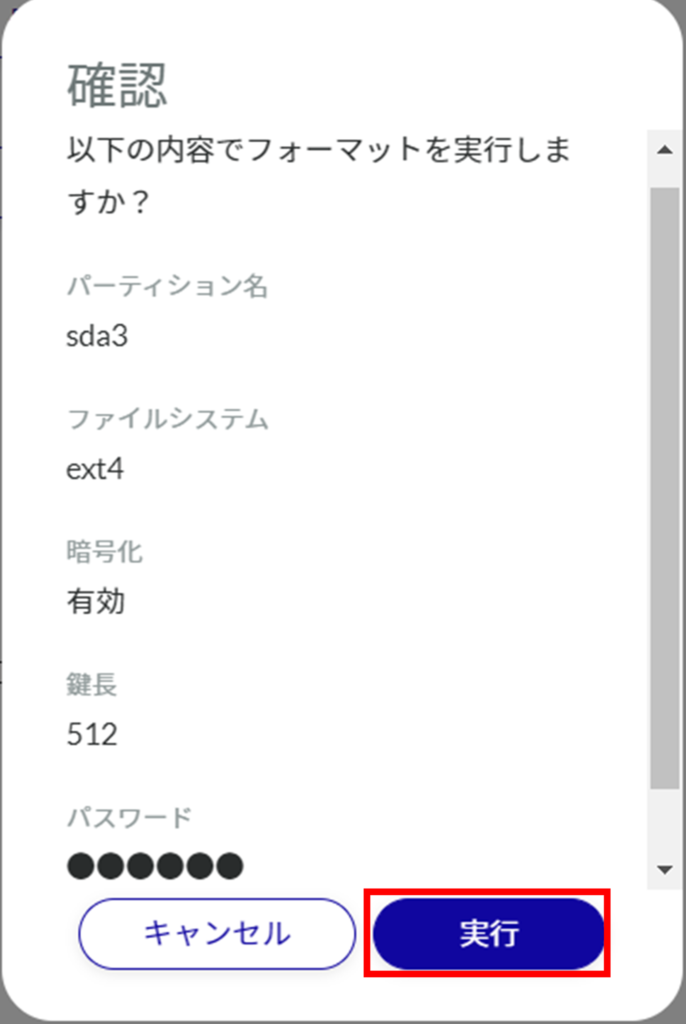
Continue to set the password and click the [ Confirm ] button.
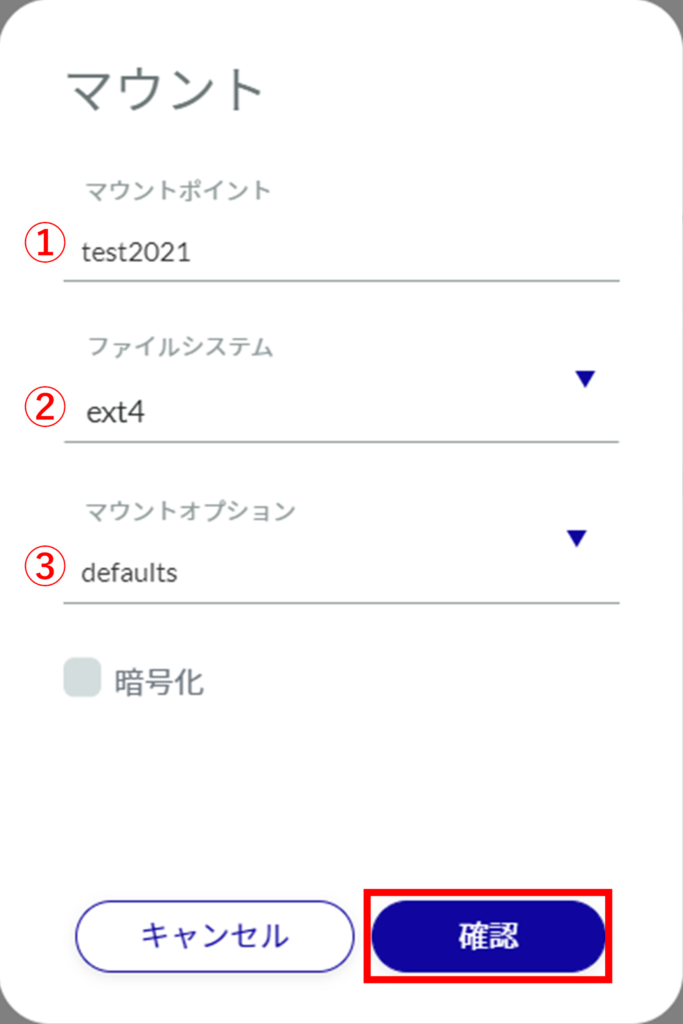
Mount partitions
[You can also select "Mount" from the Advanced screen.
❶ Specify the mount point using up to 32 alphanumeric characters.
Select the ❷ file system.
❸ Select the mount option.
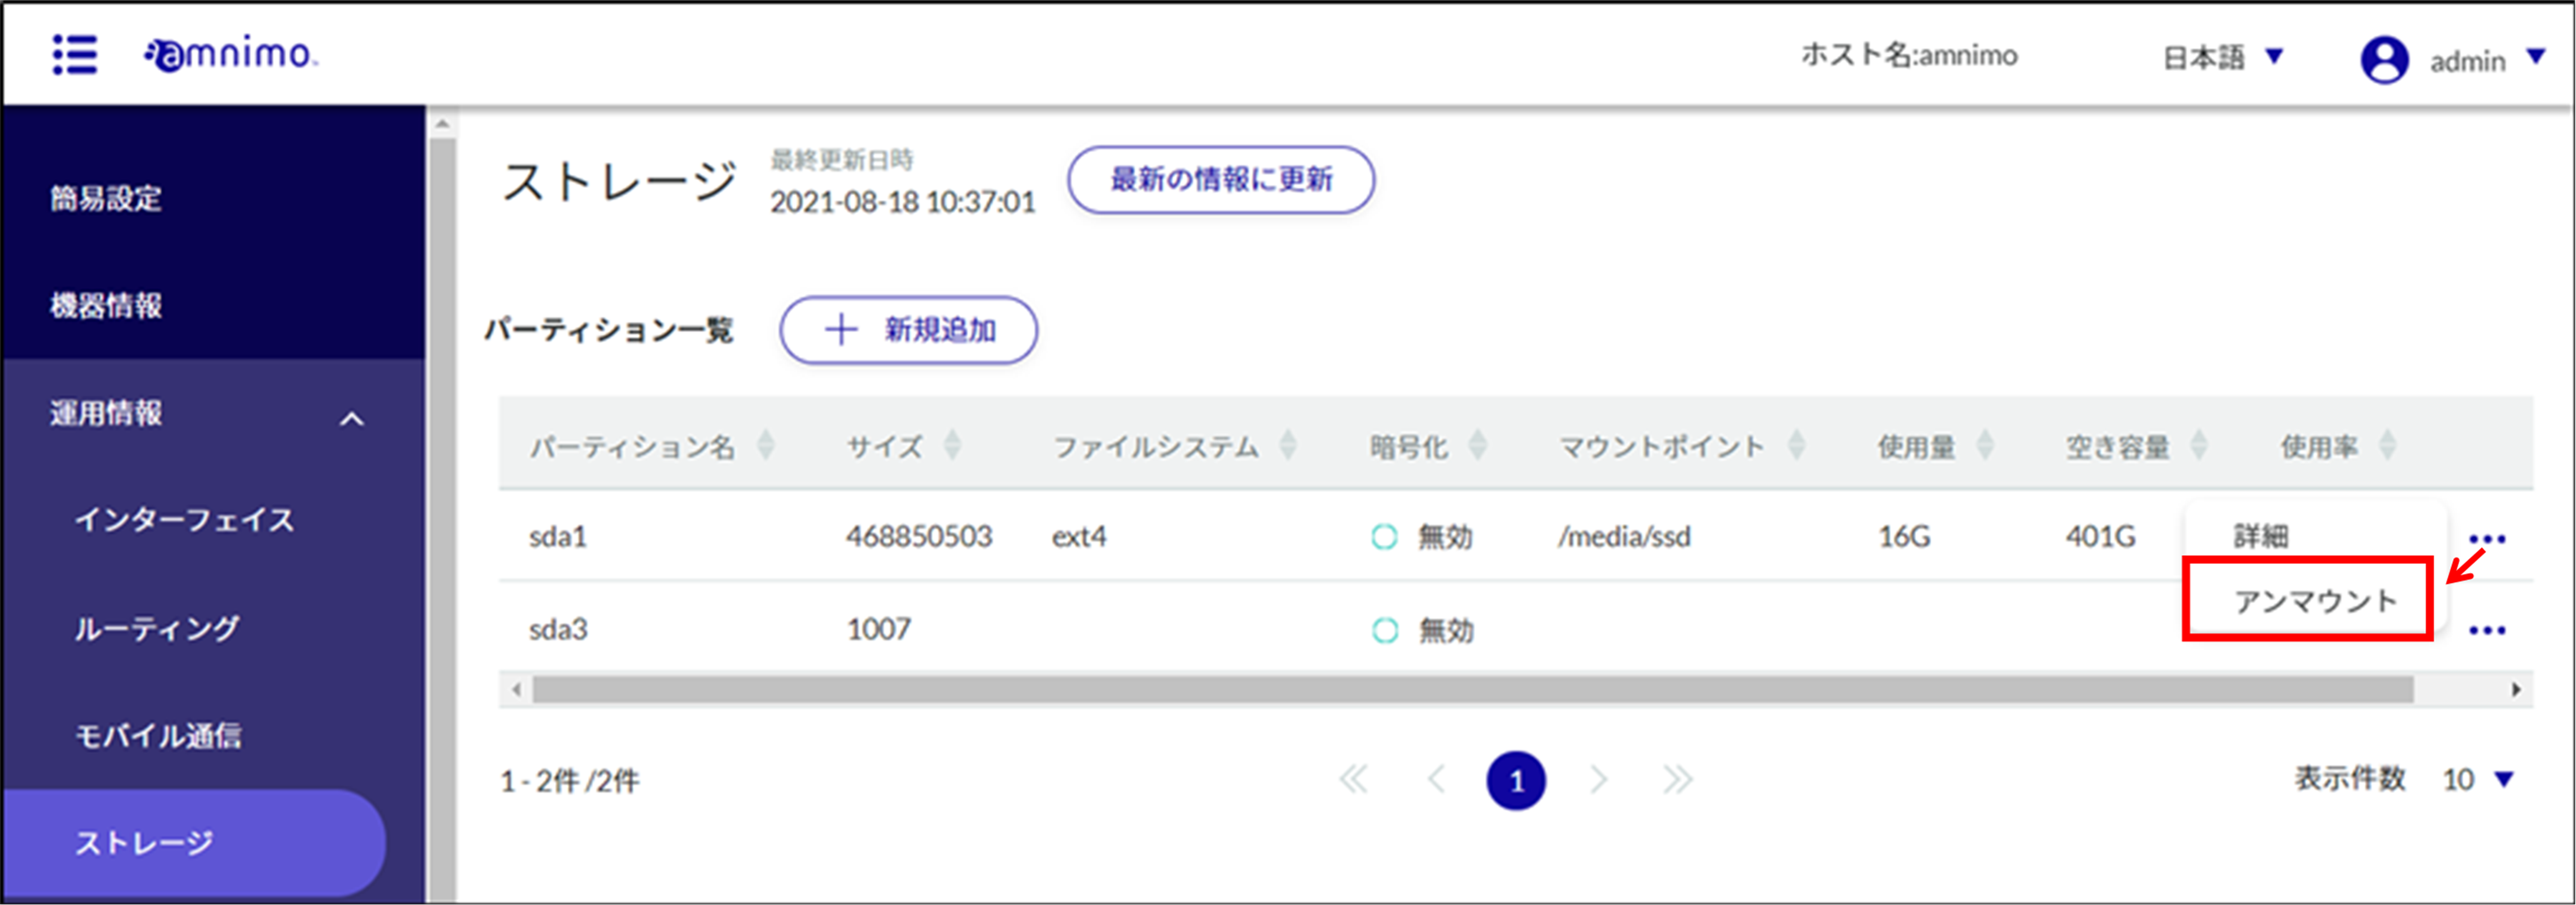
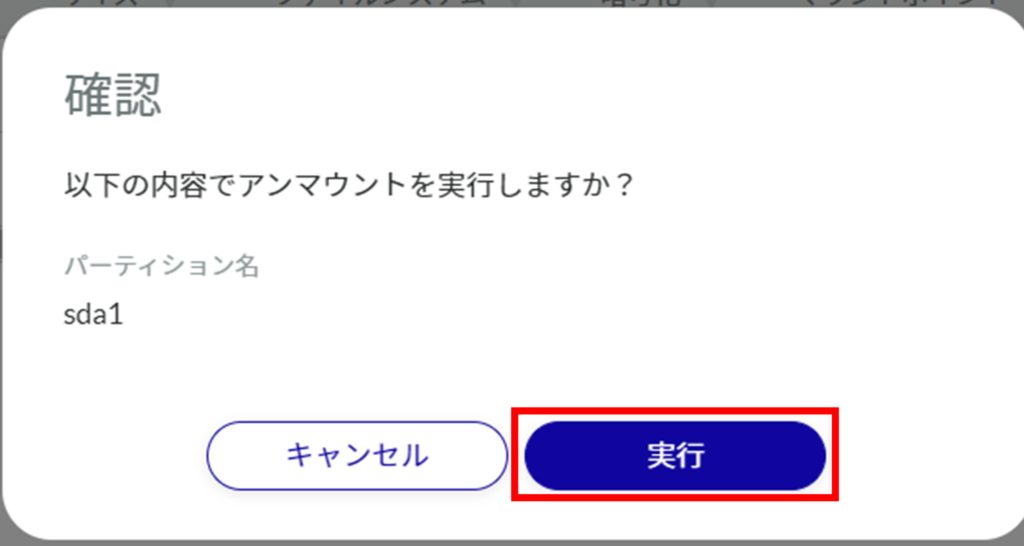
Unmount partitions
You can also select "Unmount" from the "Details" screen.
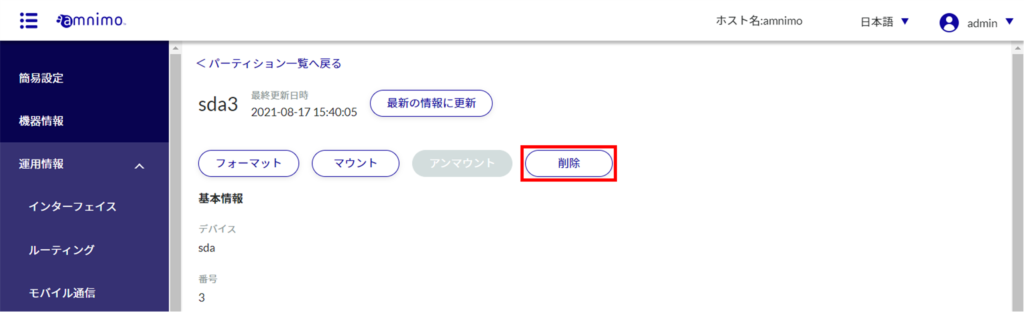
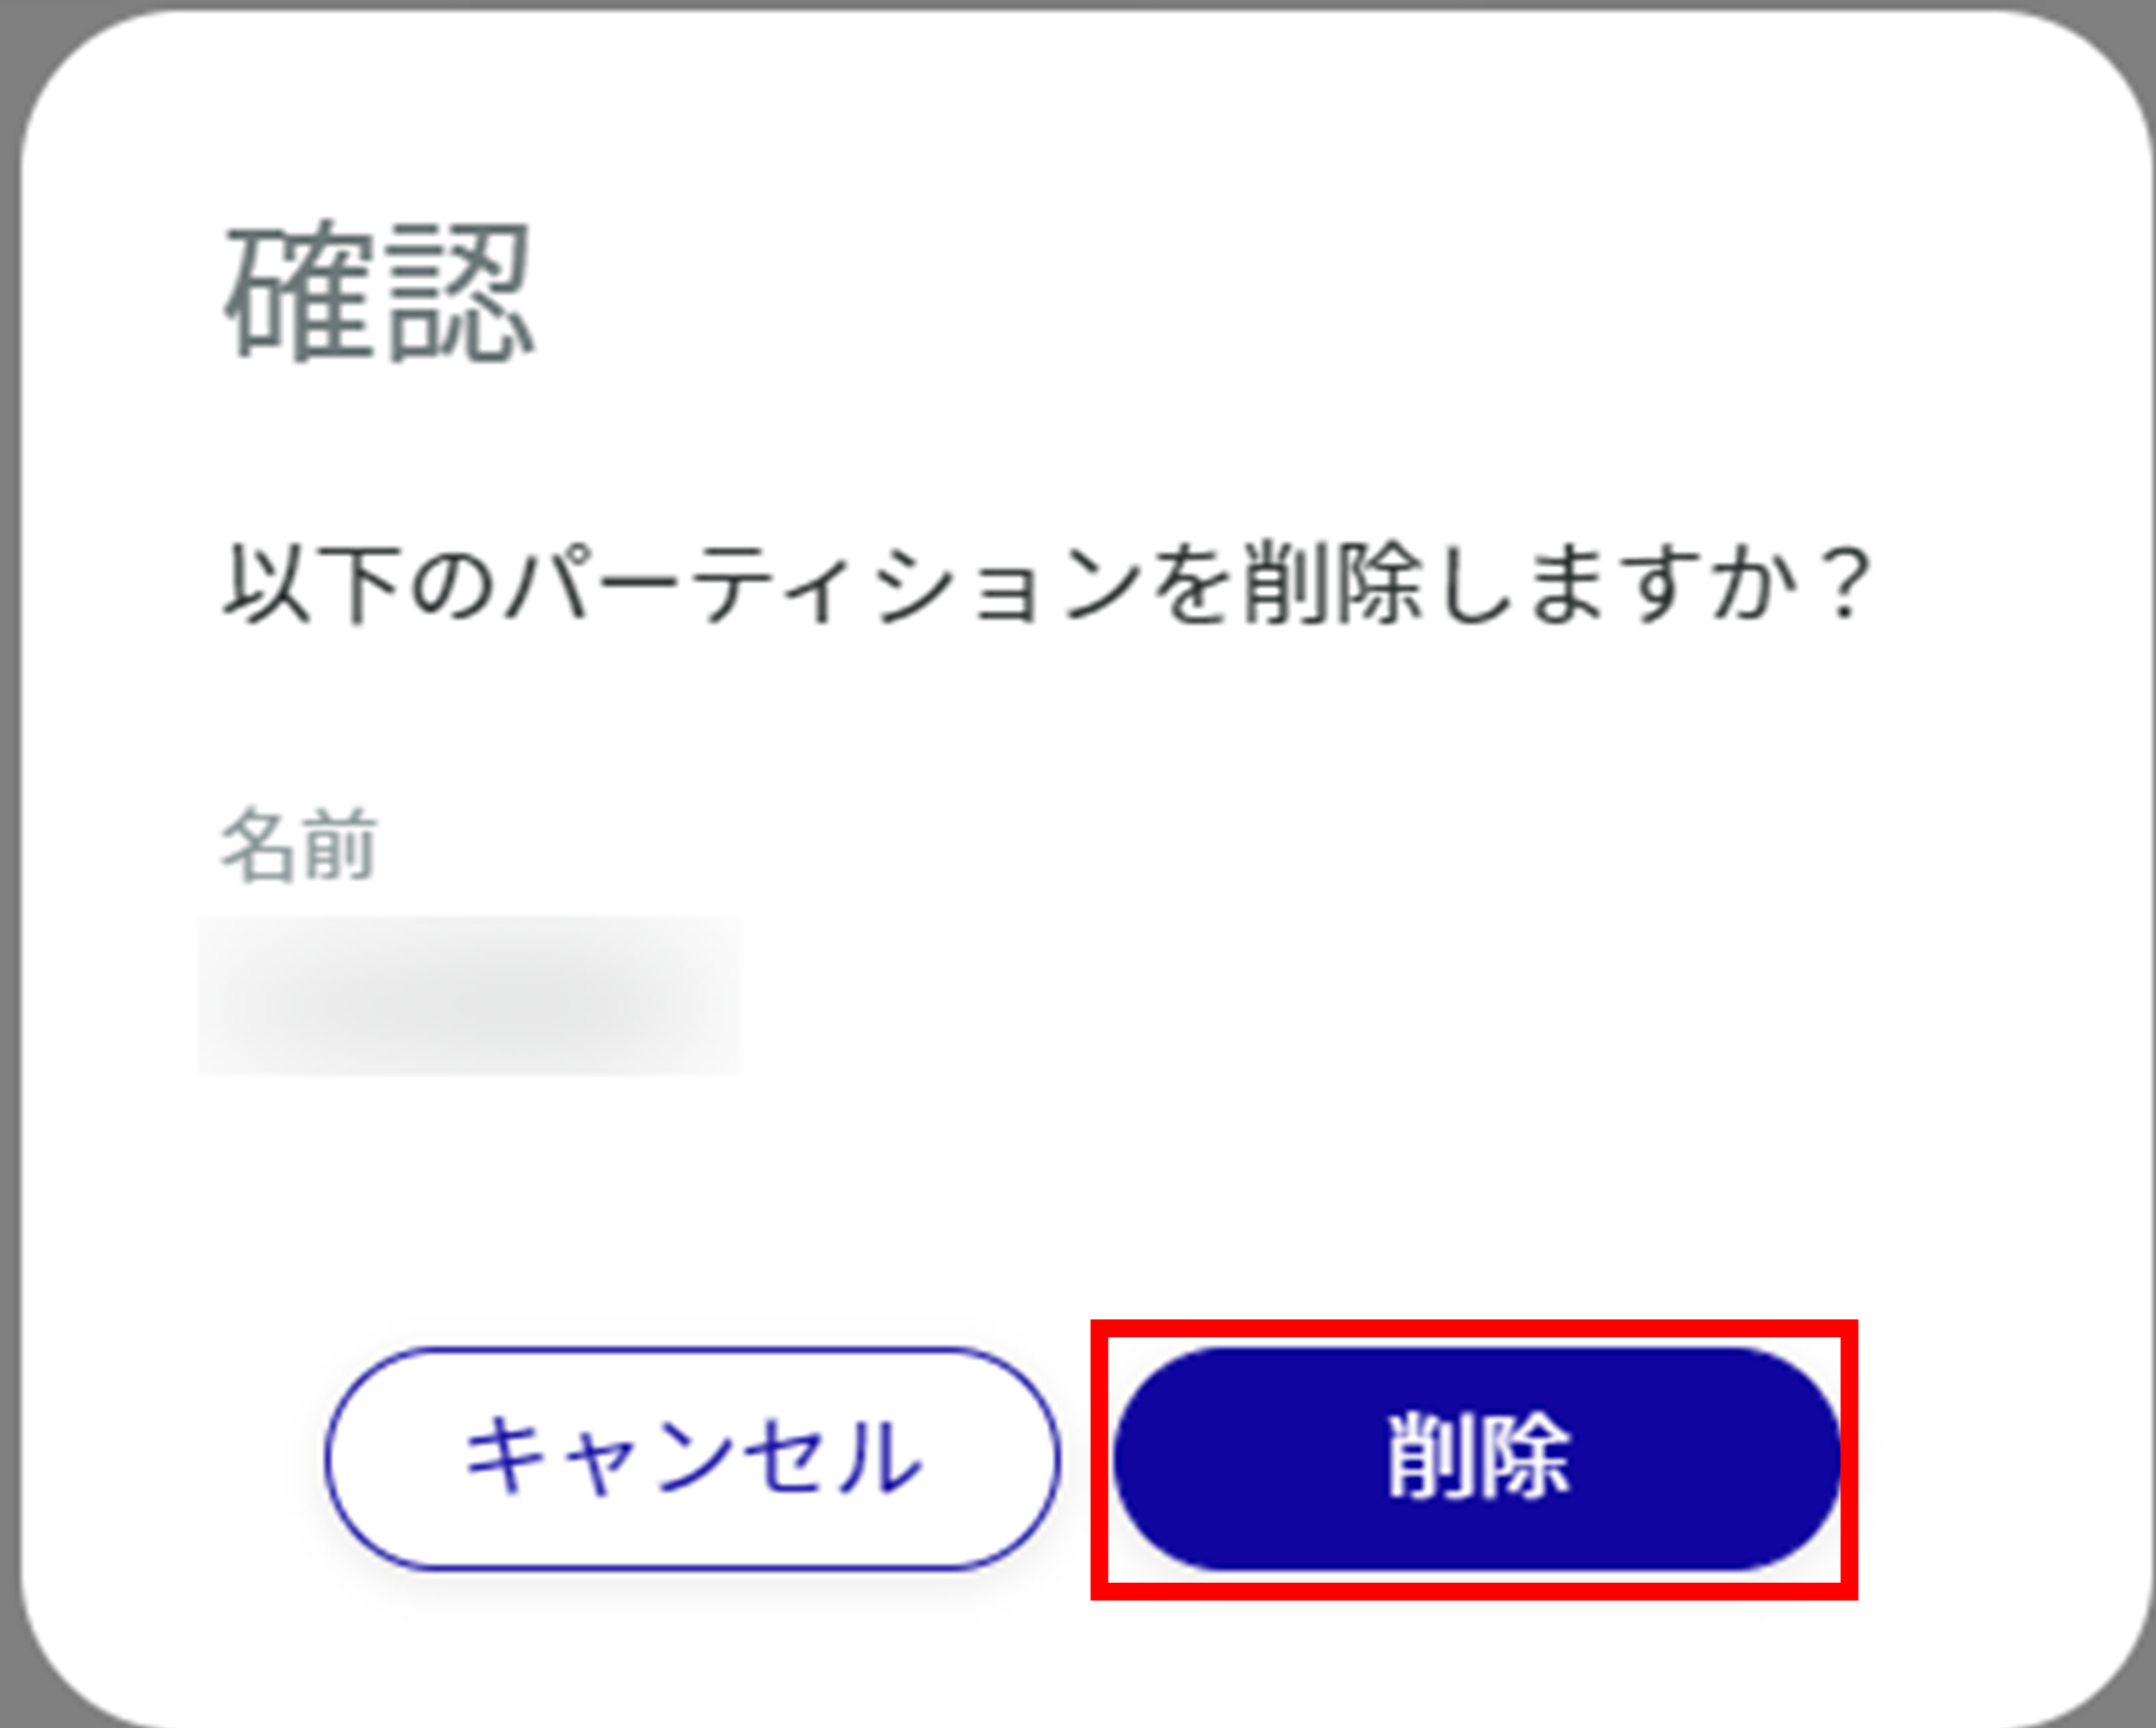
Delete partitions
The partition details screen appears.
The "Confirmation" screen appears.
The partition will be deleted.
Check PoE status #
Sensor Connection Gateway Specification A, IoT Router Indoor Version (AR10), Compact Router Indoor Version (AC10), Compact Router Indoor Version with Wireless LAN (AC15) do not have this function.
The interface displayed is as follows
- AI Edge Gateway: lan0 to lan3
- Sensor connection gateway Specification A: lan1
- Edge gateway: lan0 to lan3
- IoT Router Outdoor version (AR20): eth0, eth1
- Compact router with wireless LAN outdoor version (AC25): lan1
You can check the status of the PoE.
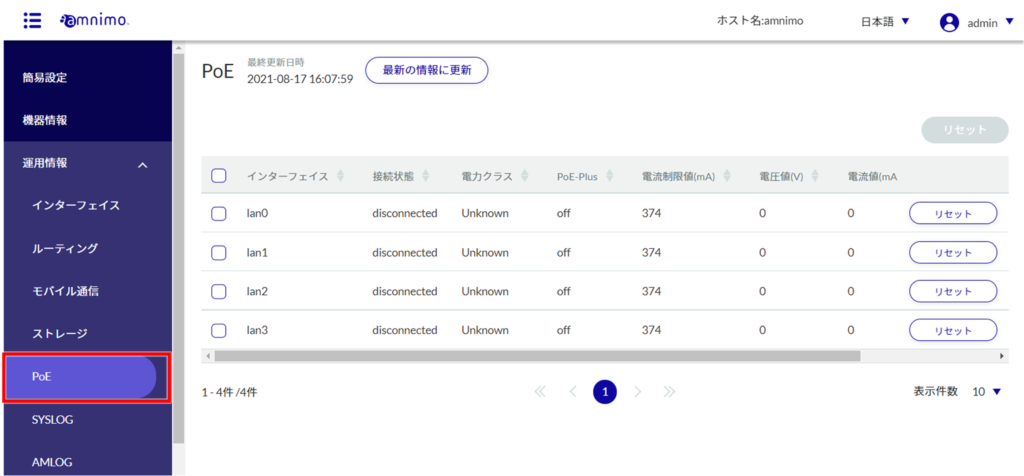
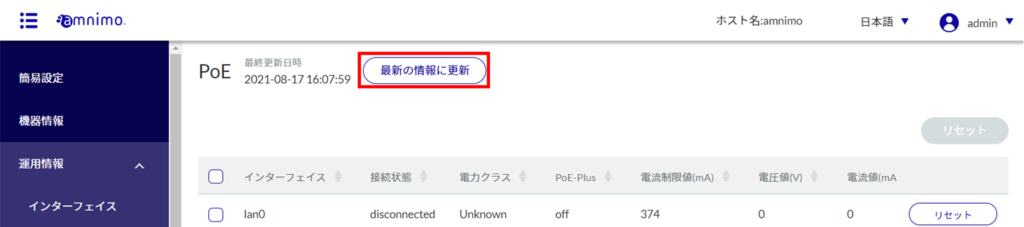
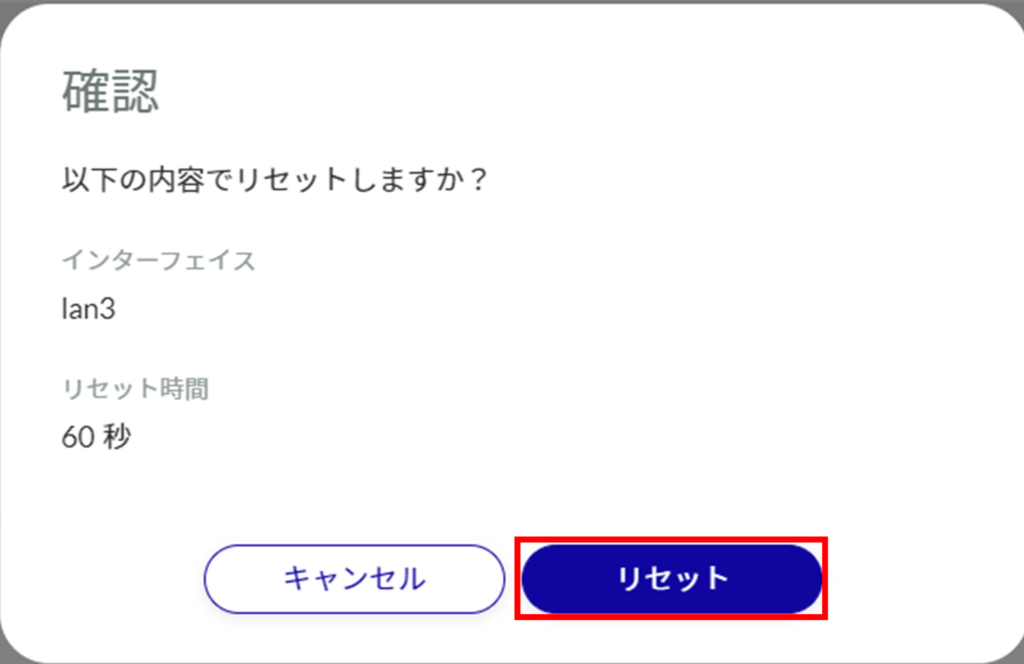
Reset PoE

The "PoE Port Reset" screen appears.
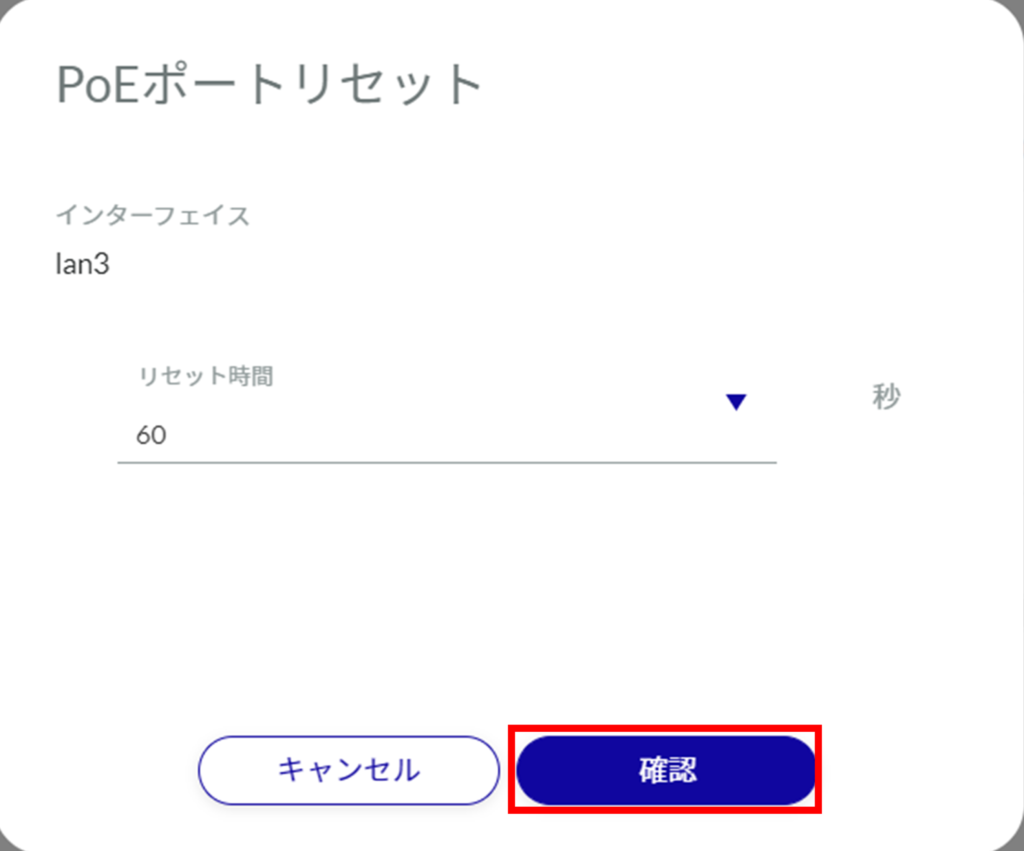
Resetting PoEs can also be performed in batches by selecting multiple PoEs from the "PoE" screen.

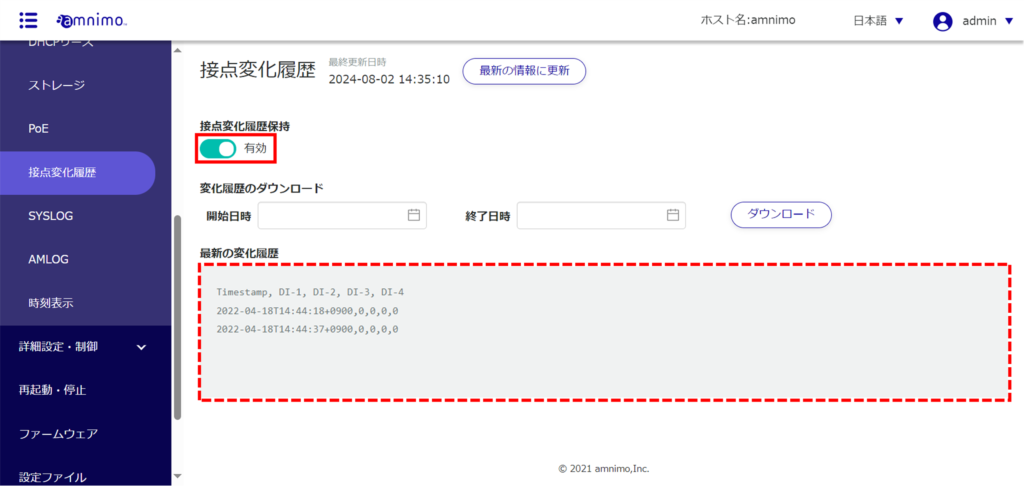
Check contact change history #
IoT routers (amnimo R series) and compact routers (amnimo C series) do not have this feature.
Displays the contact change history at the D-IN/D-OUT terminals on the rear of the terminal.
The "Contact Change History" screen appears.
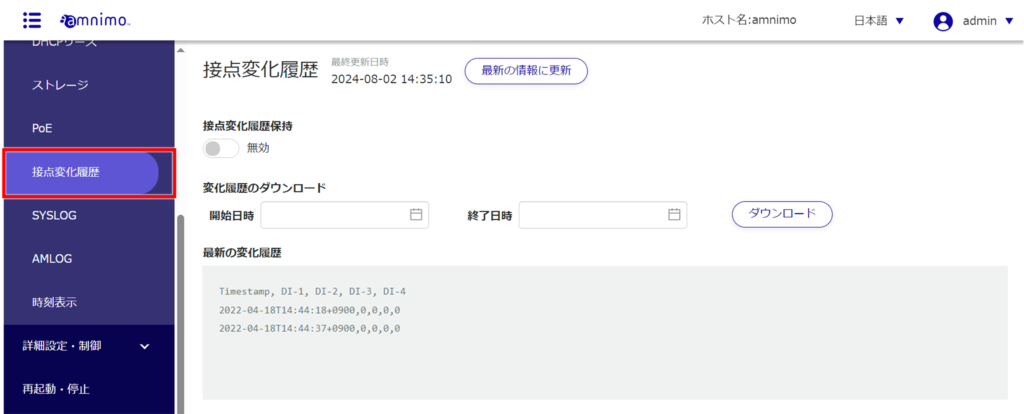
The history for the disabled period will not be displayed and cannot be downloaded.

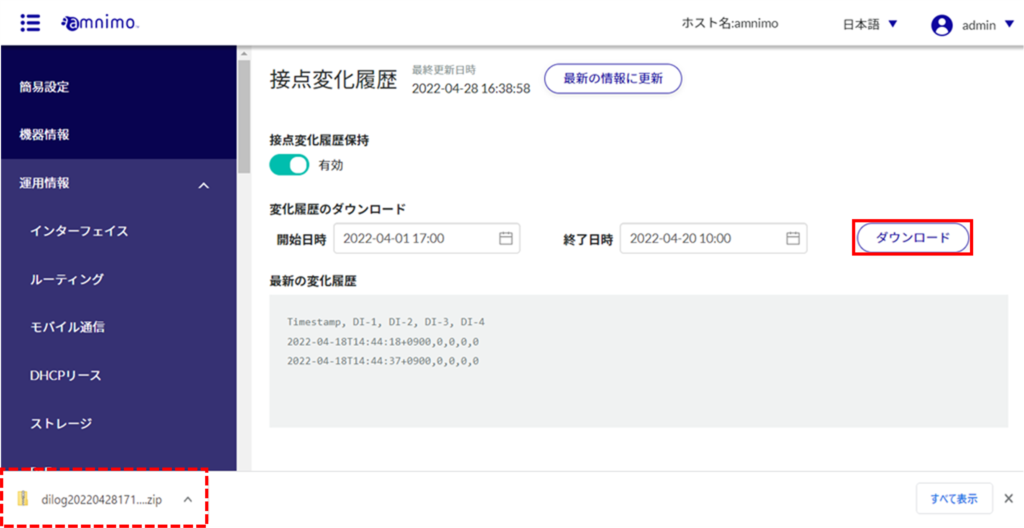
Download contact change history
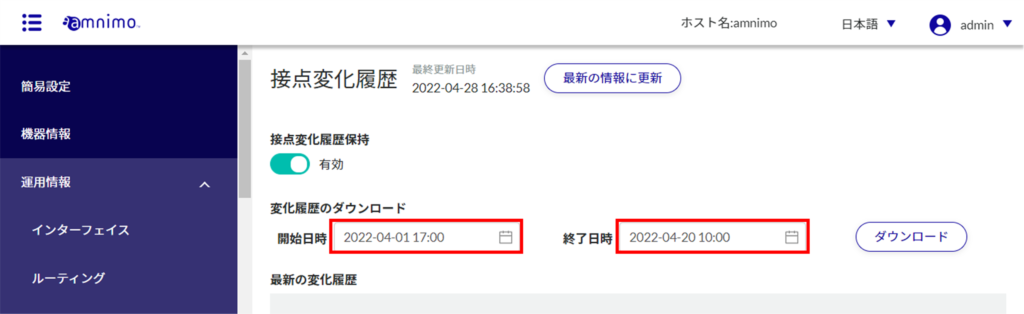
Up to 100,000 histories can be downloaded.
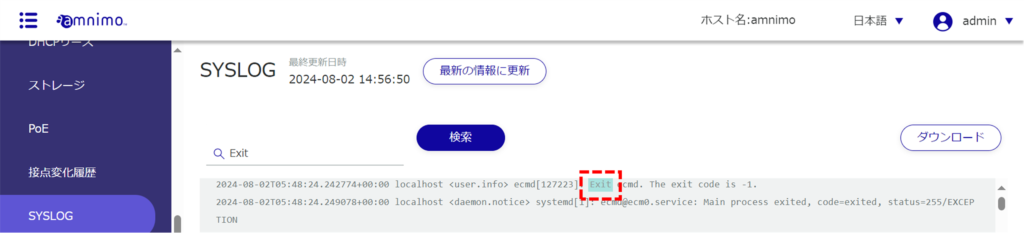
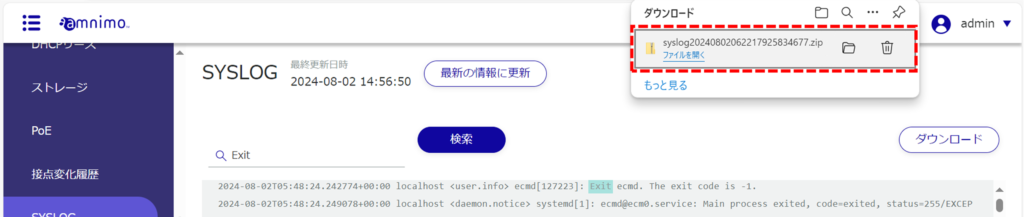
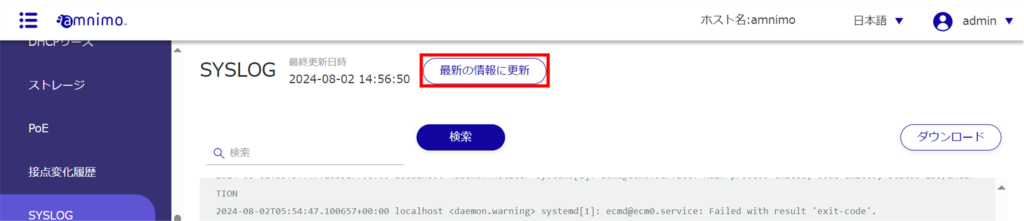
SYSLOG display operation. #
This section describes how to search for and download SYSLOG and update SYSLOG with the latest information.
The "SYSLOG" screen appears.
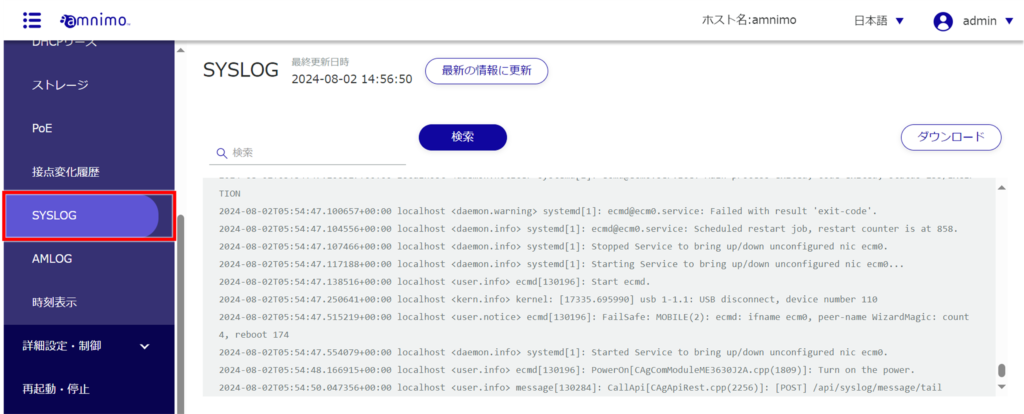
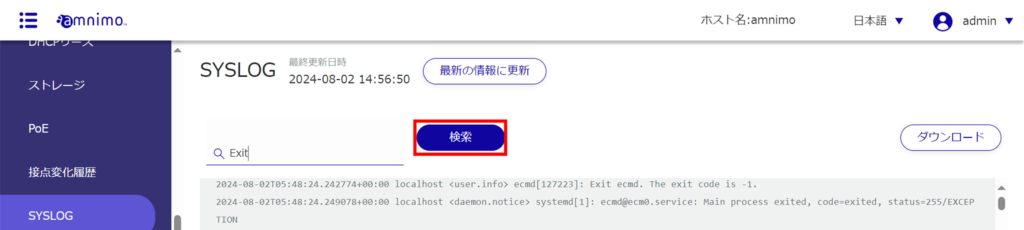
Search keywords are highlighted and displayed.
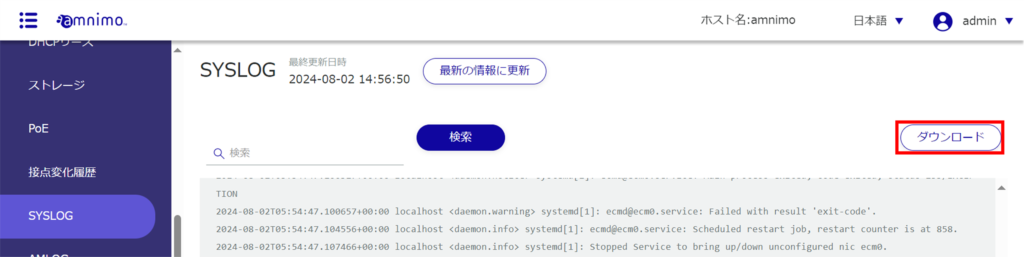
SYSLOG will be downloaded.
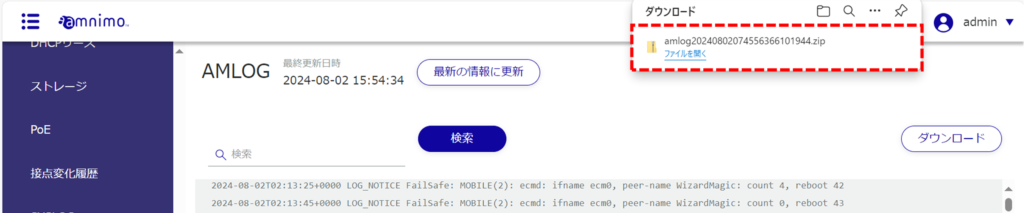
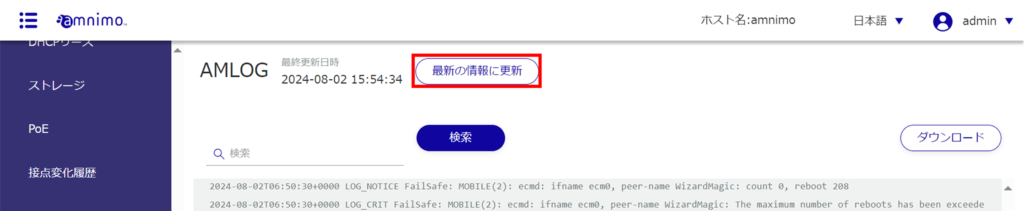
AMLOG display operation. #
Compact routers (amnimo C series) do not have this feature.
Check AMLOG, AMNIMO's log, for instructions on finding and downloading AMLOG and keeping AMLOG up-to-date.
The "AMLOG" screen appears.
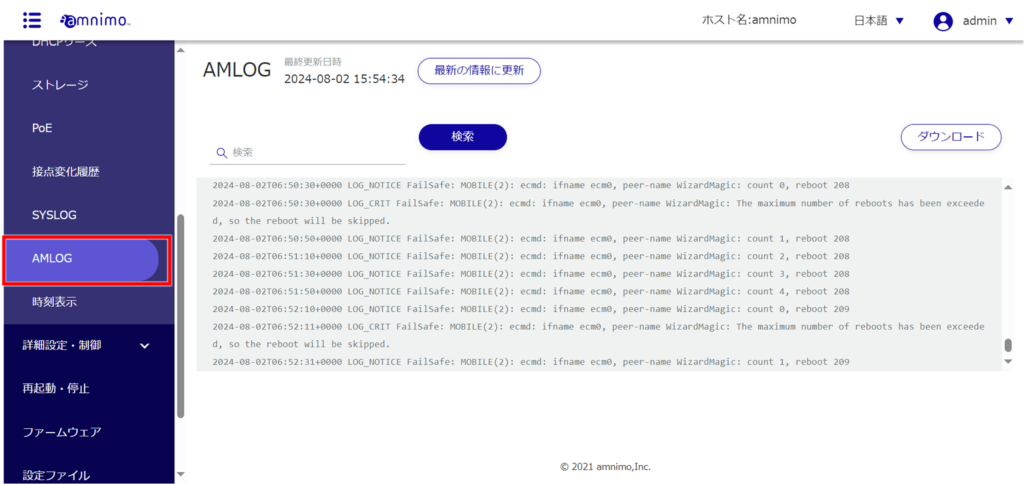
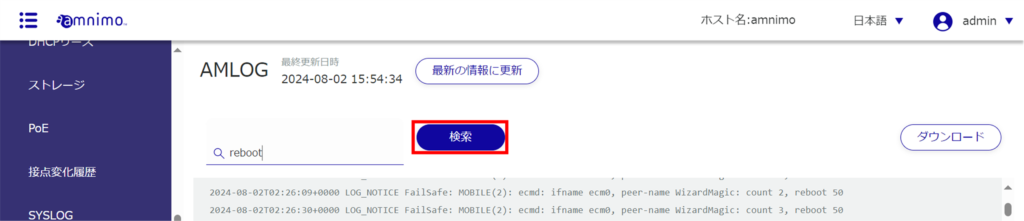
Search keywords are highlighted and displayed.
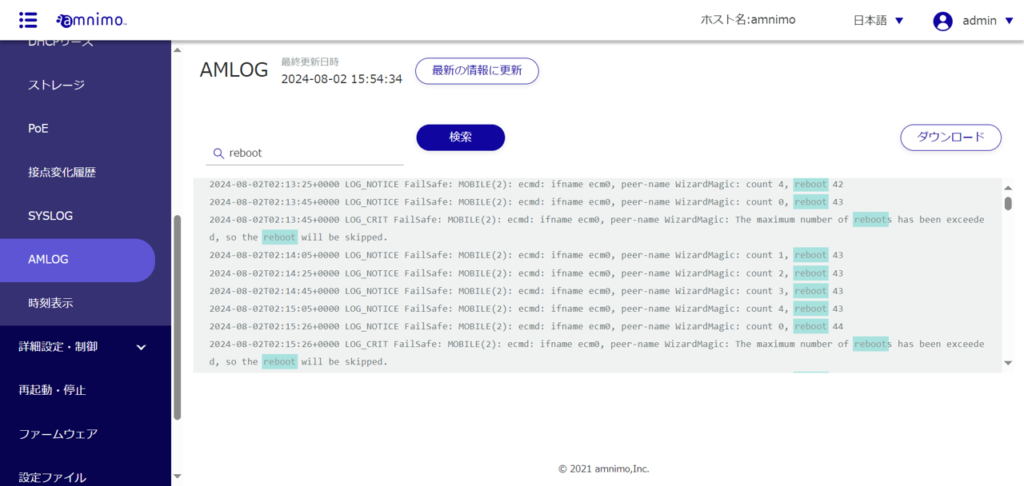

AMLOG will be downloaded.
Check the time on the product #
The "Time Display" screen appears, displaying the time of the product in real time.
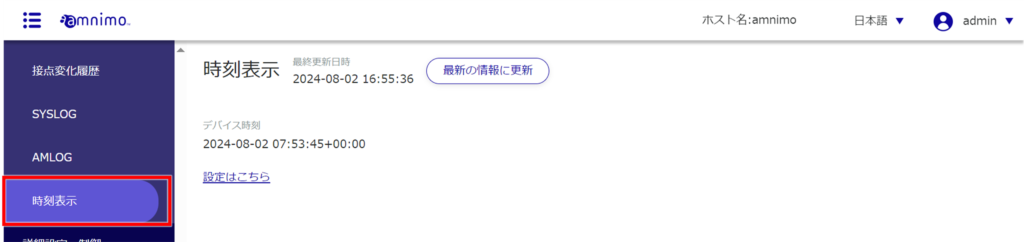
Clicking on "Click here for settings" will display the "Time Settings" screen. See " Setting the Time " for details on how to set the time.