This setting is not necessary because AC10 does not have a wireless LAN function.
Compact routers with wireless LAN can operate in two modes: access point mode and station mode. This section describes the connection procedure in access point mode.
Access point mode is a mode in which the compact router is used as the parent unit of the wireless LAN and other devices such as PCs and smartphones are connected as stations (child units).
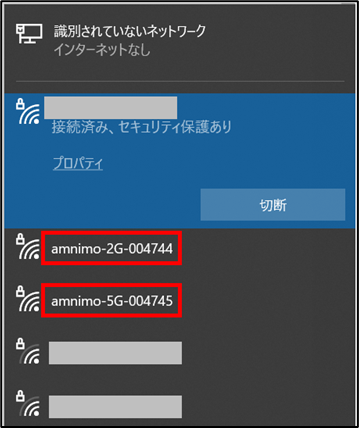
Factory-installed compact routers with wireless LAN start operating as a wireless LAN access point as soon as they are turned on, but Internet communication must be established in order to use them. The two default values for SSID are as follows
- amnimo-2g-xxxxxxxx
- amnimo-5g-xxxxxxxx
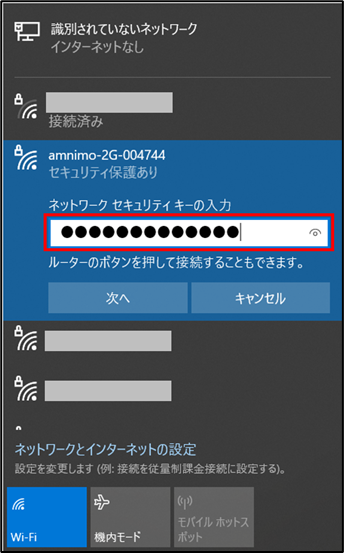
To connect with a security key #
The security key can be found at
- Sticker on the back of compact router indoor type with wireless LAN as "encryption key
- Compact router with wireless LAN outdoor type Sticker on the inside of the lid as "encryption key
- On the GUI screen, go to [Advanced Settings/Control] - [Wireless LAN Settings] and from the [Access Point] tab, enter the passphrase in the [Edit] screen for the SSID in question.

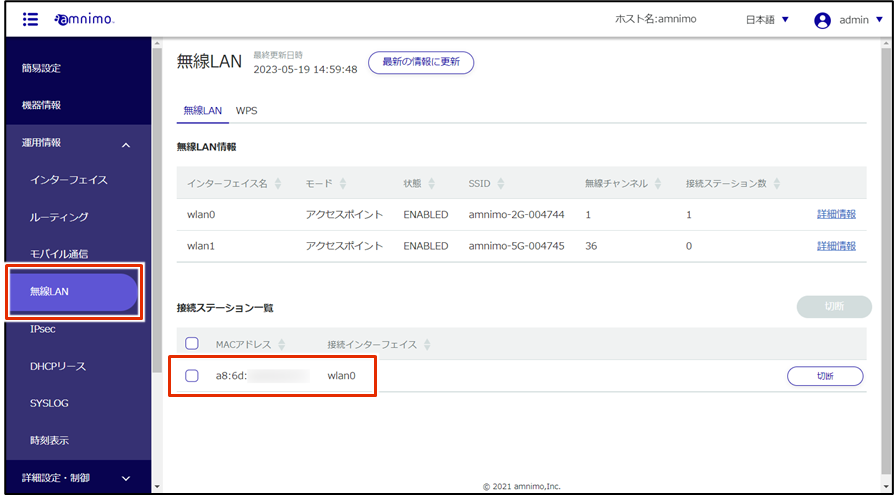
The "List of connected stations" shows information on the stations connected to the compact router.

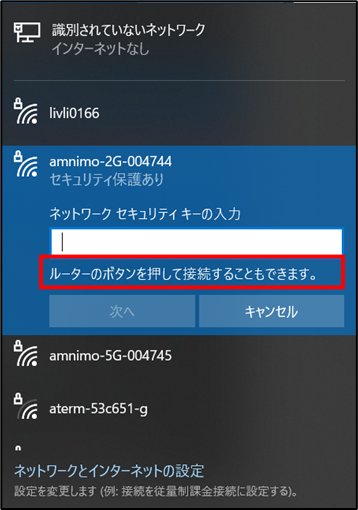
When connecting via WPS (using WPS button) #
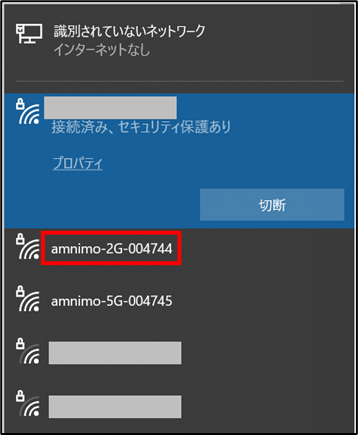
When shipped from the factory, WPS connection is available only to the access point whose SSID is amnimo-2G-xxxxxxxx. If you want to connect to amnimo-5G-xxxxxxxx via WPS, please disable amnimo-2G-xxxxxx access point in [Advanced Settings / Control] - [Wireless LAN Settings]. G-xxxxxxxx access point in [Advanced Settings and Control] - [Wireless LAN Settings].

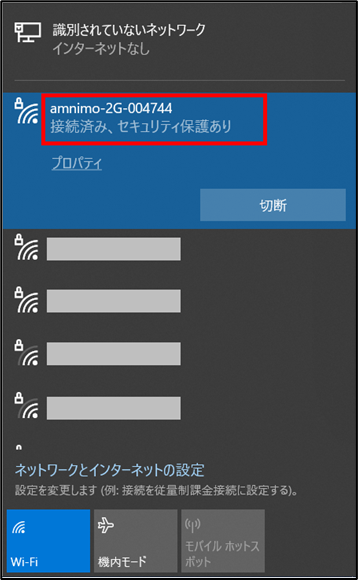
Some devices will also display a message indicating that the connection is possible via WPS, as shown in the figure.
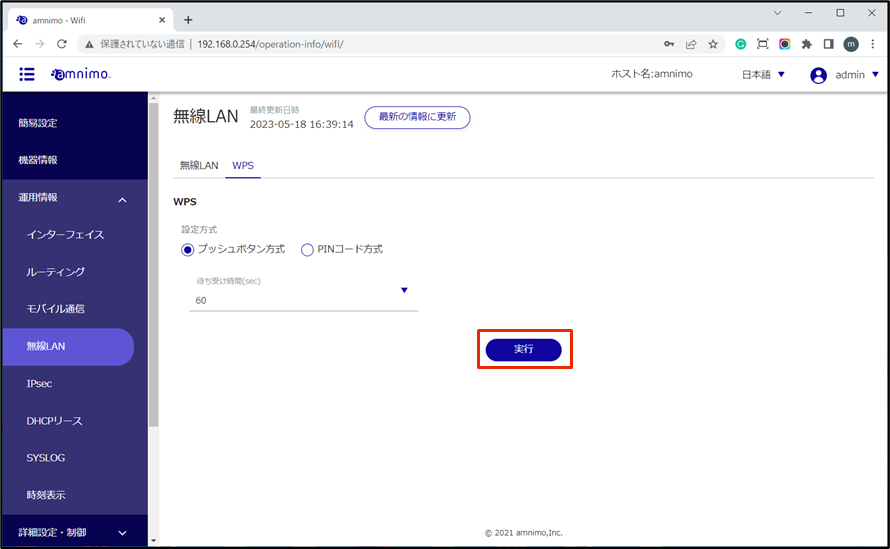
Make sure "Push Button Method" is checked and click "Execute.
If the GUI screen is not used, the connection can be made by pressing and holding the "WPS" button on the compact router itself.
The "List of connected stations" shows information on the stations connected to the compact router.

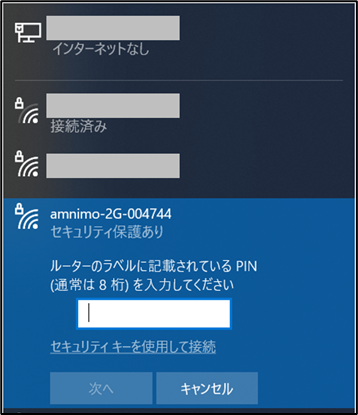
When connecting via WPS (using PIN code) #
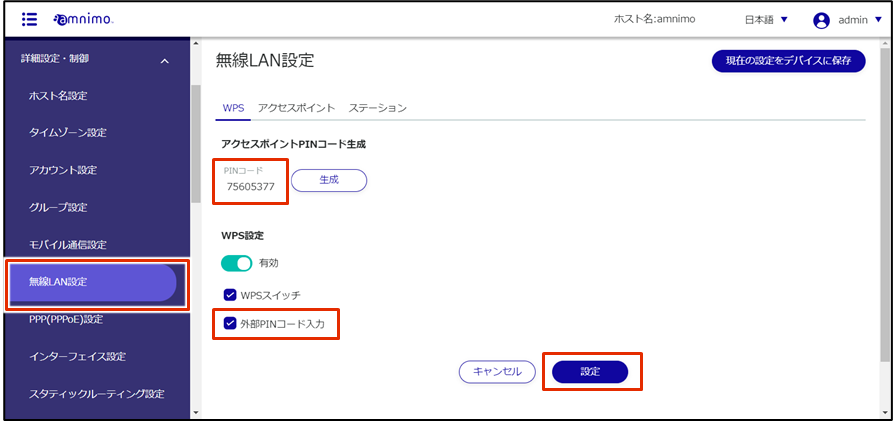
[Under [Advanced Settings/Control] - [Wireless LAN Settings], check the PIN code, check [Enter external PIN code], and click [Setup].
When shipped from the factory, WPS connection is only available for access points with SSID amnimo-2G-xxxxxxxx.
If you want to connect to amnimo-5G-xxxxxxxx via WPS, please disable the access point for amnimo-2G-xxxxxxxx in [Advanced Settings and Control] - [Wireless LAN Settings].

The "List of connected stations" shows information on the stations connected to the compact router.