NOTE
- If a camera is already connected to the device, the camera will be automatically detected once the device is activated.
- If a camera is detected, proceed to "Configuring Camera Authentication and Recording Settings".
- For detailed information on the use and configuration of the integrated video management system, please refer to the following manuals
- Possible reasons for a camera not being detected include
- The IP address of the camera belongs to a different network than the edge gateway br0
- The IP address of the edge gateway br0 is not set in the default gateway address of the camera.
- The camera's ONVIF function is not enabled.
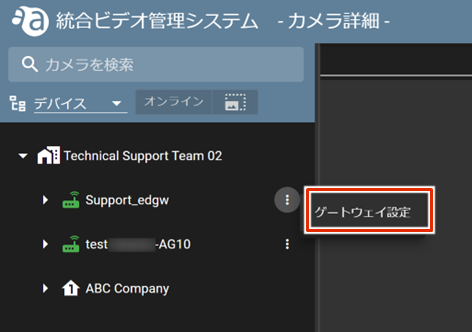
Click on ︙Device︙Gateway Settings︙.
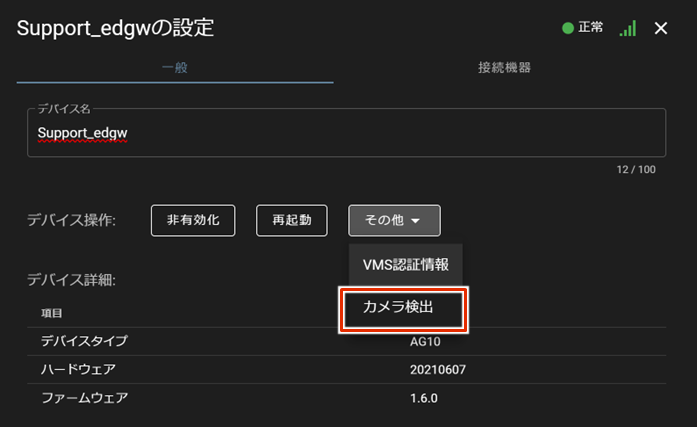
[Under "Other," click on "Camera Detection.
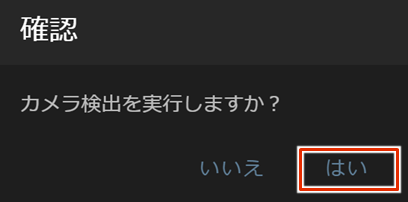
Click "Yes" when the confirmation screen appears.
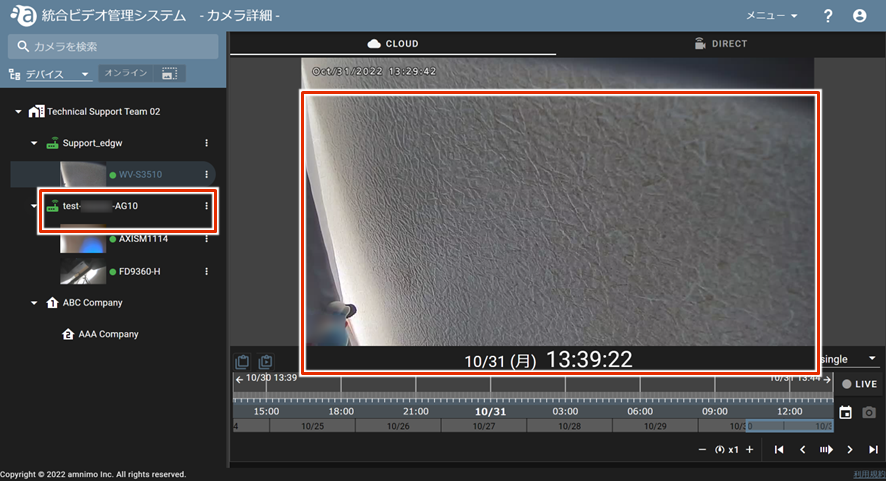
Confirm that the camera appears in the sidebar. (Thumbnails will not appear until a snapshot is taken.)
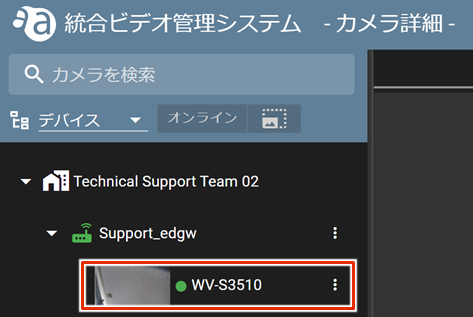
Select the added camera and confirm that the image is displayed.