Configure DNS settings for this product.
This section describes operations such as enabling DNS settings, specifying port numbers, and adding a query server.
View DNS settings #
Displays DNS settings.
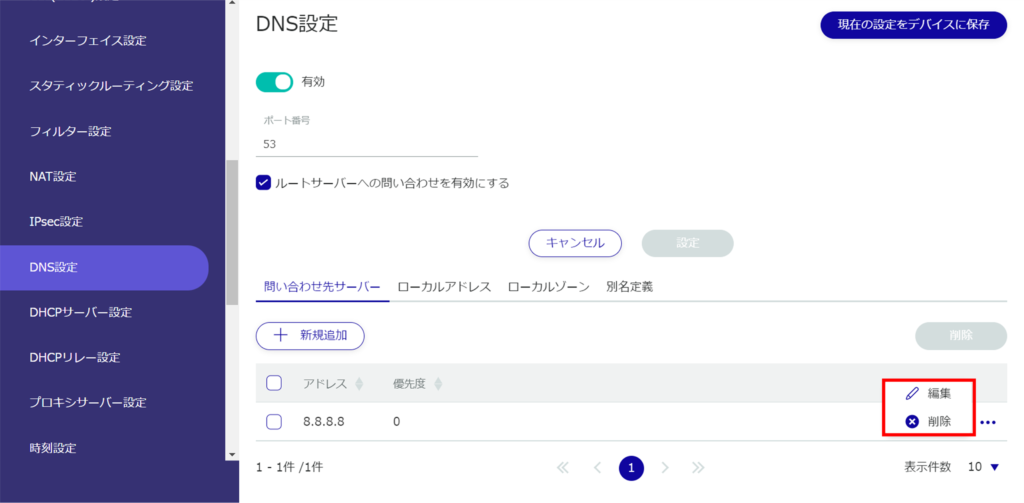
The "DNS Settings" screen displays the registered DNS settings.
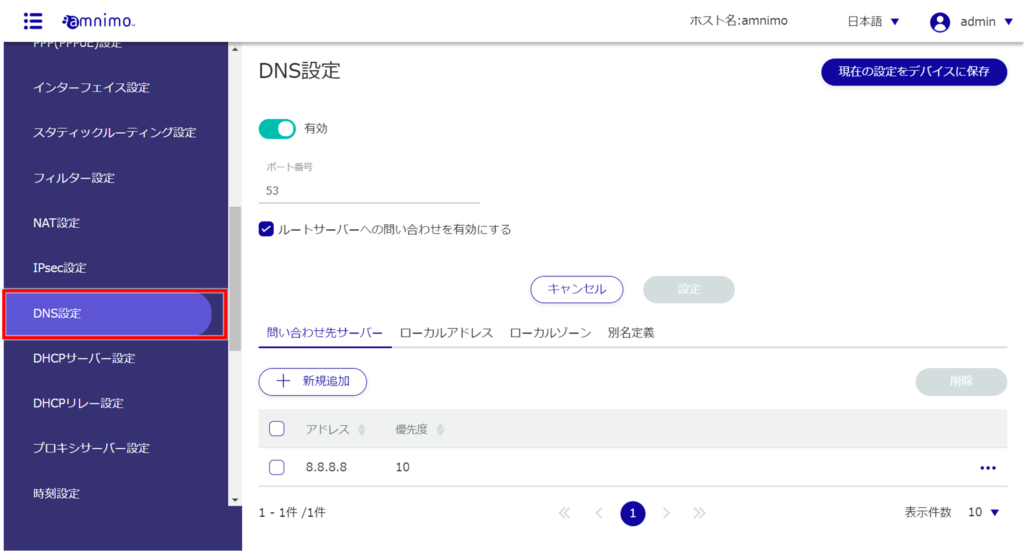
You can sort the DNS settings in descending/ascending order for each item by clicking the "Address" and "Priority" tabs for the query server and local address of the DNS settings.

Configure DNS settings #
Configure DNS settings.
Click the ❶ toggle to enable or disable DNS.
❷ Specify the port number.
❸ Select to enable or disable querying the root server.
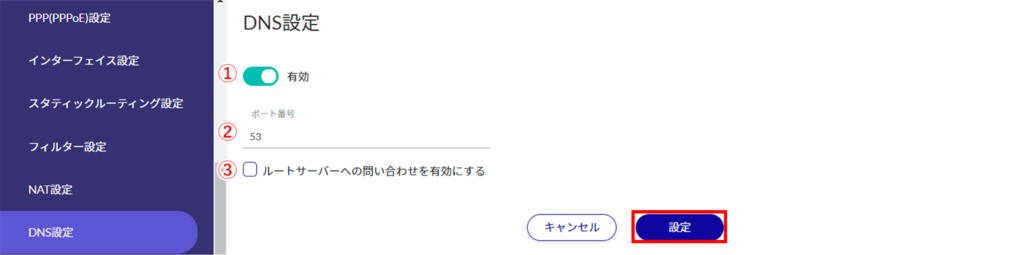
This is applied by clicking on the [ Settings ] button.
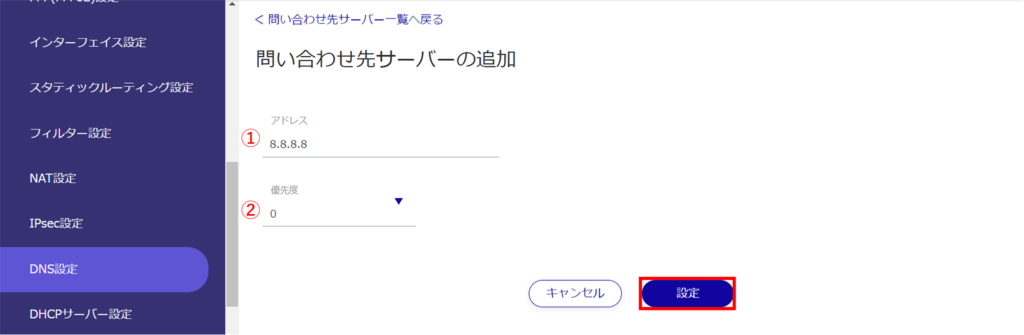
Configure the query server settings. #
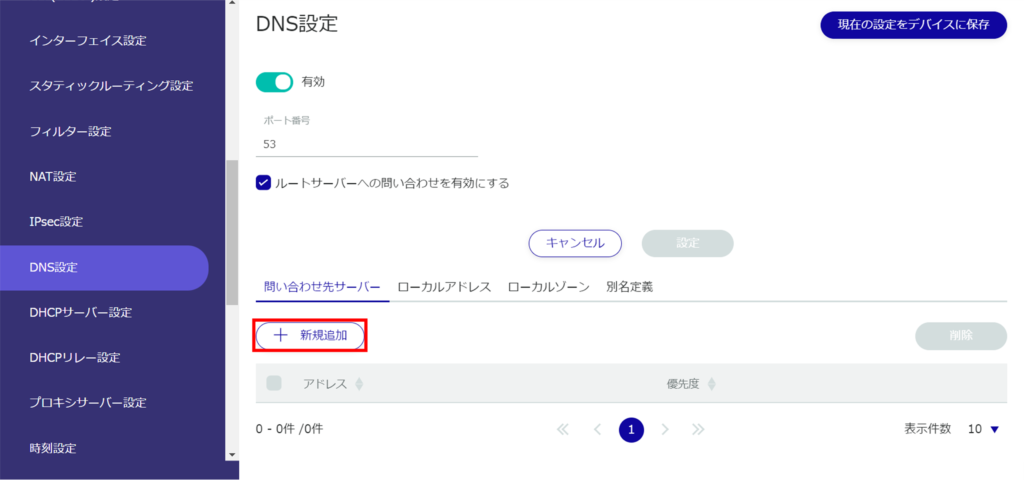
The "Add Contact Server" screen will appear.
Specify the upper-level DNS server to query.
❷ Specify the priority as a number from 0 to 99, with 0 being the highest priority.
From the DNS Settings screen, you can edit or delete the configured query server.
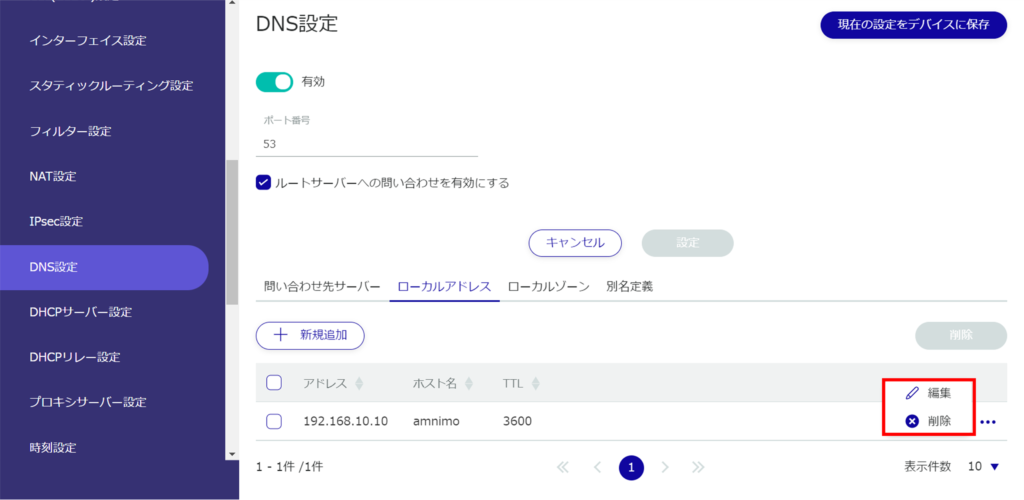
Configure local address settings. #
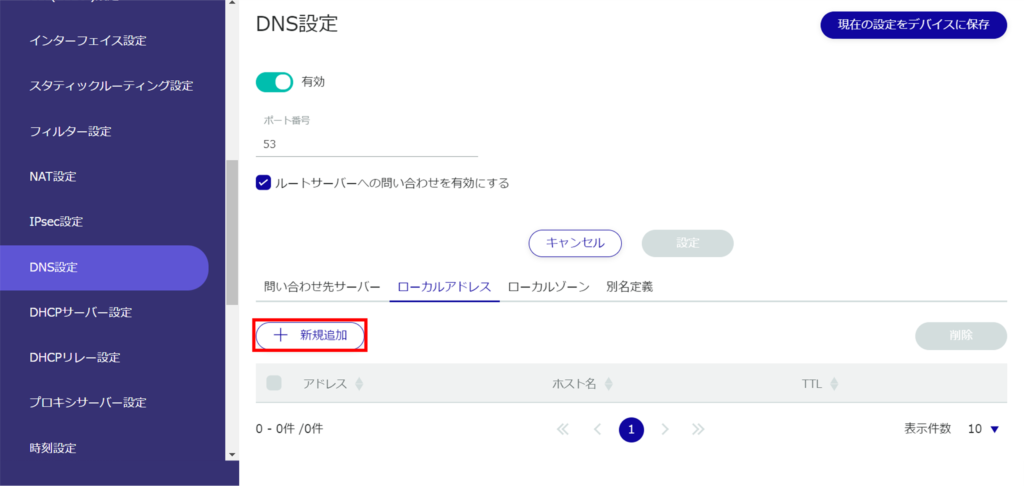
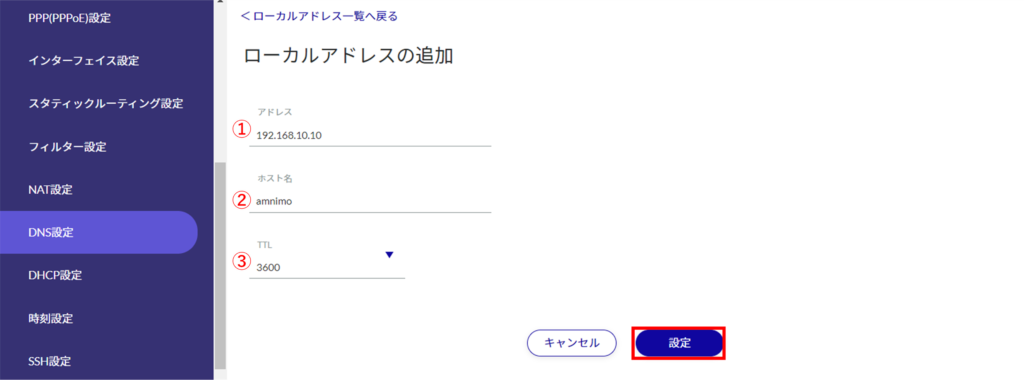
The "Add Local Address" screen appears.
❶ Specifies the address to be responded to.
❷ Specifies the host name to respond to.
❸ Set the TTL value to be returned upon response, as a number between 10 and 2419200.
From the DNS Settings screen, you can edit or delete the local address you have set.
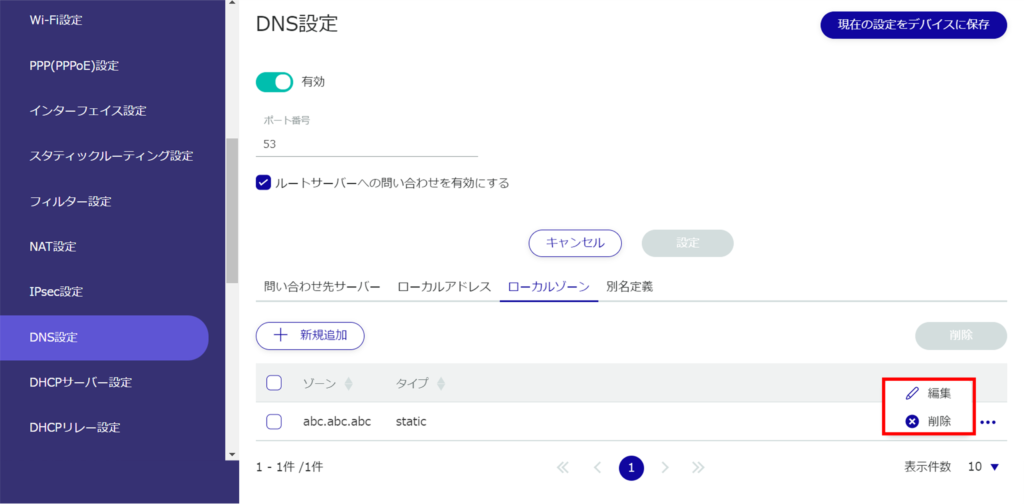
Configure local zone settings. #
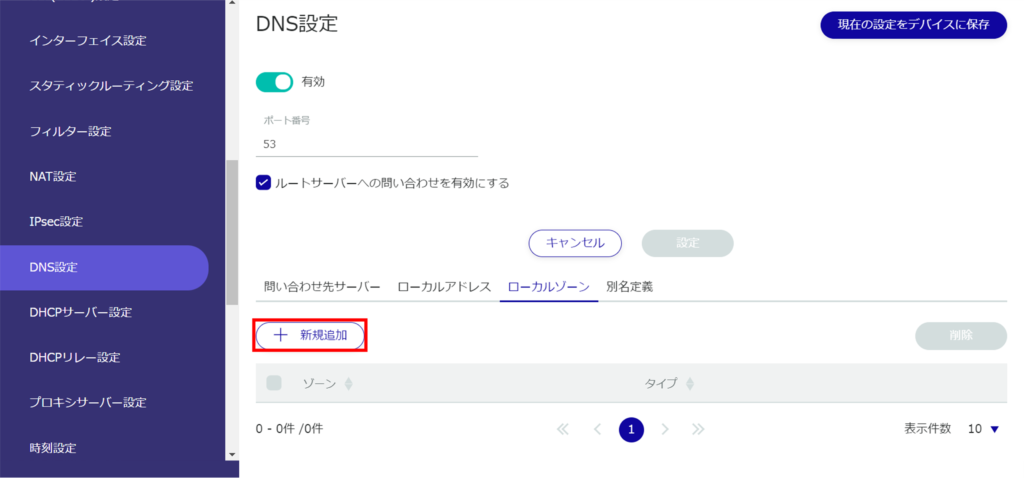
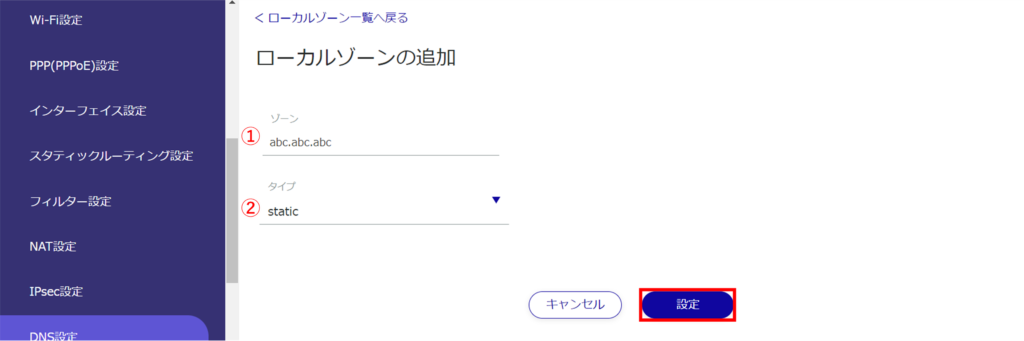
The "Add Local Zone" screen will appear.
❶ Enter any zone name.
Specify the type of ❷.
From the DNS Settings screen, you can edit or delete configured local zones.
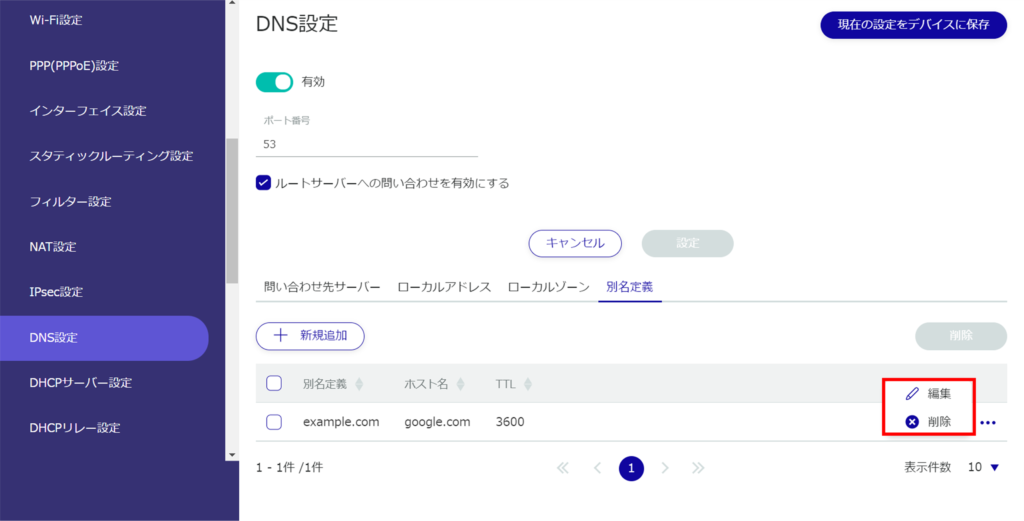
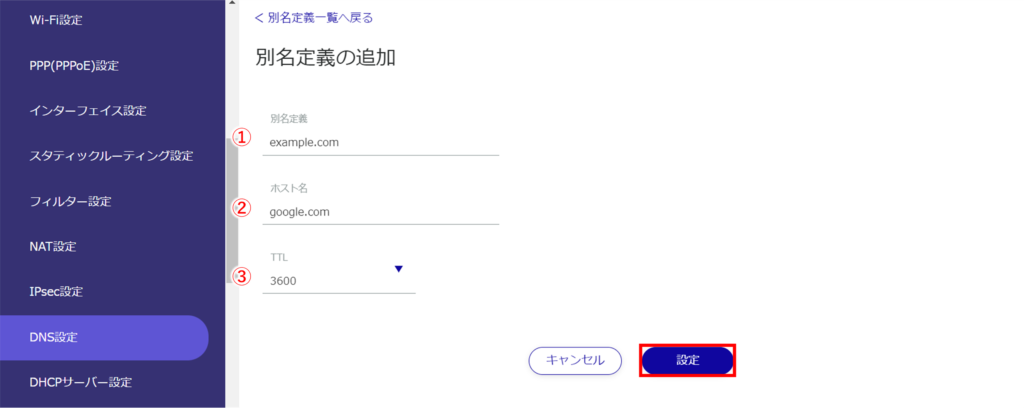
Set up an alias definition. #
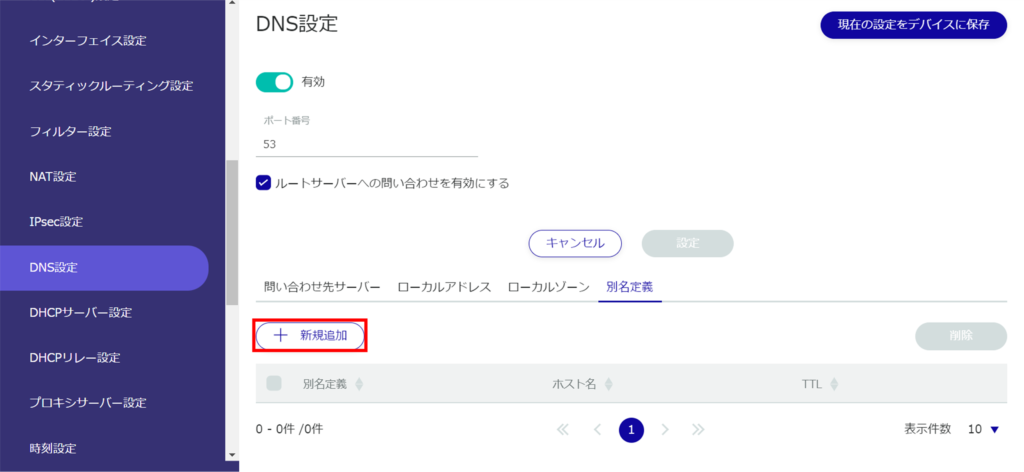
The "Add Alias Definition" screen appears.
❶ Enter any domain name.
Specify the host name.
❸ Set the TTL value to be returned upon response, as a number between 10 and 2419200.
From the DNS Settings screen, you can edit or delete the alias definitions you have set.