View Categories

CVR setting.

Configure settings to use Cloud Video Recorder (abbreviated as CVR) with this product.

NOTE

AI Edge Gateway (amnimo X series), Edge Gateway (amnimo G series), IoT Router Outdoor Edition (AR20) and Compact Router (AC10) do not have this feature.

Display CVR settings #

Displays CVR settings.

Click [Advanced Settings/Controls] – [CVR Settings] in the side menu.

The “CVR Settings” screen displays the current CVR settings.

Enable CVR settings #

Enable CVR settings.

On the “CVR Settings” screen, click the toggle to change the setting to “Enable” and click the “Setup” button.

Information on CVR settings will be updated.

Disable CVR settings #

Disables the CVR setting.

On the “CVR Settings” screen, click the toggle to change the setting to “Disable” and click the “Setup” button.

Information on CVR settings will be updated.

Manipulate camera information #

Camera information can be configured by uploading a Cloud Video Recorder configuration file or by adding new individual camera information.

NOTE
  • This function is only available on the IoT Router Indoor version (AR10).
  • If you wish to perform the same operation on compact routers with wireless LAN (AC15 and AC25), please refer to the following
    ⇒ Check operational information > Manipulate CVR configuration file

Upload the CVR configuration file #

Camera information can be configured by uploading a CVR configuration file.
Please refer to the following for instructions on how to create a configuration file.
⇒Cloud Video Recorder (For Partners) > Preparing Camera Configuration File
*Customers other than partners can also view the file.

WARNING

If a new configuration file is uploaded while camera information is already set, the existing camera information will be deleted and the camera information in the new configuration file will be reflected.
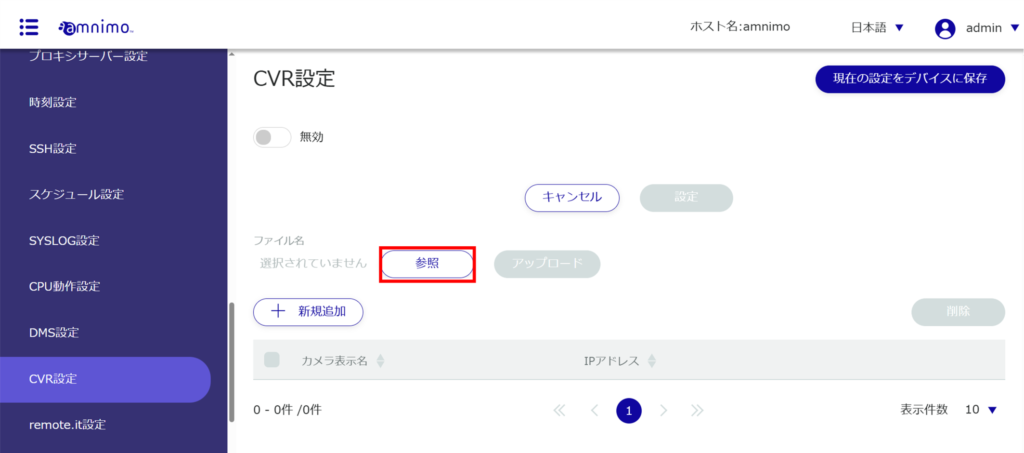
[Click Browse.
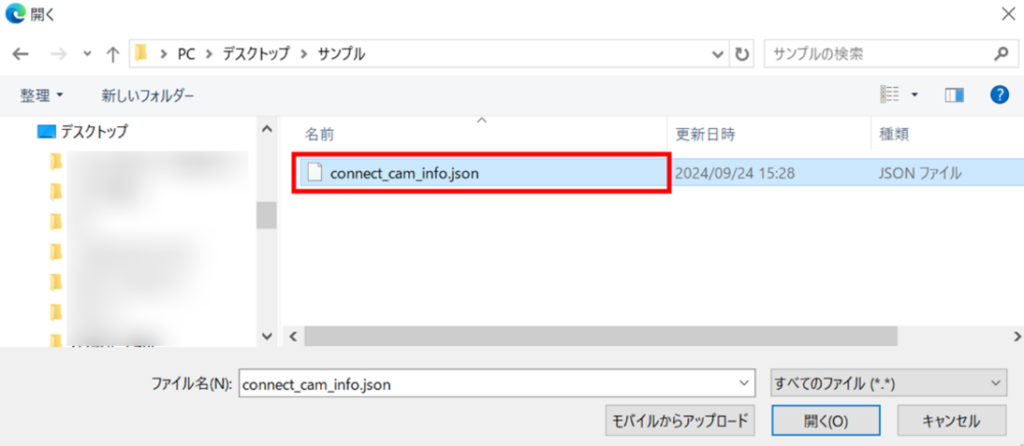
Select a configuration file.
NOTE

The extension of the configuration file is “json”.

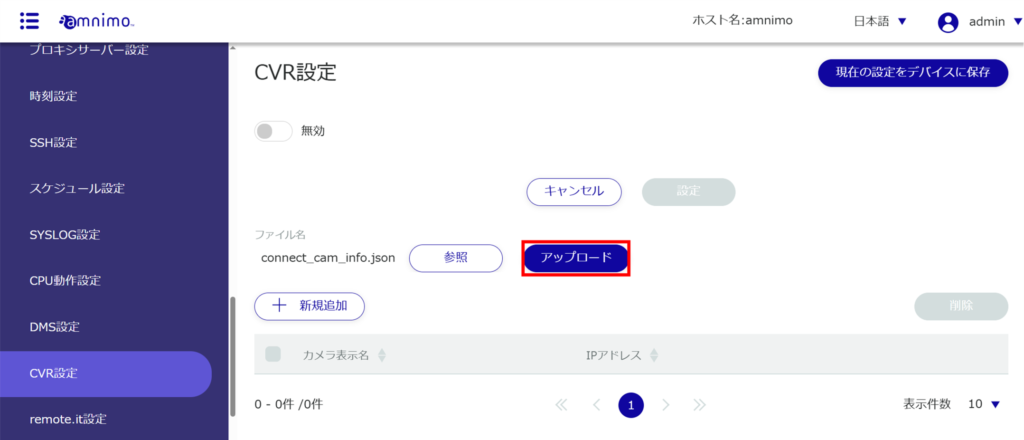
[Click Upload.
[Click Upload.
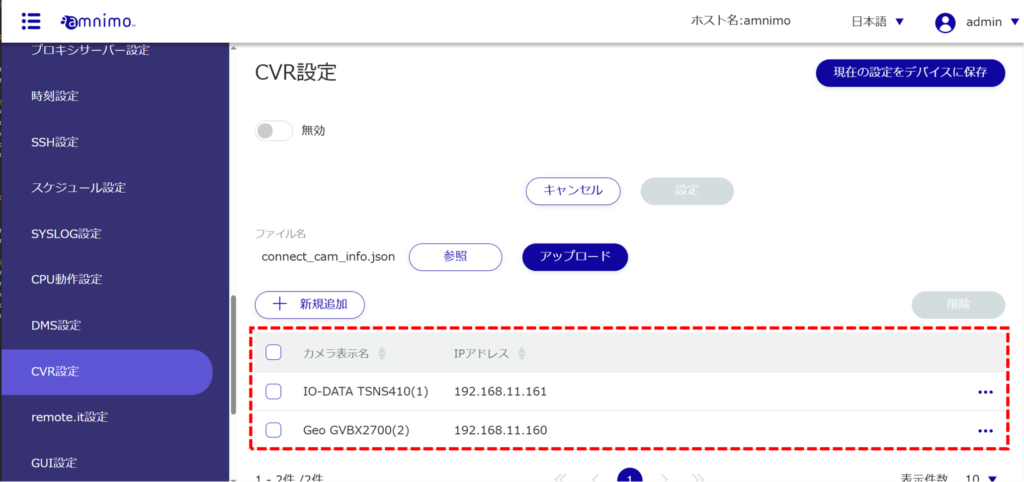
The upload of the configuration file is now complete and the settings (camera information) configured for this device can be viewed.

Add new camera information #

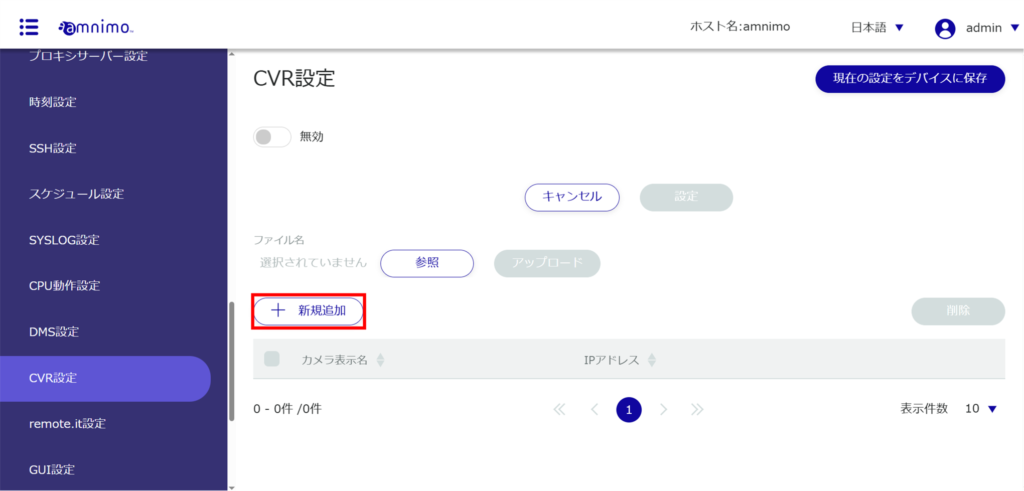
[Click Add New.
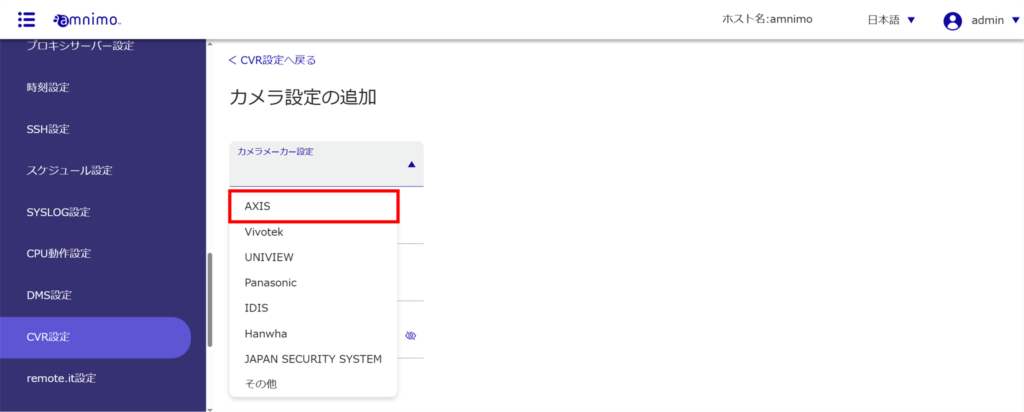
In the “Add Camera Settings” screen, use the pull-down menu to set the camera manufacturer.
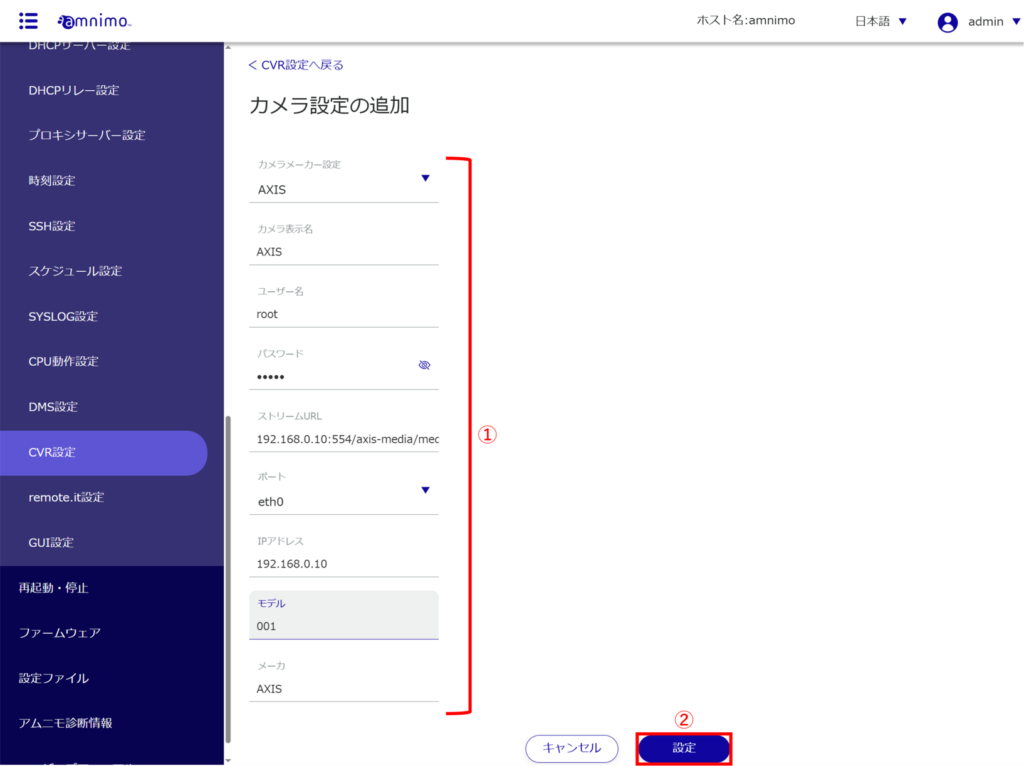
Set the contents according to the camera manufacturer’s settings (①) and click [Setup] (②).
Camera information has been added.

Editing Camera Information #

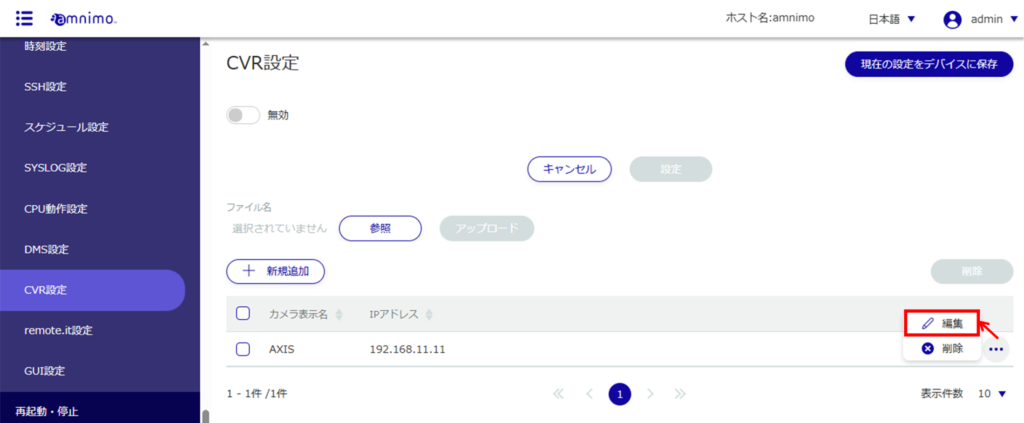
Click [ … ] at the right end of the row of camera information you wish to edit, and then click Edit.
Edit the camera information in the “Add Camera Settings” window (①) and click [Setup] (②).
Camera information has been edited.

Delete camera information #

There are two ways to delete camera information: individually, one by one, or in batches.

Delete individual camera information.

Click [ … ] at the right end of the row of camera information you wish to delete, and then click [Delete].
Click “Delete” on the “Confirm” screen.

Camera information has been deleted.

Delete camera information in a batch
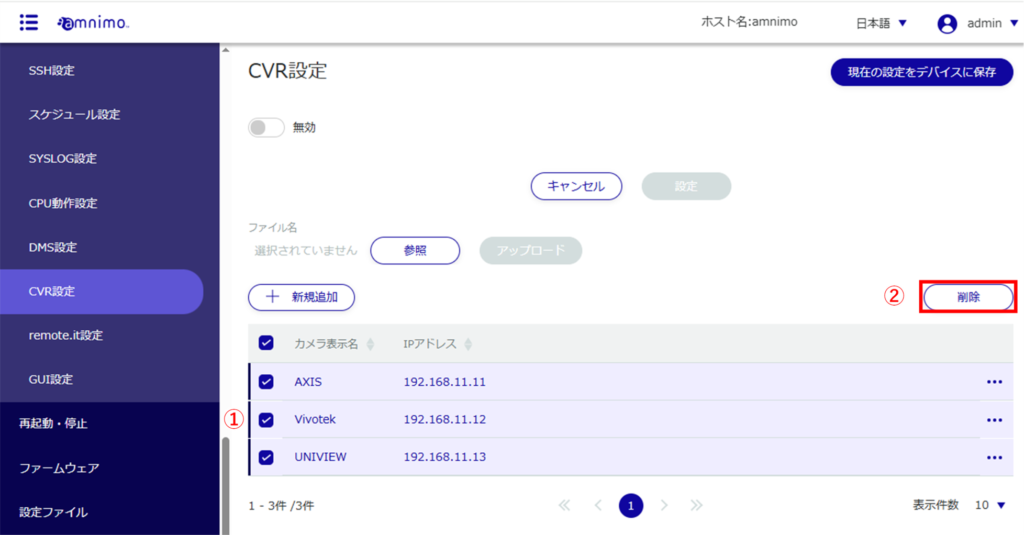
Check the checkbox to the left of the camera display name of the camera information to be deleted (①) and click [Delete] (②).
Click “Delete” on the “Confirm” screen.
Camera information has been deleted.
Scroll to Top