
This section describes the operation of the "DHCP Relay" screen.
Here you can add, edit, or delete DHCP relay settings.
Note that the DHCP server cannot be enabled when the DHCP relay setting is enabled.
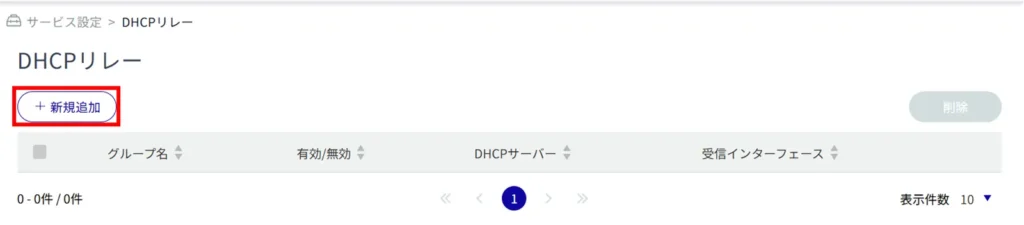
Click [Service Settings] > [DHCP Relay] in the side menu to open the "DHCP Relay" window.

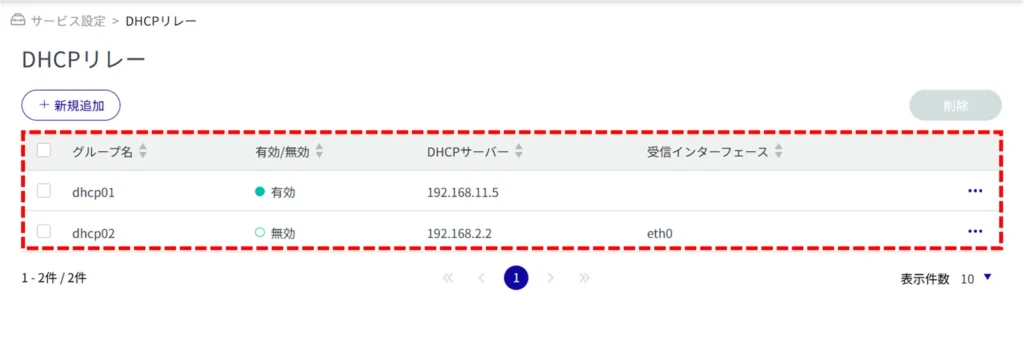
Display a list of DHCP relay settings #
Open the "DHCP Relay" window to view a list of DHCP relay settings.
Adding DHCP Relay Settings #
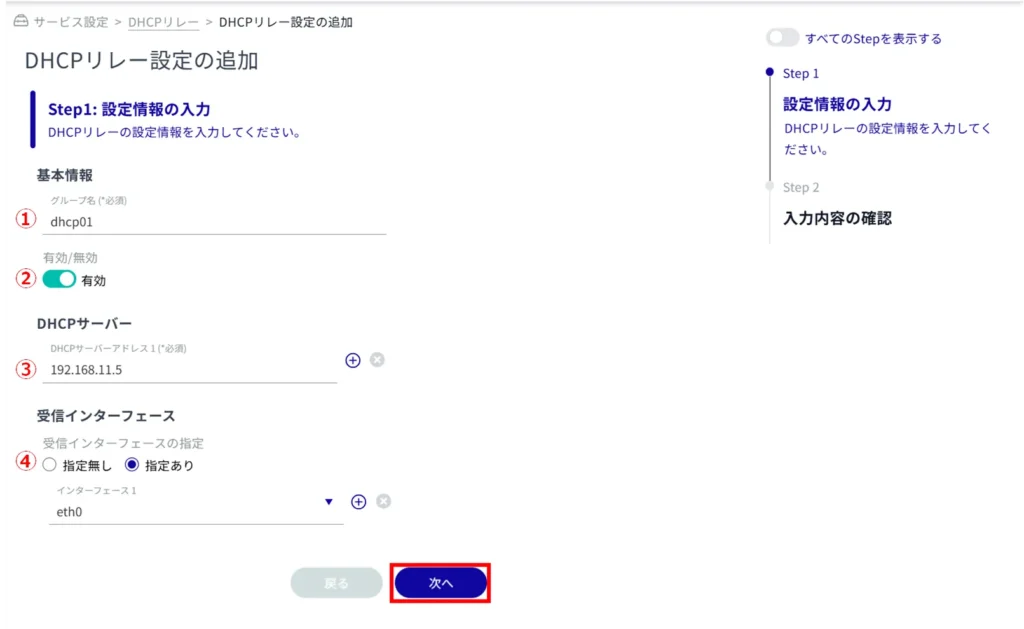
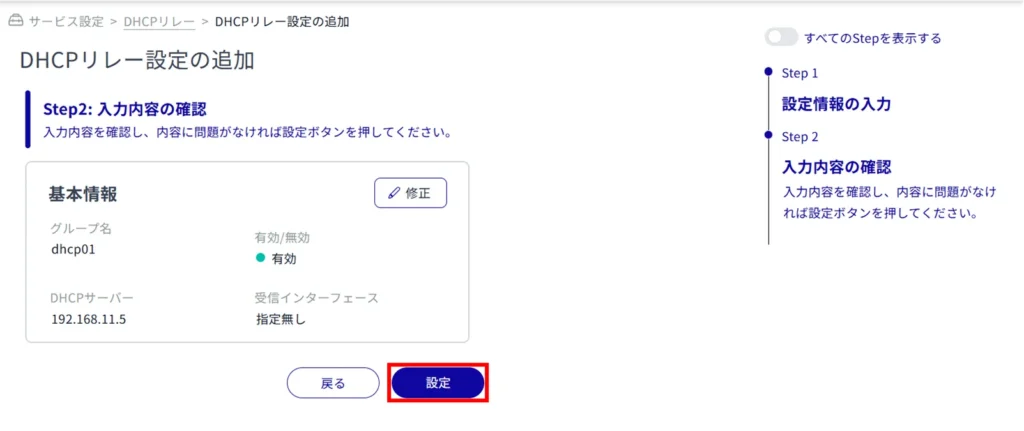
The "Add DHCP Relay Settings" screen appears.
Enter a group name.
(2) Click the toggle to select Enable / Disable.
Enter the IP address of the DHCP server. [Up to four IP addresses can be specified by clicking "+Add".
Select the receiving interface. [If "Yes" is selected, the interface must be selected. [Up to 10 (1 for AC series) can be specified by clicking "+Add".
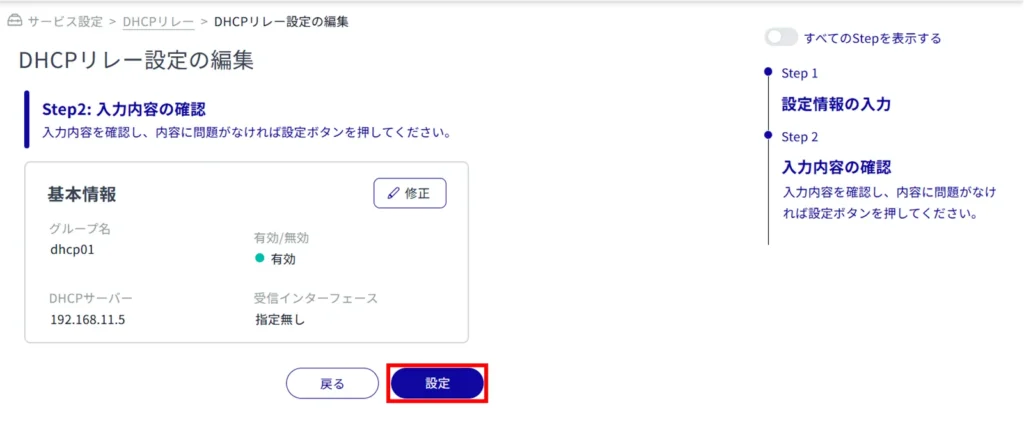
Edit DHCP Relay Settings #
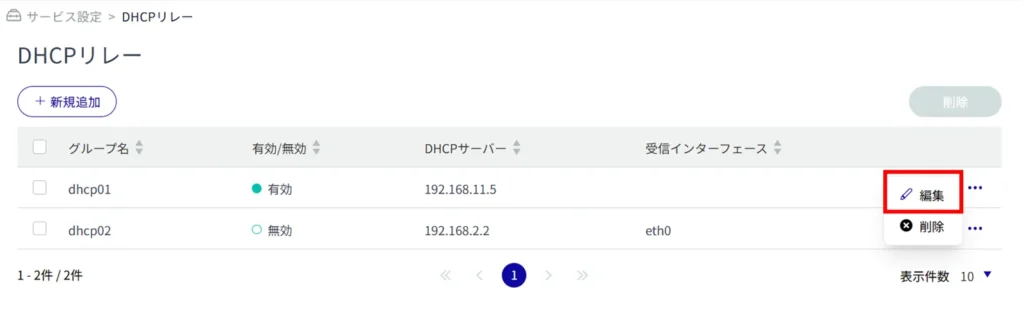
The "Edit DHCP Relay Settings" window appears.
Delete DHCP relay settings #
There are two ways to delete DHCP relay settings: individually or collectively.
Delete individual DHCP relay settings #
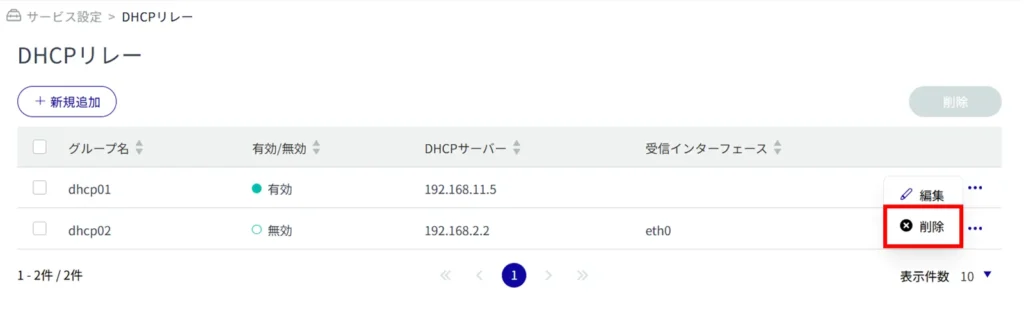
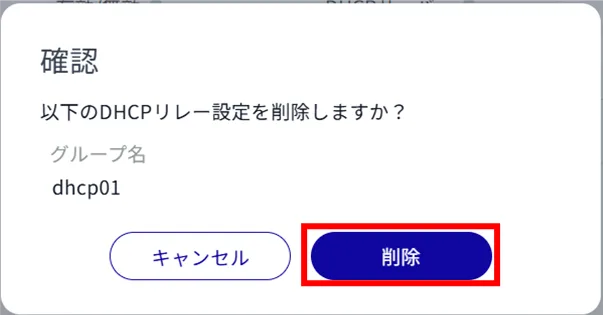
The DHCP relay setting is deleted.
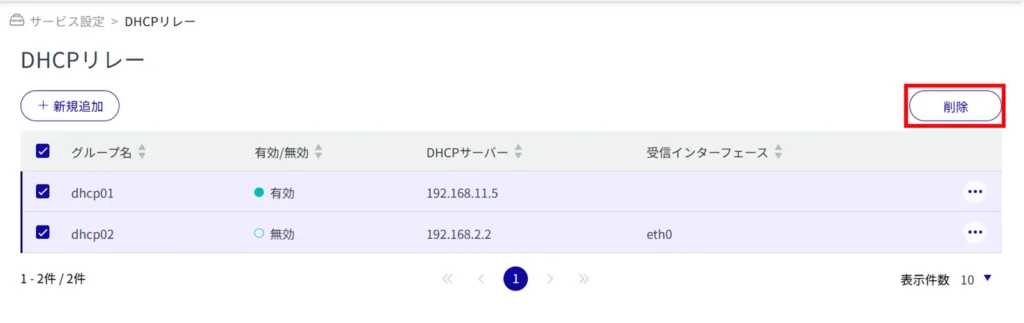
Selecting and deleting multiple DHCP Relay settings #
This method is used to check the DHCP relay settings to be deleted before deleting them. This is useful for deleting multiple DHCP Relay settings at once.
You can also select a single DHCP Relay setting to delete.
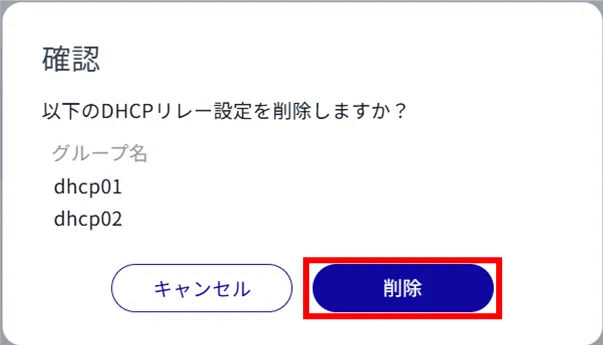
The DHCP relay setting is deleted.