
This section describes the operation of the "CVR" screen.
Here you can configure the settings for using the Cloud Video Recorder (abbreviated as CVR) with this product.
AI Edge Gateways and Sensor Connection Gateways (amnimo X series), Edge Gateways (amnimo G series), and Compact Routers (AC10) do not have this feature.
Click [Service Settings] > [CVR] in the side menu to open the "CVR Settings" screen.
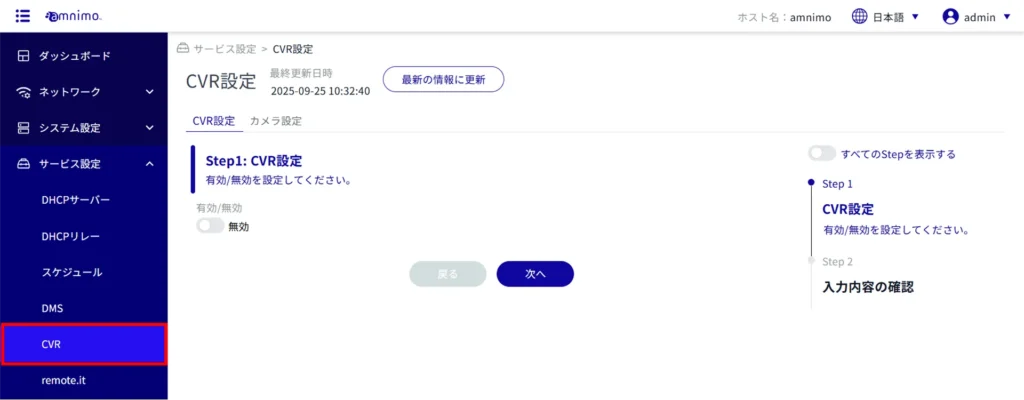
CVR setting #
Display CVR settings #
Open the "CVR Settings" tab to see the current status of the CVR settings.
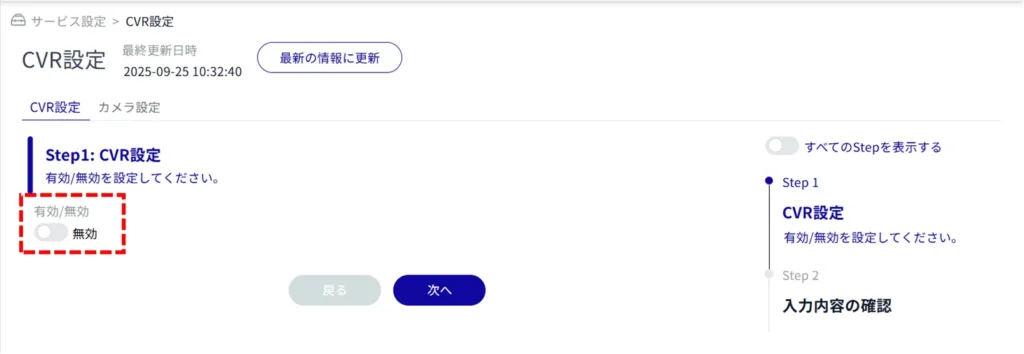
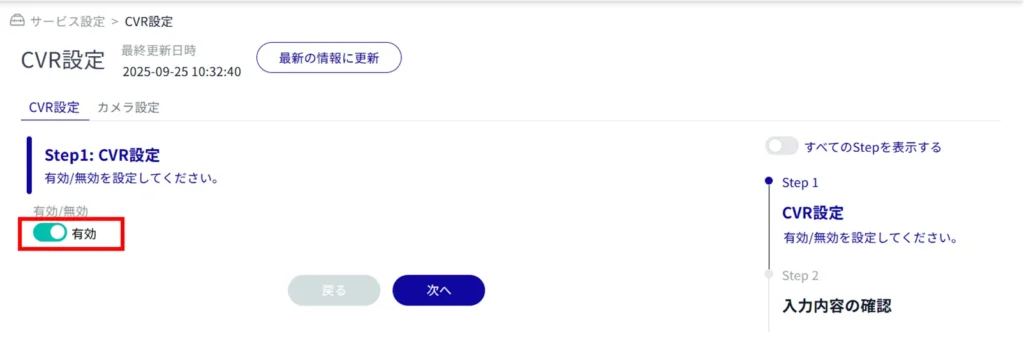
Change CVR settings #
Enables/disables the CVR setting.
Below are the steps for activation.
Enable "CVR Settings" to use CVR.
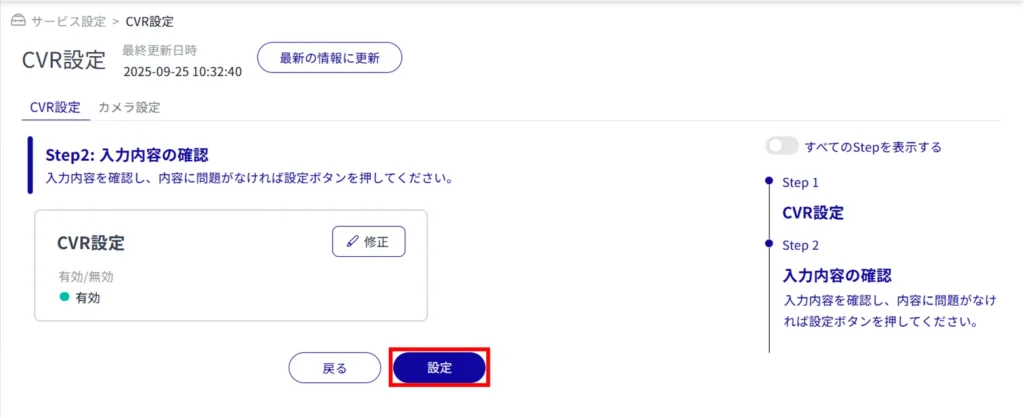
The CVR setting is changed.
Camera Information #
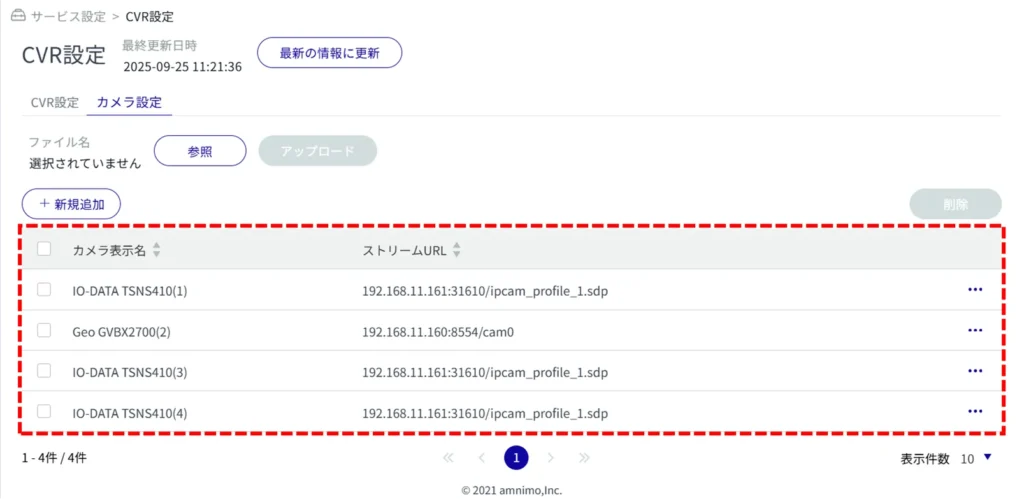
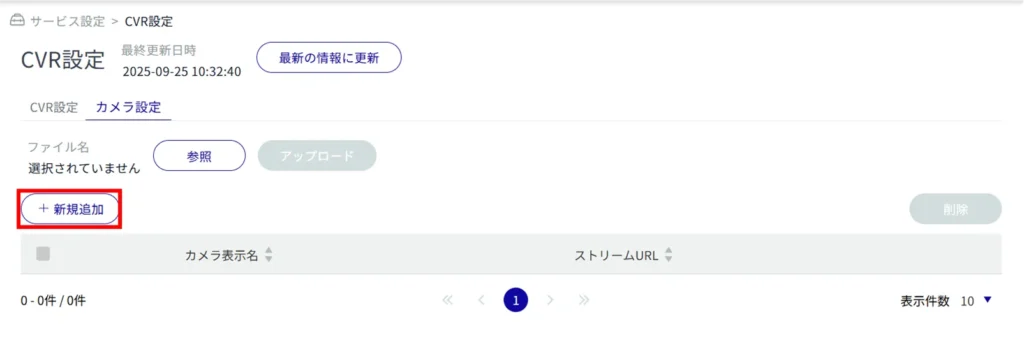
Display camera settings #
Open the "Camera Settings" tab to see the current status of the camera settings.
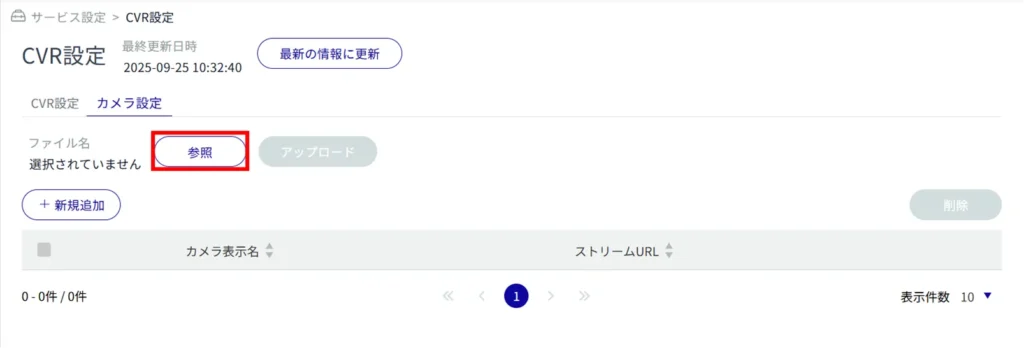
Set camera information #
Camera information can be configured in two ways
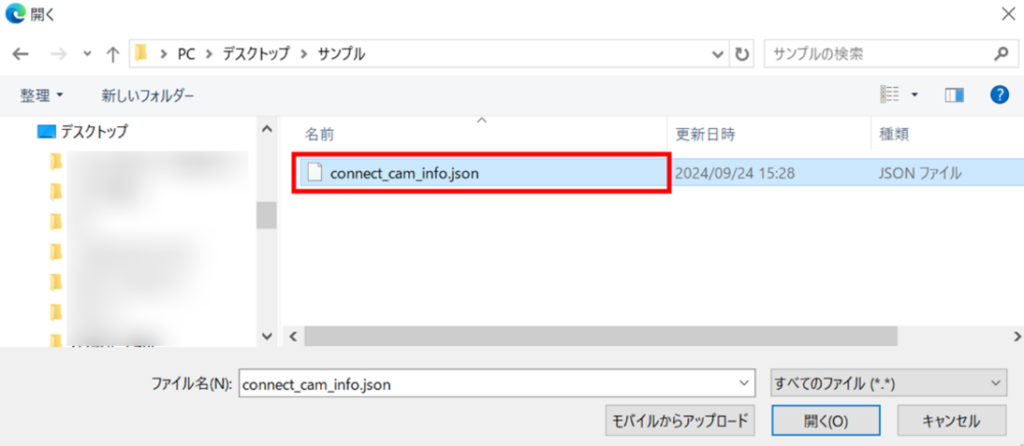
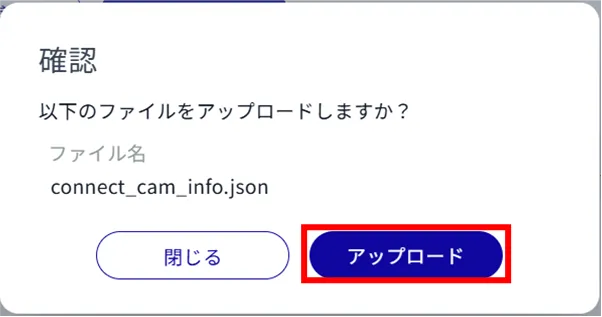
Upload the CVR configuration file
Camera information can be configured by uploading a configuration file for the CVR.
Please refer to the following for instructions on how to create a configuration file.
⇒Cloud Video Recorder (For Partners) > Preparing Camera Configuration File
*Customers other than partners can also view the file.
If a new configuration file is uploaded while camera information is already set, the existing camera information will be deleted and the camera information in the new configuration file will be reflected.
The extension of the configuration file is "json".
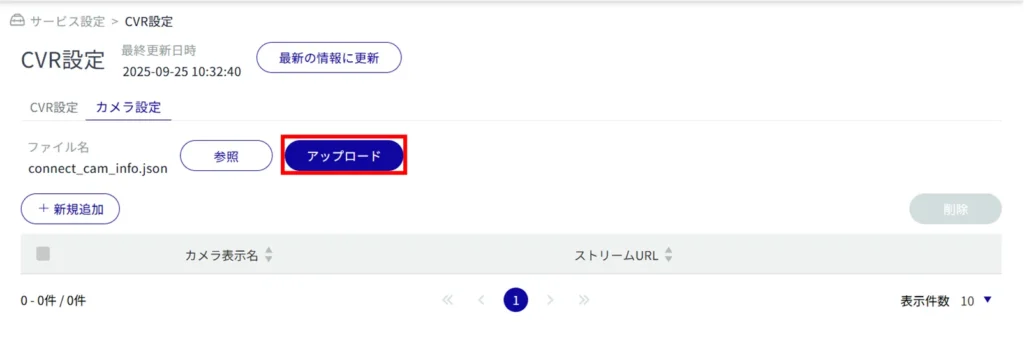
After the upload of the configuration file is complete, you will be able to check the settings (camera information) on this device.
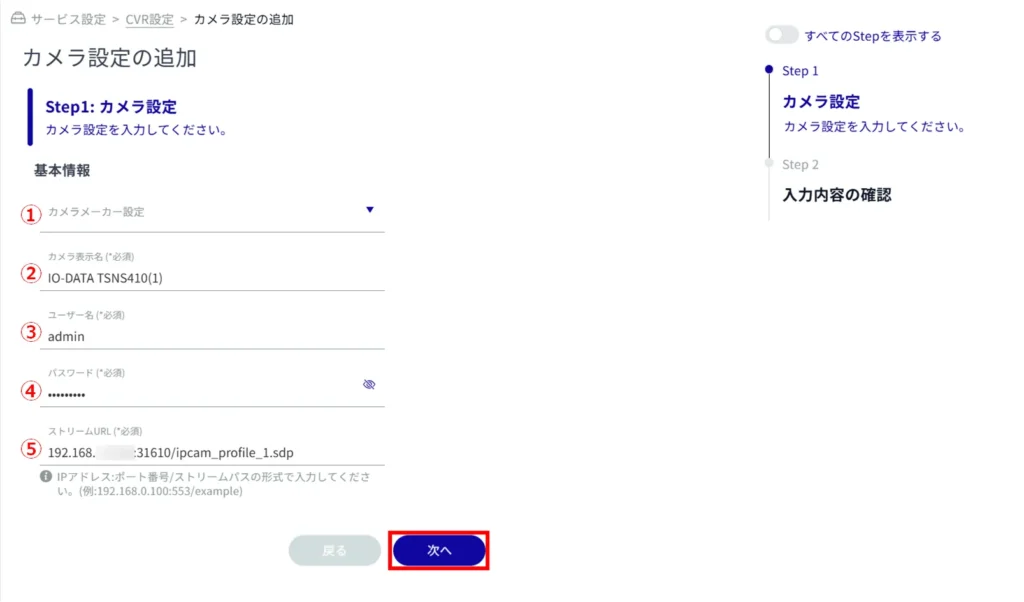
Add new camera information
(1) Select the camera manufacturer from the pull-down menu. (Optional)
(2) and (5) are automatically entered according to the selection (excluding "Other").
(2) Enter the camera display name.
(3) Enter the user name.
(4) Enter the password.
(5) Enter the stream URL.
Add the IP address and port number to the stream path set by the camera manufacturer selection in (1). (Example: 192.168.0.100 :554/examples )
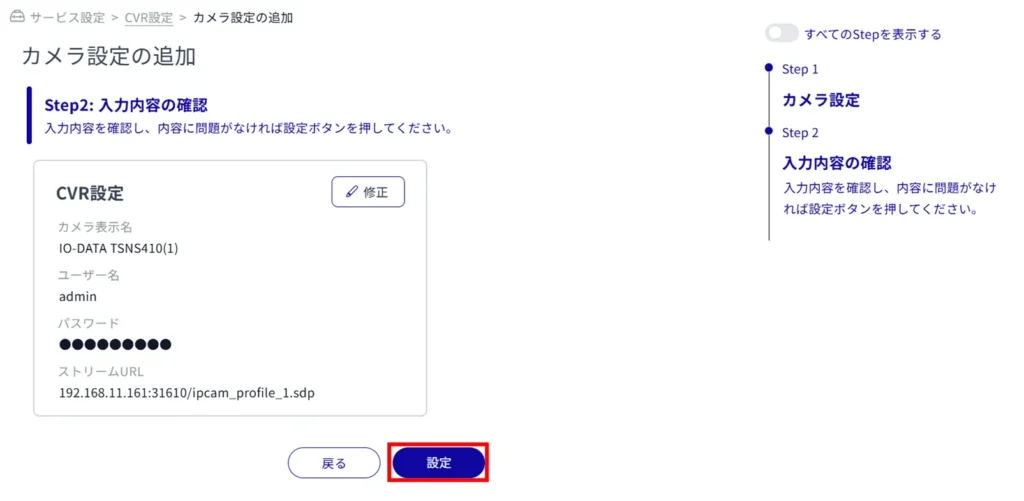
Adding camera information is completed.
Editing Camera Information #


Delete camera information #
There are two ways to delete camera information: individually, one by one, or in batches.
Delete individual camera information.
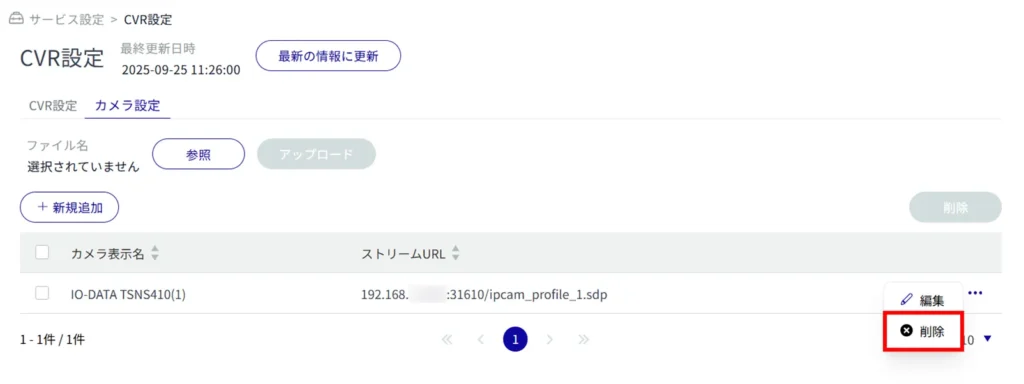
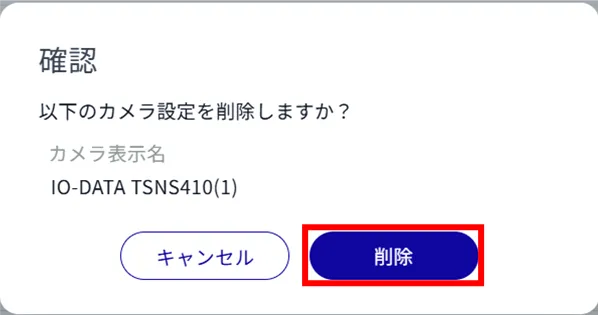
The selected camera settings will be deleted.
Delete camera information in a batch
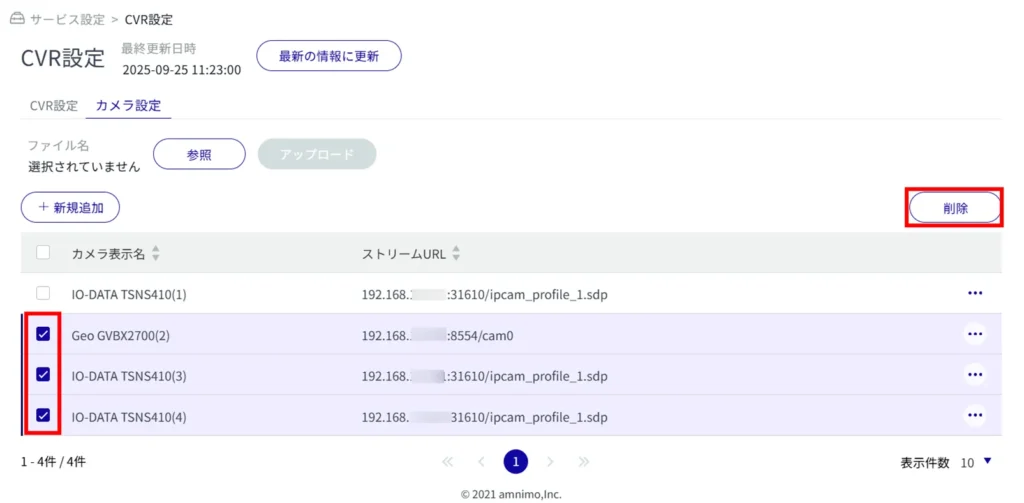
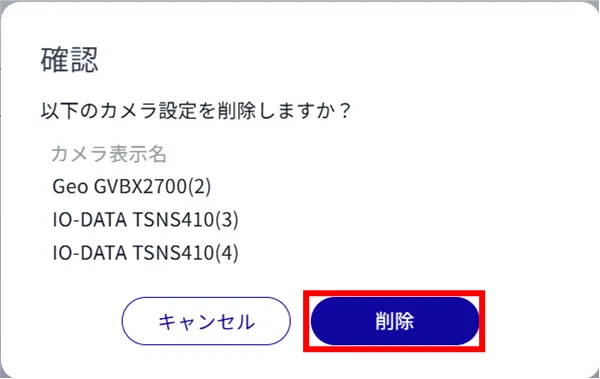
The selected camera settings will be deleted.