
This section describes the Member Management screen.
You can invite new tenant members, change their roles, delete them, etc.
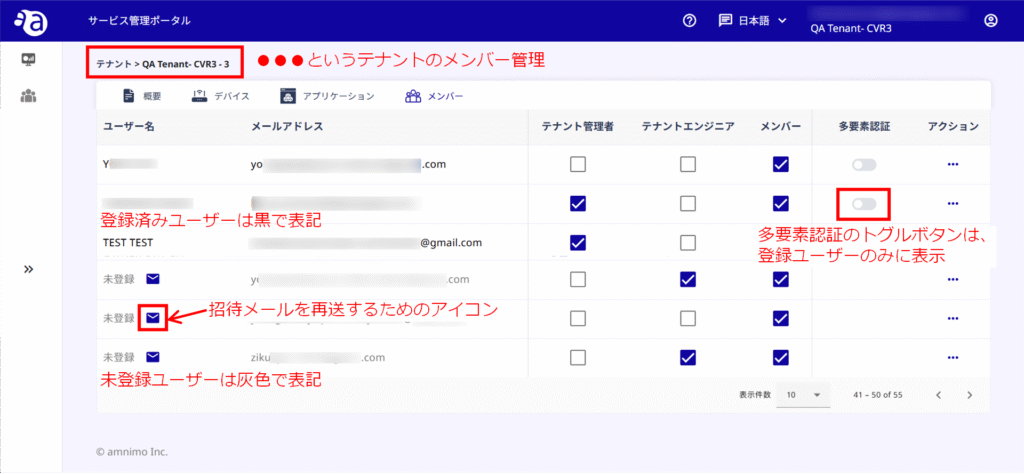
When you open the Members tab for the first time, only the tenant administrator's account information is registered.
This information cannot be changed or deleted by the administrator himself.
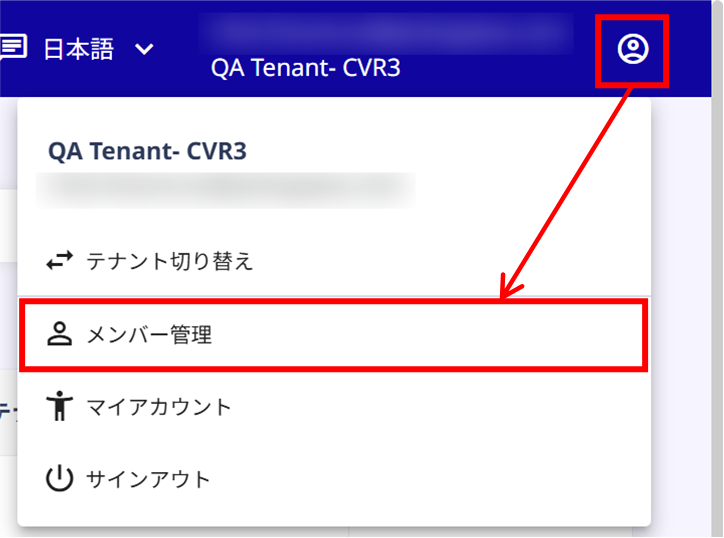
You can also access member management for the top level tenants from the icon on the far right of the menu bar at the top of the Service Management Portal.
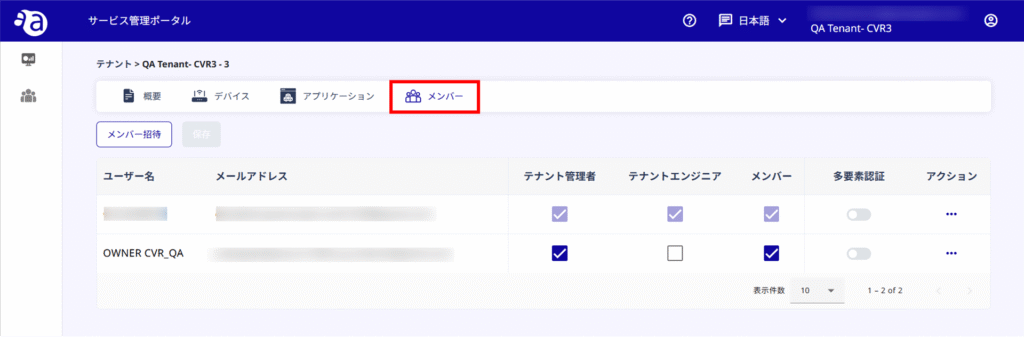
About the Member Management Screen #
The view of the member management screen is as follows.
Detailed operating procedures are described in the sections that follow.
How to invite members #
To invite a tenant, follow these steps
Before inviting, check the permissions of the roles and applications used.
- Service Management Portal Authorization Table
- Device Management System Authorization Table
- Table of Authorities for Integrated Video Management System
- Cloud Video Recorder Authorization Table

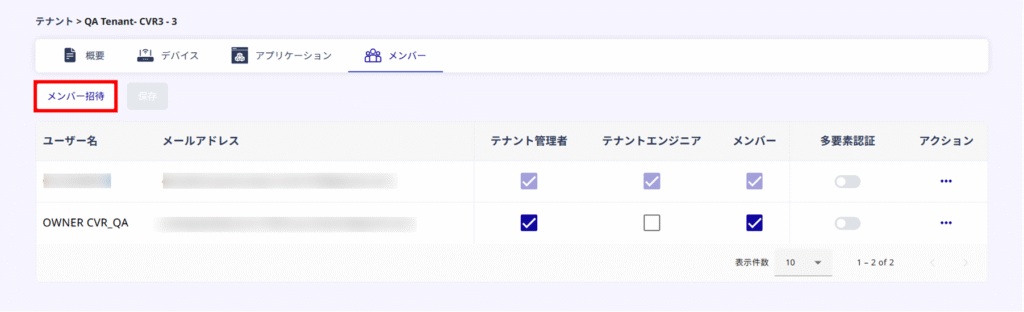
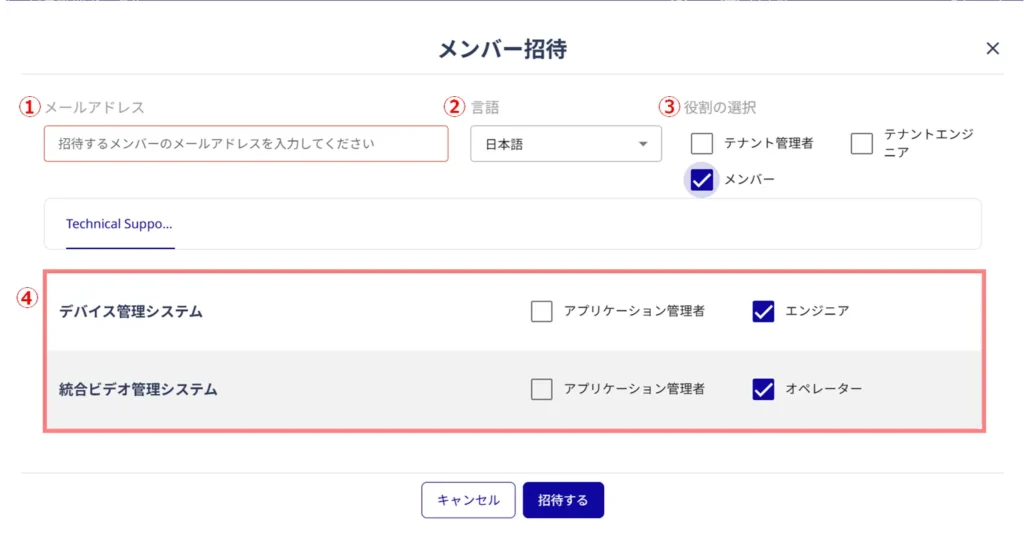
Enter the members you wish to invite and select their display language and role.
Enter a valid e-mail address.
Select the display language (Japanese or English).
(3) Select and check the role.
Select and check the roles according to the application to be used.
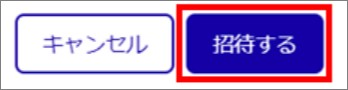
Invited members will follow the instructions in the email they receive to register their account.
How to change a member's role #
You can change the role of an account that is already a member on the Members tab.
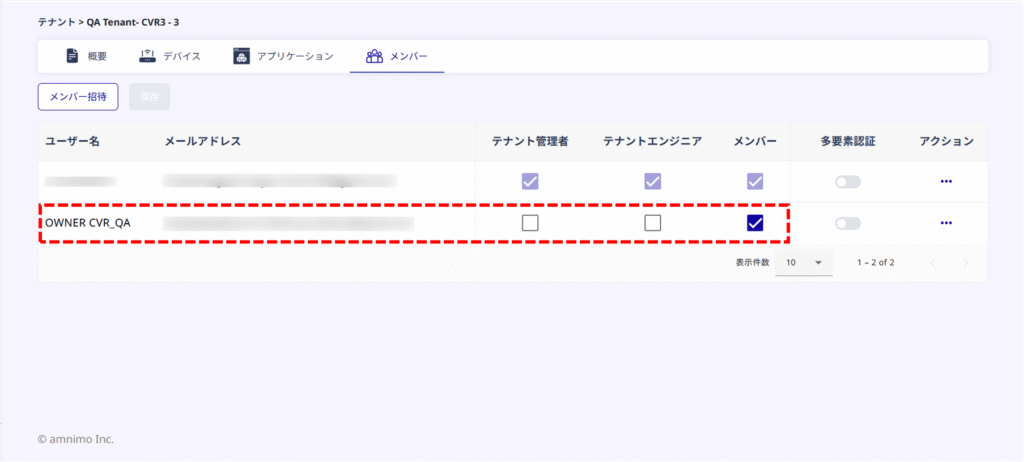
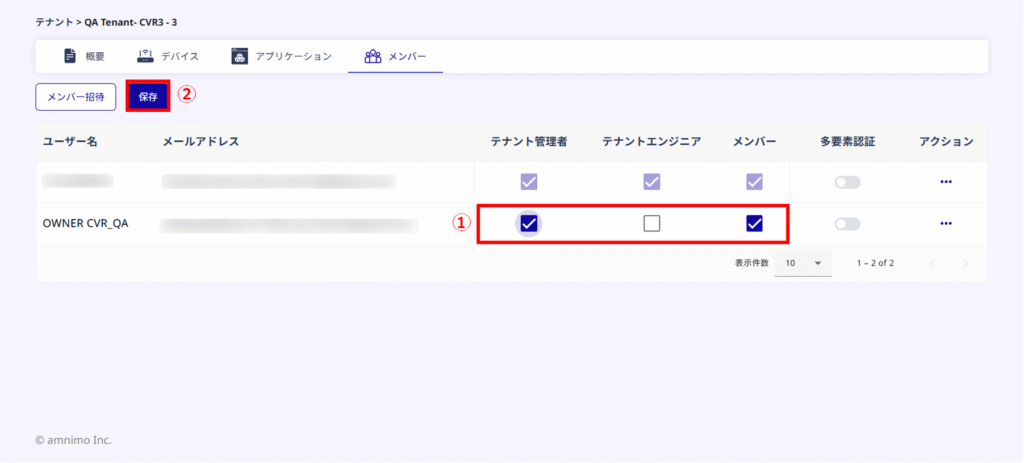
Tenant administrators are not allowed to make their own role changes.
multi-factor authentication #
Confirmation of multi-factor authentication #
Tenant members with multi-factor authentication enabled will appear as follows
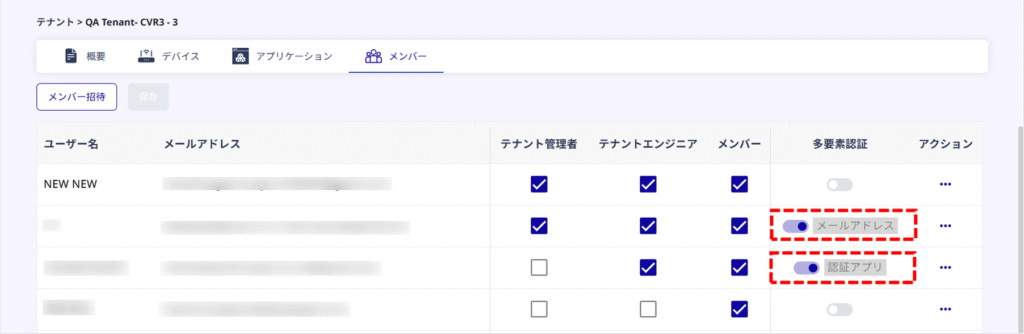
| Display next to toggle | Types of multi-factor authentication |
|---|---|
| Email Address | Email Authentication |
| Authentication App | Authentication App |
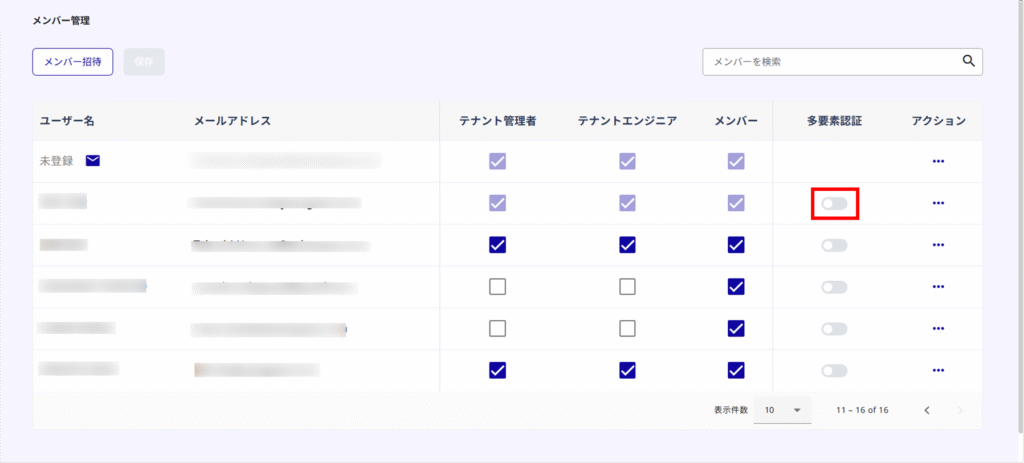
Set up multi-factor authentication on the member management screen #
The Member Management screen allows you to enable/disable multi-factor authentication for tenant members.
When multi-factor authentication is enabled, the default email authentication is set.

Change of tenant's representative manager #
If there are other members in the tenant who have "tenant administrator" privileges and have completed account registration, the tenant's representative administrator can be changed.
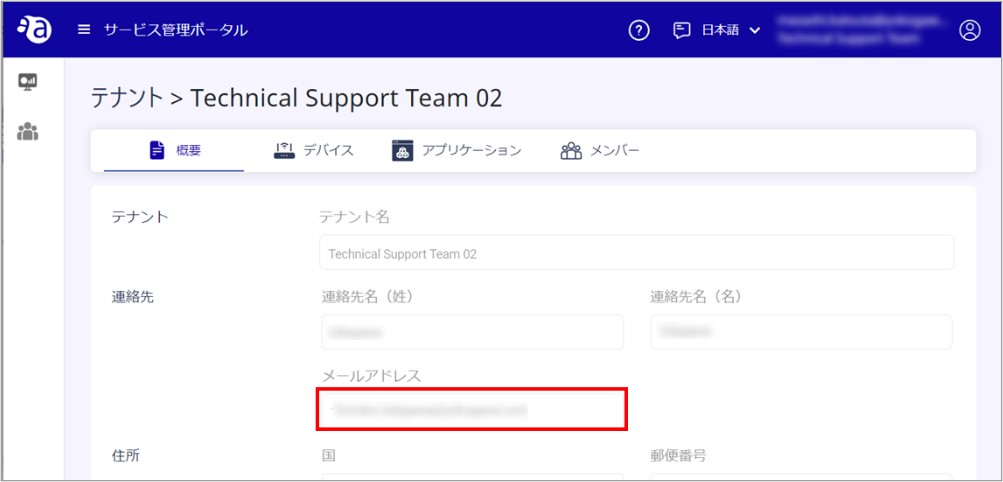
The current representative tenant administrator is the account with the email address registered in the "Overview" tab.

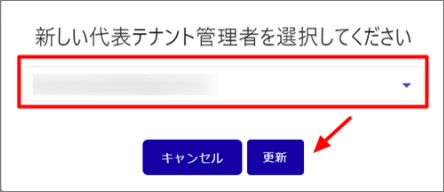
When clicking "Change Representative Tenant Administrator," the message "No tenant administrator available for selection" may appear. In this case, the current representative tenant administrator may not have completed account registration.
You may complete your account registration or change your current tenant administrator's email address from the "Overview" tab (you cannot use the email address you have already registered for your account).
Once the email address has been changed, you will receive an email informing you that you have been invited to become an administrator. Please follow the instructions in the body of the email to complete your registration
Resend invitation email #
If the member to whom you have invited the tenant has not completed account registration, you can resend the invitation e-mail by clicking on the "Resend invitation e-mail" icon and clicking "Yes" on the confirmation dialog that appears.

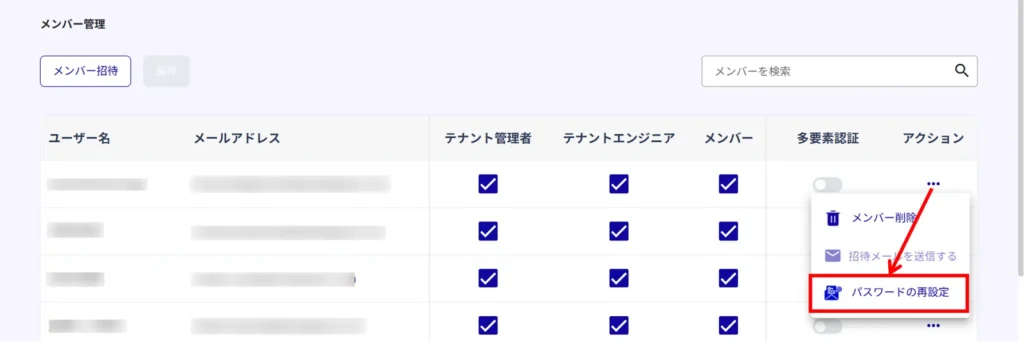
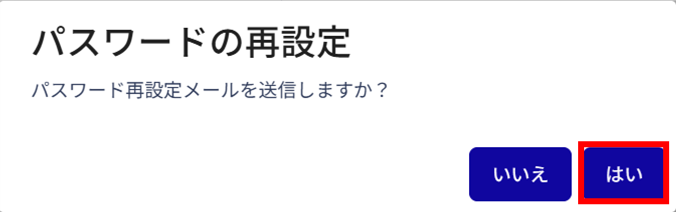
Reset Member's Password #
The tenant administrator can reset the member's password.
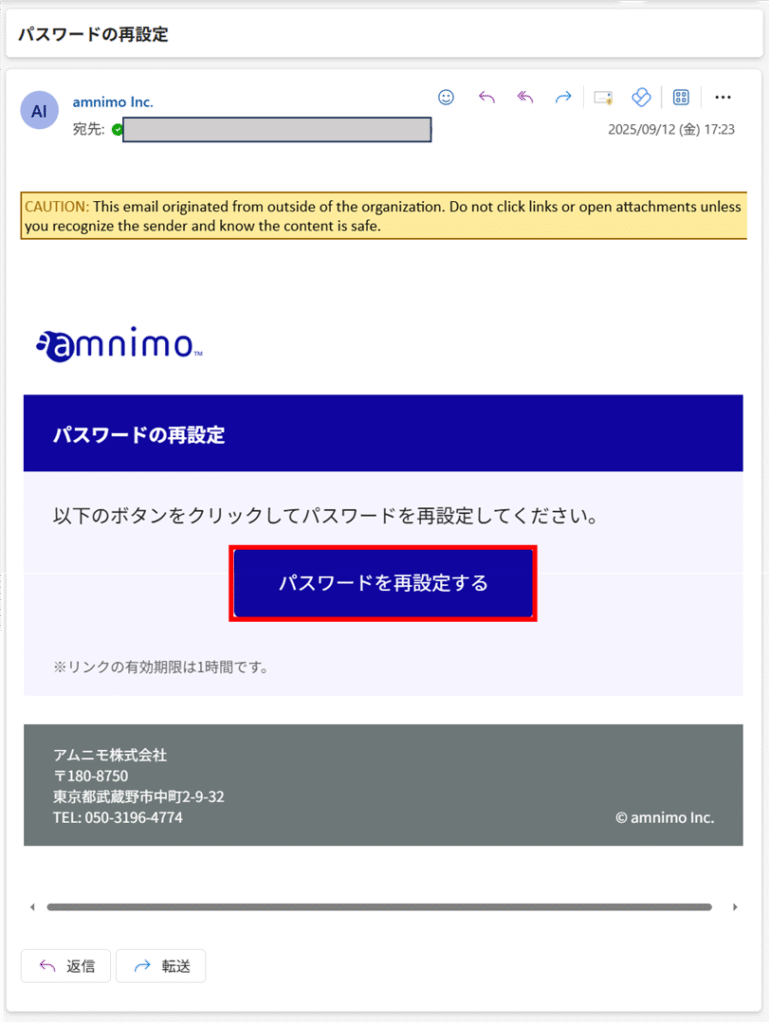
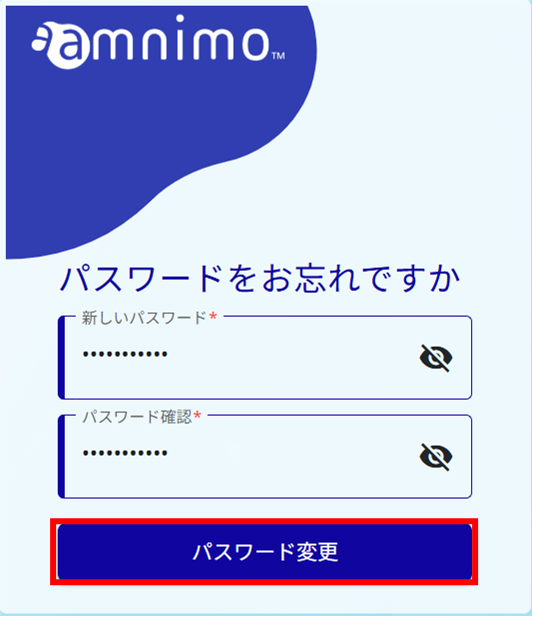
From the password reset email sent by the tenant administrator, the tenant member will reset his/her own password.
If you have set up email authentication with multi-factor authentication, you cannot reset your password from the "Forgot your password?" link on the sign-in page.
To reset passwords, the tenant administrator should follow the instructions in this section to reset the passwords of the members in question from the "Member Management" section of the Service Management Portal.
Tenant Administrator] Send password reset e-mail #
Tenant Member] Reset Password #
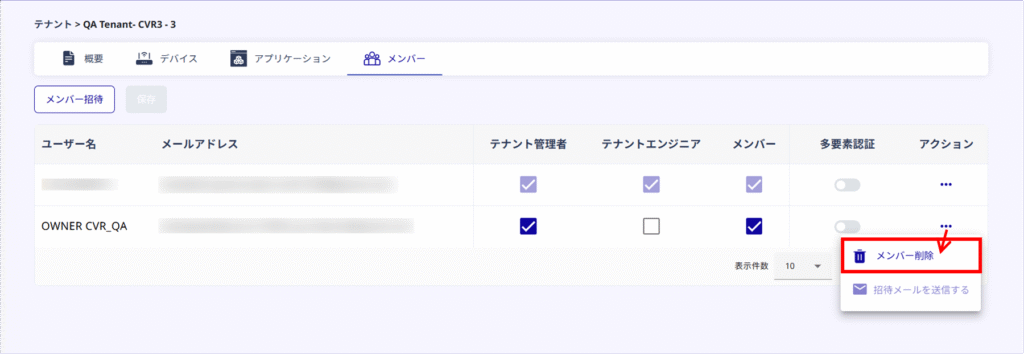
Delete a member #
You can delete a member whose "Delete Member" is active by clicking on "..." in the Action column.
Click and then click Yes in the confirmation dialog to execute the deletion.
Please confirm that the email address information of the target member disappears from the screen after the deletion is successfully completed.